 Fixated on Home

Introduction to DIY Retaining Walls for Fixer-Uppers
Owning a fixer-upper with a sloped yard can be both a challenge and an opportunity. Uneven terrain leads to erosion, poor drainage, and underutilized space, but a well-built retaining wall can turn that liability into a stunning outdoor renovation feature. In 2026, home improvement trends emphasize sustainable, low-maintenance designs that enhance curb appeal and property value. This comprehensive guide equips you with advanced DIY techniques for constructing durable retaining walls using concrete blocks or natural stone.
Whether you're leveling a backyard for a patio or creating terraced gardens, these walls provide structural support while incorporating modern elements like permeable materials for superior drainage. Expect to invest time and effort, but with our step-by-step instructions, safety tips, cost-saving hacks, and pitfalls to avoid, you'll achieve professional results on a budget. Perfect for outdoor renovation enthusiasts ready to tackle home improvement projects that last.
Why Retaining Walls Are Essential for Sloped Fixer-Uppers
Retaining walls hold back soil on sloped properties, preventing landslides, water pooling, and foundation damage. For fixer-uppers, they unlock flat, usable space for entertaining, gardening, or play areas. Beyond functionality, they boost aesthetics—imagine cascading flower beds or a sleek modern barrier defining your landscape.
In 2026, expect a surge in eco-friendly designs amid rising climate concerns. Homeowners prioritize walls that manage stormwater runoff effectively, reducing flood risks. According to industry experts, properly installed walls can increase property value by up to 20% through enhanced usability and visual appeal.
2026 Trends in Retaining Wall Design
Stay ahead with these forward-thinking trends:
- Permeable Systems: Use interlocking blocks with gaps or gravel cores to allow water infiltration, minimizing erosion and complying with local regulations.
- Natural Integration: Blend stone veneers with native plants for a seamless, low-water look.
- Smart Tech: Embed sensors for moisture monitoring, tying into home improvement apps.
- Modular Prefabs: Lightweight, snap-together units for faster DIY installs.
For more inspiration, check out resources from This Old House, a trusted source for home improvement projects.
Material Selection: Concrete Blocks vs. Natural Stone
Concrete Blocks
Ideal for beginners, concrete blocks (like Allan Block or Keystone) offer affordability ($10–$20 per sq ft) and ease of installation. They're stackable, often with built-in lips for stability, and available in textured finishes mimicking stone. Best for walls under 4 feet high.
Natural Stone
For a premium, timeless look, choose fieldstone, limestone, or granite ($25–$50 per sq ft). Mortared or dry-stacked, they provide unmatched durability but require more skill. Perfect for curved or irregular slopes in fixer-uppers seeking rustic charm.
Other Options
Consider timber for temporary or low-budget builds ($5–$15 per sq ft), though it rots faster. Always verify local codes—some areas mandate engineered walls over 3 feet.
Pro Tip: Calculate needs with online tools from sites like Family Handyman.
Planning and Preparation
Success starts with planning. Measure your slope's height, length, and angle. Sketch designs, factoring in 1-inch setback per foot of height for stability. Check for utilities (call 811) and obtain permits—essential for walls over 3–4 feet.
Soil type matters: Clay needs deeper footings; sandy soil drains well but shifts. Test compaction with a plate compactor. Budget $20–$50 per linear foot for materials, plus $200–$500 for tools if buying new.
Tools and Materials List
- Shovel, wheelbarrow, level, string line
- Plate compactor or hand tamper
- Masonry saw, rubber mallet, 4-ft level
- Geotextile fabric, gravel (3/4-inch clean), drainage pipe
- Blocks/stone, concrete adhesive or mortar
- Safety gear: gloves, goggles, steel-toe boots
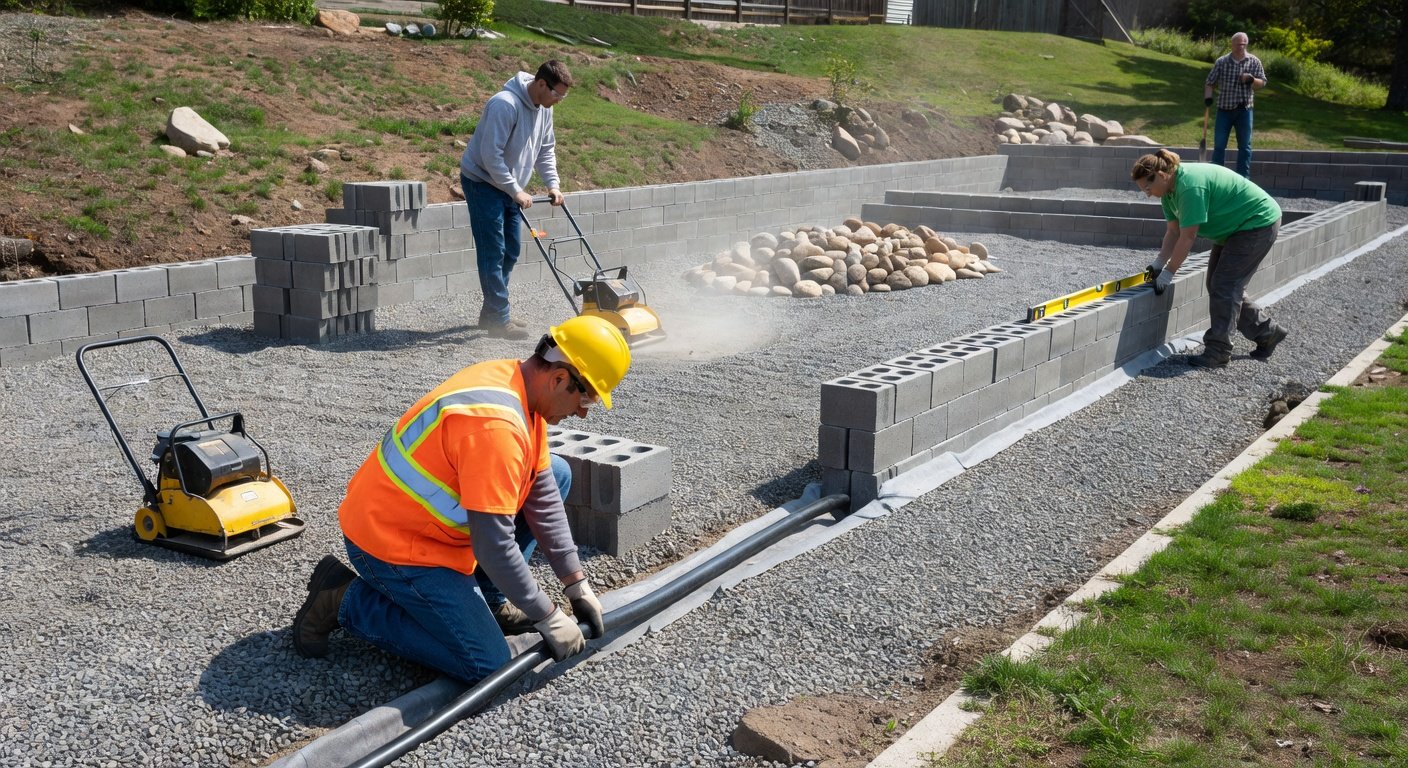
Step-by-Step DIY Installation Guide
Follow these advanced steps for a wall lasting 20+ years. Work in dry weather; build during cooler months to avoid heat stress on materials.
- Excavate the Trench: Dig 12–18 inches deep, wider than your base by 6 inches per side. Slope the trench bottom 1 inch per foot away from structures.
- Install Base: Add 6 inches of gravel, compact in 3-inch layers. Lay geotextile fabric to prevent soil migration.
- Place Drainage: Run 4-inch perforated pipe behind the wall, sloped for outflow. Cover with gravel to the wall's midpoint.
- Lay First Course: Set base blocks/stones in a bed of mortar or leveled gravel. Use string lines for straightness; check level every block.
- Stack Courses: Stagger seams like bricks. Apply adhesive between courses for concrete; mortar for stone. Backfill with gravel, compacting every 2 feet.
- Cap and Finish: Secure capstones with adhesive. Add topsoil and plants for integration.
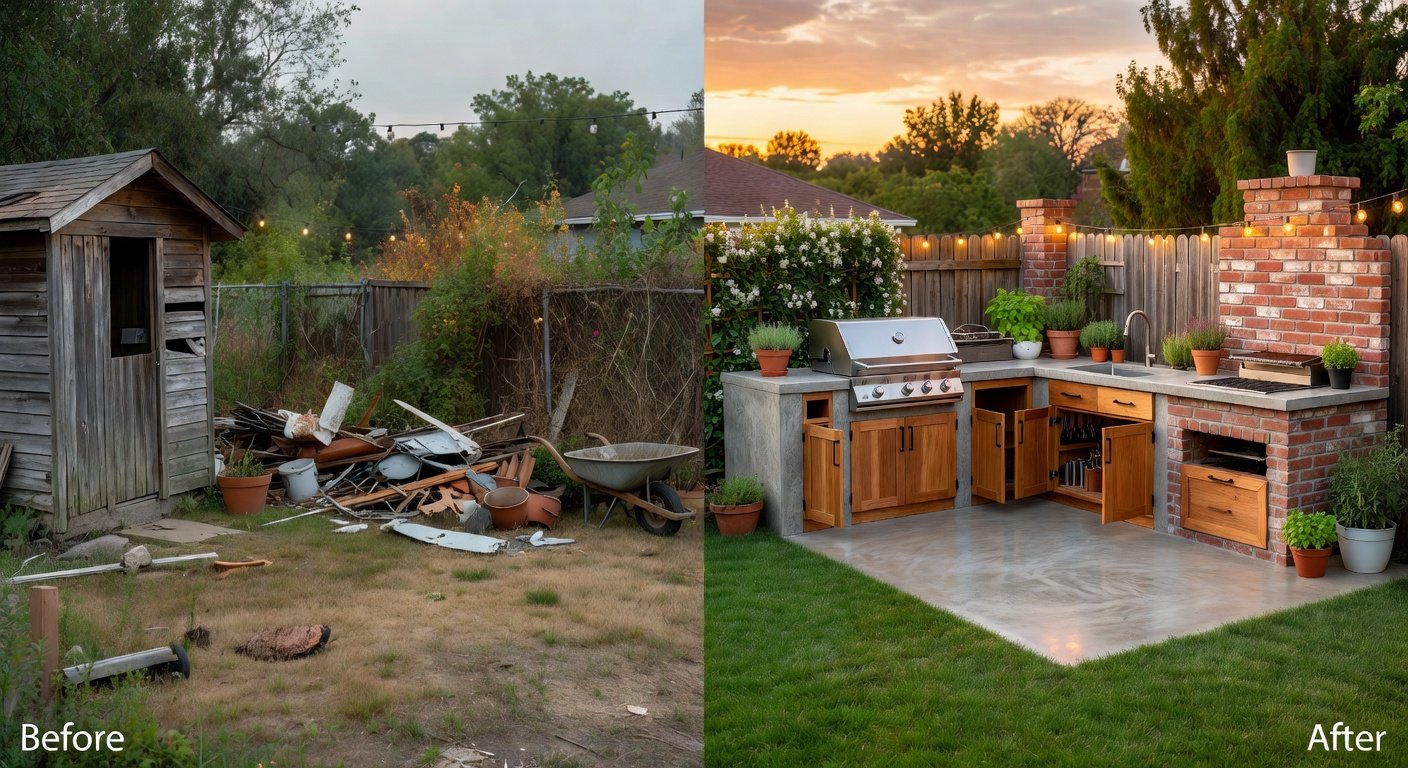
This before-and-after shows a sloped, eroded yard transformed into terraced bliss—your fixer-upper awaits!
Safety Tips for DIY Builds
Retaining walls involve heavy lifting and trenches—safety first:
- Wear PPE; lift with legs, not back.
- Brace walls during construction; shore trenches over 5 feet deep.
- Avoid working alone; have a spotter for compactors.
- Monitor weather—rain softens soil.
For official guidelines, visit Lowe's safety resources.
Cost-Saving Hacks
Slash expenses without skimping quality:
- Source reclaimed stone from local quarries or demolition sites (save 50%).
- Rent tools ($50/day for compactor) instead of buying.
- Buy bulk gravel; reuse excavated soil for backfill.
- Opt for segmental blocks—no mortar needed.
Total DIY cost: $1,500–$5,000 for a 50-ft x 4-ft wall vs. $10,000+ pro install.
Common Pitfalls and How to Avoid Them
Steer clear of these mistakes:
- Poor Drainage: Always include pipe and gravel—90% of failures stem from water buildup.
- Inadequate Base: Compact thoroughly; settling causes leaning.
- Overbuilding Height: DIY max 4 feet; hire engineers for taller.
- Ignoring Codes: Fines and teardowns await non-compliant walls.
Maintenance for Longevity
Inspect annually for cracks, erosion, or shifts. Re-point mortar every 5 years; flush drainage pipes. Plant deep-rooted groundcover to stabilize soil.
FAQs
Q: How long does a DIY wall last?
A: 20–50 years with proper build.
Q: Can I build on a steep slope?
A: Yes, but terrace multiple shorter walls.
Q: What's the 2026 permeable trend?
A: Designs allowing water through, like open-joint blocks.
Conclusion
Building a DIY retaining wall is a game-changer for your 2026 fixer-upper's outdoor renovation. From material choices to permeable innovations, these techniques deliver durable, beautiful results. Roll up your sleeves, follow our guide, and watch your sloped yard become the envy of the neighborhood. Start planning today for timeless home improvement success!
No comments yet. Be the first!