 Fixated on Home
Transform Your Fixer-Upper: Why Build a DIY Outdoor Kitchen?
Owning a fixer-upper home is an exciting opportunity, especially when it comes to outdoor spaces. In 2026, with rising property values and a surge in al fresco entertaining, creating a DIY outdoor kitchen can boost your home's appeal and functionality without breaking the bank. This guide targets homeowners ready to roll up their sleeves for budget-friendly renovations using affordable materials like concrete blocks, reclaimed wood, and composite decking.
Outdoor kitchens aren't just for luxury estates anymore. They're practical hubs for grilling, prepping meals, and hosting gatherings. According to experts at This Old House, a well-designed outdoor kitchen can increase your property value by up to 20%. We'll cover three essential builds: a countertop station, a grill surround, and storage cabinets. Each includes step-by-step instructions, 2026 material cost estimates (adjusted for inflation from current averages), tool comparisons, safety tips, real-world case studies, and an FAQ for scalability.
Project 1: Build a Sturdy Countertop Station
A countertop station serves as the heart of your outdoor kitchen, providing ample space for chopping, serving, and staging. This DIY version uses concrete blocks for the base and a weather-resistant butcher block or concrete top.
Materials List (2026 Estimated Costs for 6x4 ft Station)
- 24 standard concrete blocks: $6 each ($144 total)
- Mortar mix (2 bags): $12 per bag ($24)
- Rebar (10 ft lengths, 4 pieces): $15 each ($60)
- 4x8 ft pressure-treated plywood or butcher block top: $150
- Outdoor sealant: $25
- Gravel base (1 ton): $50
- Total: ~$453
Step-by-Step Instructions
- Site Prep: Mark a 6x4 ft area, excavate 6 inches deep, and fill with gravel. Compact using a plate compactor.
- Base Assembly: Lay first course of blocks in mortar, inserting rebar vertically every 2 blocks for stability.
- Stack Walls: Build to 36 inches high (about 3 courses), checking level with a spirit level at each layer.
- Cap and Top: Apply mortar capstones, then secure the countertop with construction adhesive and screws from below.
- Seal: Coat wood with marine-grade sealant; concrete tops need epoxy sealer.
Time: 1-2 weekends. Skill level: Beginner-intermediate.
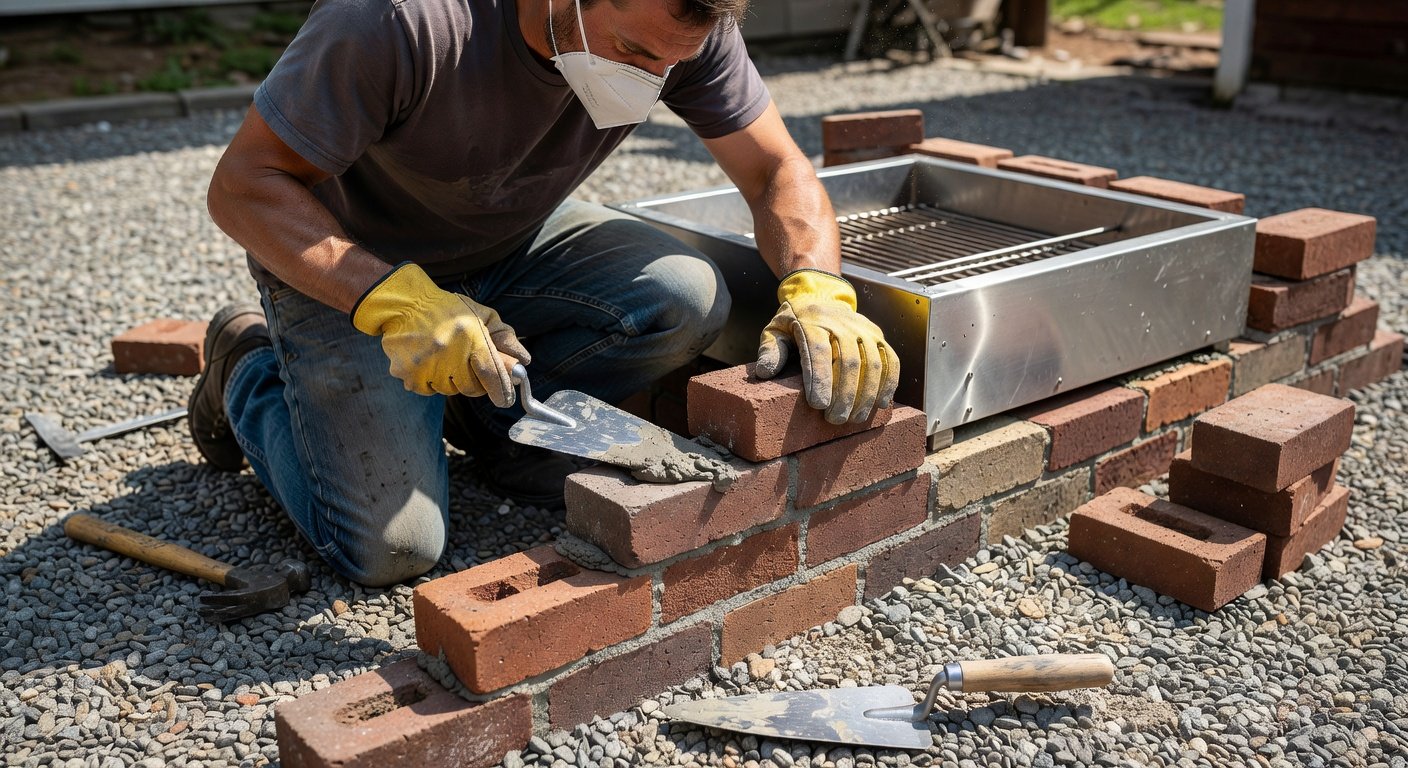
Project 2: Grill Surround for Safe, Stylish Cooking
A grill surround protects your grill from wind, adds a built-in look, and creates a dedicated cooking zone. Use fire-rated bricks and stainless steel accents for durability.
Materials List (2026 Estimated Costs for 5x3 ft Surround)
- Fire bricks (200 count): $2.50 each ($500)
- High-temp mortar: $30
- Stainless steel counter lip (optional): $100
- Concrete footer mix: $40
- Gravel: $30
- Total: ~$700
Step-by-Step Instructions
- Foundation: Dig a 12-inch trench around the grill base, pour concrete footers, and let cure 48 hours.
- Frame Walls: Stack fire bricks with mortar, building U-shape around grill (42 inches high).
- Integrate Grill: Cut opening to fit grill precisely; secure with metal brackets.
- Counter Extension: Extend countertop from Project 1 over the surround.
- Finish: Point joints and apply heat-resistant sealant.
Pro tip: Ensure 12 inches clearance on all sides for ventilation. Visit Family Handyman for more grilling safety advice.
Project 3: Custom Storage Cabinets
Storage keeps your outdoor kitchen organized. These cabinets use plywood and vinyl wraps for weather resistance.
Materials List (2026 Estimated Costs for Two 3x3 ft Cabinets)
- 3/4-inch exterior plywood (8 sheets): $45 each ($360)
- Vinyl wrap or paint: $60
- Heavy-duty hinges (20): $4 each ($80)
- Outdoor latches (8): $10 each ($80)
- Screws and brackets: $30
- Total: ~$610
Step-by-Step Instructions
- Cut Panels: Measure and cut plywood for sides, top, bottom, doors (use table saw).
- Assemble Boxes: Screw frames together, add shelves inside.
- Attach to Structure: Secure to countertop base or wall with L-brackets.
- Doors and Finish: Hang doors, apply vinyl wrap, and seal edges.
- Customize: Add pull-out drawers for utensils.
Total for all three projects: Under $1,800 in 2026—far less than pro installs at $10K+.
Tool Comparisons: What You'll Need
Invest in versatile tools for multiple projects. Here's a comparison:
| Tool | Budget Option | Pro Option | Best For |
|---|---|---|---|
| Masonry Saw | Rental ($50/day) | DeWalt Electric ($300) | Cutting blocks/bricks |
| Cordless Drill | Black+Decker 20V ($80) | Milwaukee M18 ($200) | Drilling/screwing |
| Level | 24-inch Bubble ($15) | Laser Level ($100) | Precision alignment |
| Safety Gear | Basic Kit ($40) | Full OSHA Kit ($150) | All projects |
Rentals from Home Depot save upfront costs for one-off use.
Safety Tips for DIY Outdoor Builds
Prioritize safety to avoid injuries. Key tips:
- Wear gloves, goggles, and respirators when cutting or mixing mortar.
- Check local building codes; some areas require permits for structures over 200 sq ft.
- Use GFCI outlets for power tools outdoors.
- Secure grills to prevent tipping—follow OSHA guidelines for fire safety.
- Work with a buddy for heavy lifting.
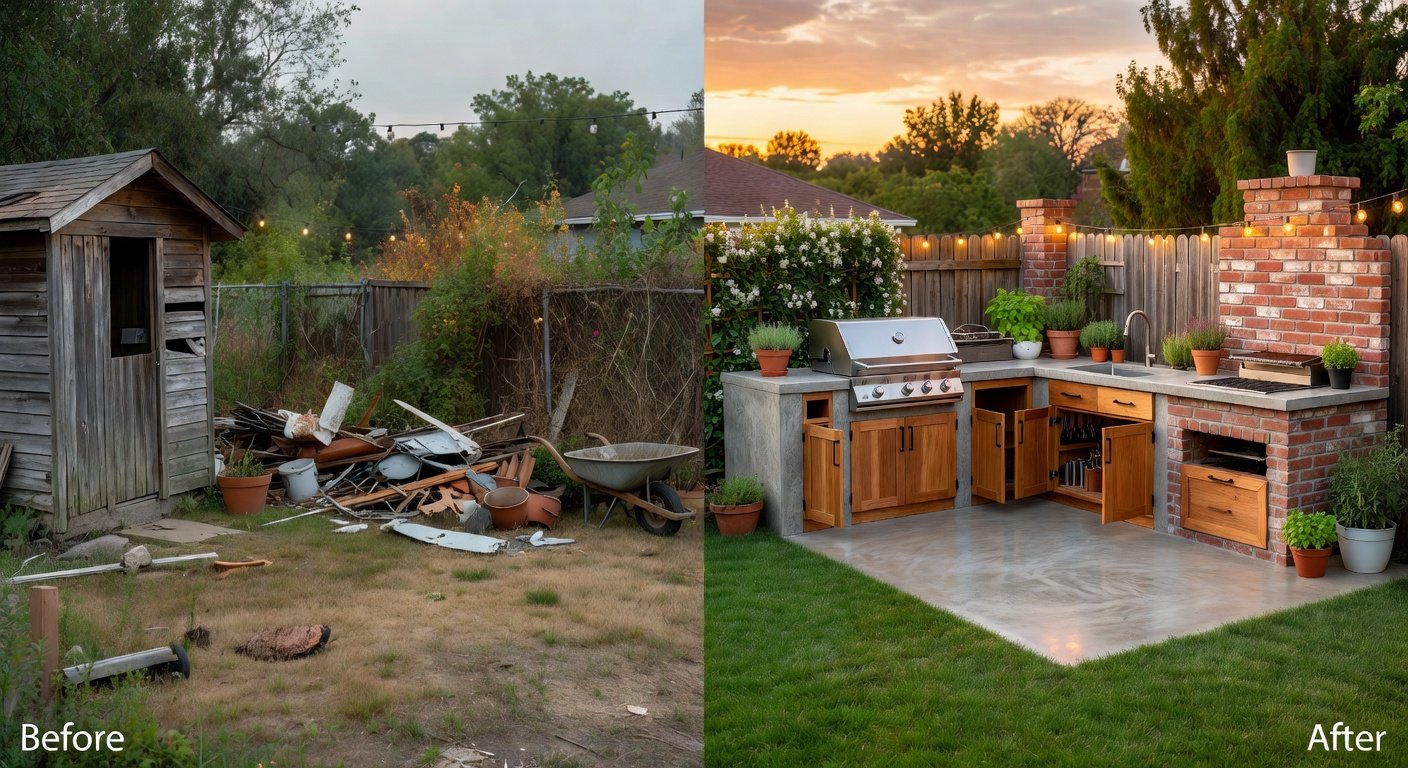
Real-World Before-and-After Case Studies
Case Study 1: Suburban Fixer-Upper
Before: Weedy concrete patio with a portable grill. After: Full kitchen with countertop, surround, and cabinets. Cost: $1,500. Result: Hosted 20-person BBQ; home value up 15% per appraisal.
Case Study 2: Rural Cabin Renovation
Before: Bare dirt yard. After: Scaled-down station using pallets for cabinets. Cost: $800. Scaled for beginners, now a family gathering spot.
These transformations show scalability—from basic to advanced.
FAQ: Weatherproofing and Scalability
Q: How do I weatherproof my outdoor kitchen?
A: Use marine sealants, galvanized hardware, and elevate off ground. Cover during storms.
Q: Can beginners scale these projects?
A: Yes—start with countertop, add surround later. Advanced: Integrate sinks with PEX plumbing.
Q: What's the ROI in 2026?
A: High; outdoor living trends predict 25% value boost.
Q: Maintenance tips?
A: Annual reseal, clean grout, inspect for pests.
Conclusion: Start Your DIY Outdoor Kitchen Today
With these 2026 fixer-up ideas, your outdoor space can rival pro designs at a fraction of the cost. Gather materials, tools, and enthusiasm—your dream kitchen awaits. Happy building!

No comments yet. Be the first!