 Fixated on Home
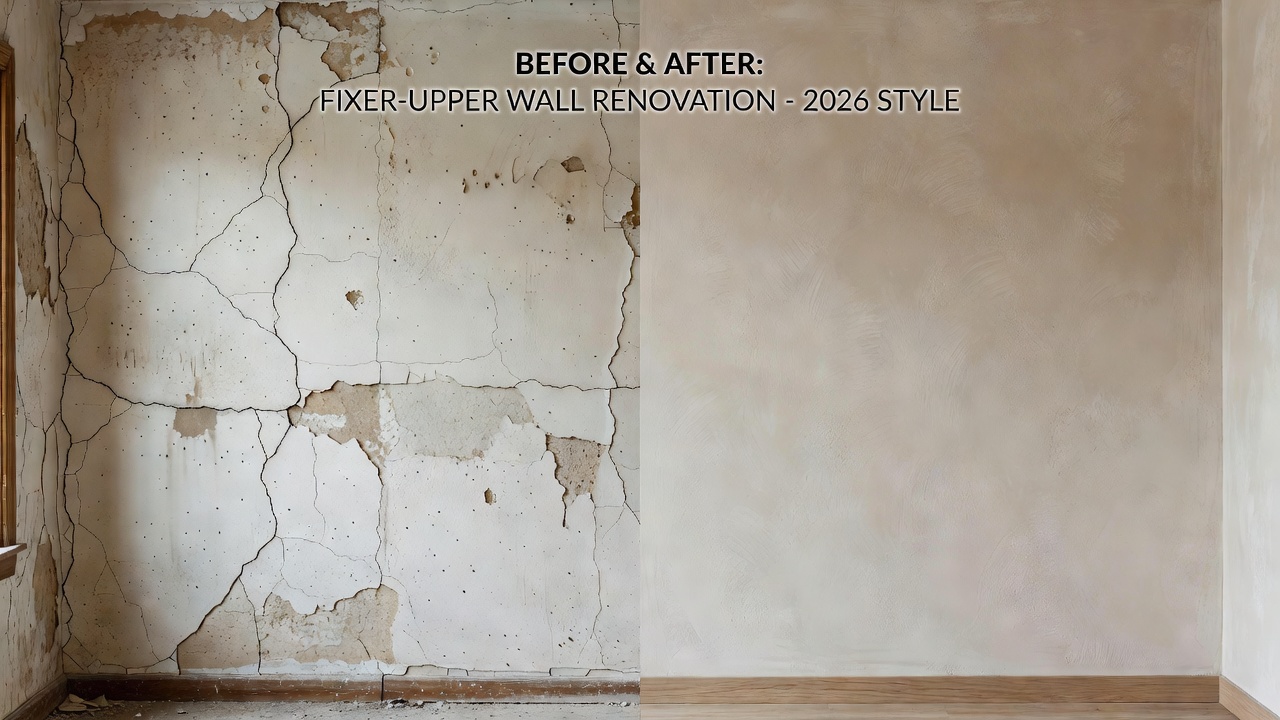
Transforming Fixer-Upper Walls on a Budget
Homeowners tackling older properties often face walls with cracks, uneven surfaces, and outdated finishes. This guide focuses on low-cost methods to refresh those surfaces using textures and paint, delivering high visual impact without major demolition. The approach emphasizes preparation, affordable materials, and current design trends to create lasting appeal. Many fixer-uppers from earlier decades present unique challenges such as plaster deterioration or previous poor repairs, yet these can be addressed systematically to achieve a polished result that enhances property value and personal enjoyment.
Understanding the search intent behind budget wall renovations reveals a desire for practical, time-efficient solutions that prioritize visual transformation over structural overhauls. Quick updates allow homeowners to live in improved spaces sooner while managing expenses carefully. Throughout this article, we explore detailed techniques suitable for various skill levels, supported by real-world applications and decision-making frameworks.
Prepping Damaged Walls for Success
Proper preparation prevents future issues like peeling or visible imperfections. Start by cleaning surfaces thoroughly with a mild detergent solution to remove dust and grease. Repair cracks with joint compound, sanding smooth once dry. For water stains, apply a stain-blocking primer to seal them effectively. This step ensures new textures and paint adhere well and last longer. Expand your prep by inspecting for mold or loose material, addressing any underlying moisture problems before proceeding. Use a putty knife to fill holes in stages, allowing each layer to dry fully to avoid shrinkage cracks.
Always work in a well-ventilated area and wear protective gear such as gloves, goggles, and a dust mask. If dealing with textured ceilings, test a small area first to avoid damage during prep. Common mistakes include skipping the cleaning phase, which leads to poor adhesion, or over-sanding delicate plaster. Take time to gather tools like sandpaper in multiple grits, a shop vacuum for dust control, and drop cloths to protect floors. This foundational work often determines the longevity of your updates.
Choosing Budget-Friendly Textures
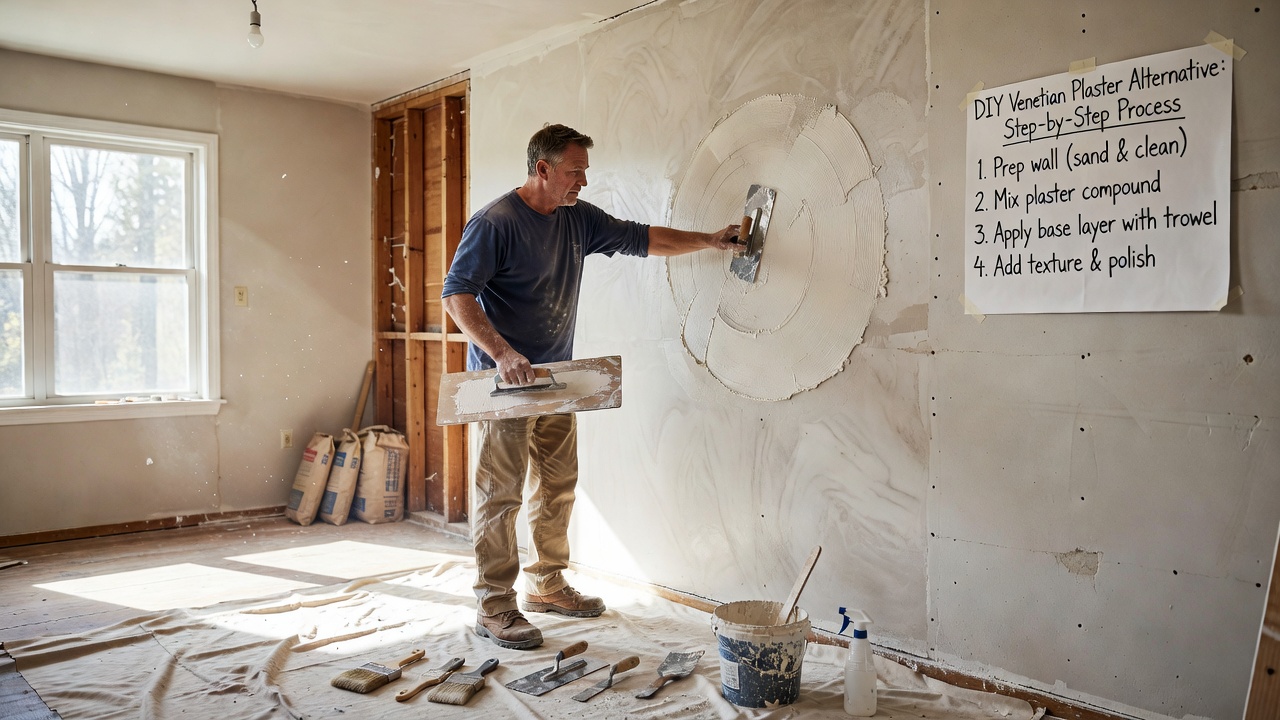
Textures add depth without expensive materials. Venetian plaster alternatives use joint compound mixed with water for a smooth, marble-like finish at low cost. Apply in thin layers with a trowel, then polish for sheen. Shiplap swaps involve lightweight MDF panels or even painted plywood strips to mimic real wood without the expense of solid lumber. Other options include subtle knockdown textures created with a sponge or specialized brush for a casual, organic look that hides minor imperfections effectively.
- Venetian plaster alternative: Mix compound, apply two coats, sand lightly between layers for a refined surface.
- Shiplap option: Cut panels to size, attach with construction adhesive, then paint in your chosen hue.
- Knockdown texture: Spray or dab compound onto walls, flatten peaks with a knife for dimension.
These options suit most fixer-uppers and require minimal tools. Experiment on scrap board first to perfect your technique and ensure the texture complements your room's architecture. Textures also provide practical benefits like sound dampening in busy households.
Step-by-Step Painting Methods and 2026 Color Trends
After texturing, painting brings everything together. Use high-quality primer followed by two coats of durable paint. For 2026 trends, earthy tones like warm neutrals and soft greens dominate, creating calm, inviting spaces. Apply with a roller for even coverage on large areas and brushes for edges. Consider accent walls in deeper shades to highlight architectural features without overwhelming the room.
Work in sections to maintain wet edges and avoid lap marks. Allow full drying time between coats for best results. Detailed steps include cutting in edges with an angled brush, then rolling in a W-pattern for uniform distribution. Test colors on large poster board under different lighting conditions throughout the day. Popular 2026 palettes draw inspiration from nature, pairing soft beiges with muted sages for versatile appeal across living areas and bedrooms alike.
This Old House offers additional painting best practices for older homes. Another helpful resource is Family Handyman for technique videos and troubleshooting guides.
DIY Versus Rental Tools Comparison
DIY tools like basic rollers and brushes keep costs down for small projects. For larger jobs, renting a texture sprayer or drywall sander from a local hardware store saves time and effort. Compare needs: handheld tools work for beginners, while rentals suit those handling multiple rooms. Pros of DIY include full control and no rental fees, while rentals provide professional-grade finishes faster. Consider your timeline, physical stamina, and project scale when deciding. Many find a hybrid approach works best, using personal tools for prep and rentals for finishing stages.
Real Fixer-Upper Case Studies
One homeowner updated a living room by prepping cracked plaster, adding a subtle texture with joint compound, and painting in a trending sage green. The result transformed a dated space into a modern retreat with improved light reflection. Another project swapped outdated paneling with affordable shiplap-style strips, yielding a farmhouse look on a tight budget. A third example involved a hallway refresh where a knockdown texture concealed uneven drywall seams, followed by a warm neutral paint that unified the home's flow. Each case demonstrates how targeted techniques yield noticeable improvements while respecting budget constraints.
Keeping Material Costs Affordable
Focus on bulk purchases of primer, paint, and compound from major retailers. Prioritize versatile products that serve multiple purposes to stretch resources. Many achieve complete room refreshes using basic supplies without exceeding modest spending limits. Shop sales, compare generic brands to name options, and calculate needs accurately to minimize waste. Repurposing existing tools and borrowing from neighbors further reduces outlays while fostering community support during renovations.
Common Mistakes to Avoid
Rushing prep leads to visible flaws later. Always allow adequate drying times and avoid painting in extreme temperatures or humidity. Overloading brushes with paint causes drips, so apply thin coats instead. Ignoring ventilation can result in strong odors lingering. Planning ahead by measuring walls and creating a material list prevents multiple store trips that inflate costs and time.
Working with Textured Ceilings
Textured ceilings require gentle handling to maintain consistency. Match new textures to existing patterns or opt for a fresh coat of paint in a bright white to refresh without full reapplication. Use extension poles for safety and reach, and cover floors extensively to manage dust.
FAQ
How do I cover water stains?
Use a dedicated stain-blocking primer before texturing or painting to prevent bleed-through and ensure a clean final appearance.
Can I apply textures over textured ceilings?
Yes, but test adhesion first and consider lighter applications to avoid added weight or future cracking.
What if my walls have extensive damage?
Repair major issues with mesh tape and compound, then proceed with texture for camouflage and added durability.
Which paint finish works best for high-traffic areas?
Satin or eggshell finishes offer durability and easy cleaning while maintaining a subtle sheen suitable for most rooms.
How long should I wait between coats?
Follow manufacturer recommendations, typically two to four hours for drying, though full cure takes longer in humid conditions.
Conclusion
Budget wall renovations empower homeowners to enhance fixer-uppers efficiently. By focusing on preparation, creative textures, and timely paint trends, these methods deliver professional-looking results at accessible costs. Start with small sections to build confidence and enjoy the refreshed space. With careful planning and execution, your walls can become standout features that elevate the entire home.
No comments yet. Be the first!