 Fixated on Home
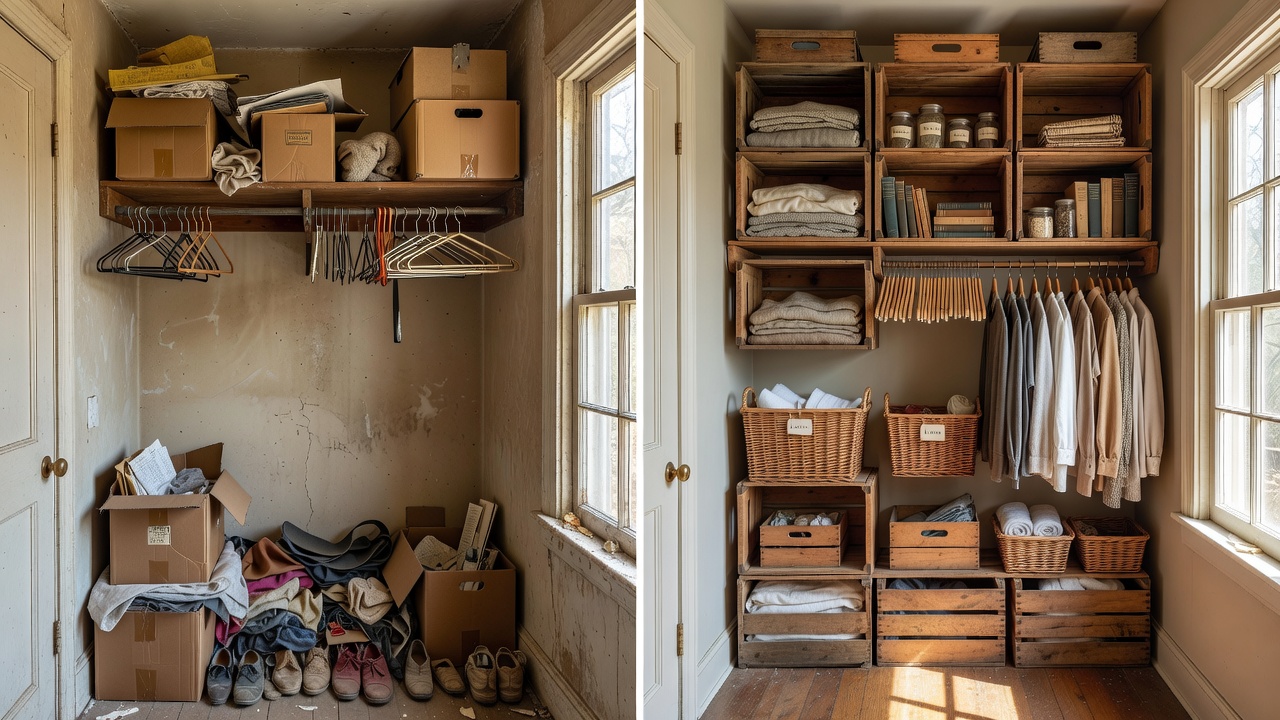
Introduction to Budget Closet Organization in Fixer-Uppers
Older homes frequently feature closets that feel cramped, oddly proportioned, or challenged by uneven walls, slanted floors, and minimal square footage. In 2026, many homeowners are embracing DIY approaches that rely on repurposed materials and everyday tools to build functional, attractive storage solutions without expensive renovations. These upgrades emphasize vertical space utilization, modular components, and clever adaptations that work around structural quirks common in homes built before the 1970s. Each project delivers clear step-by-step instructions, material lists, tool recommendations, time estimates suitable for beginners, and before-and-after comparisons that illustrate real transformations.
By focusing on low-cost strategies, these ideas help maximize every inch while adding long-term value through better organization. Homeowners can expect to complete most projects in a single weekend, often using items sourced from salvage yards or household discards. The following sections detail eight distinct projects along with guidance on overcoming typical fixer-upper obstacles, maintenance routines, and ways to scale solutions for lasting results.
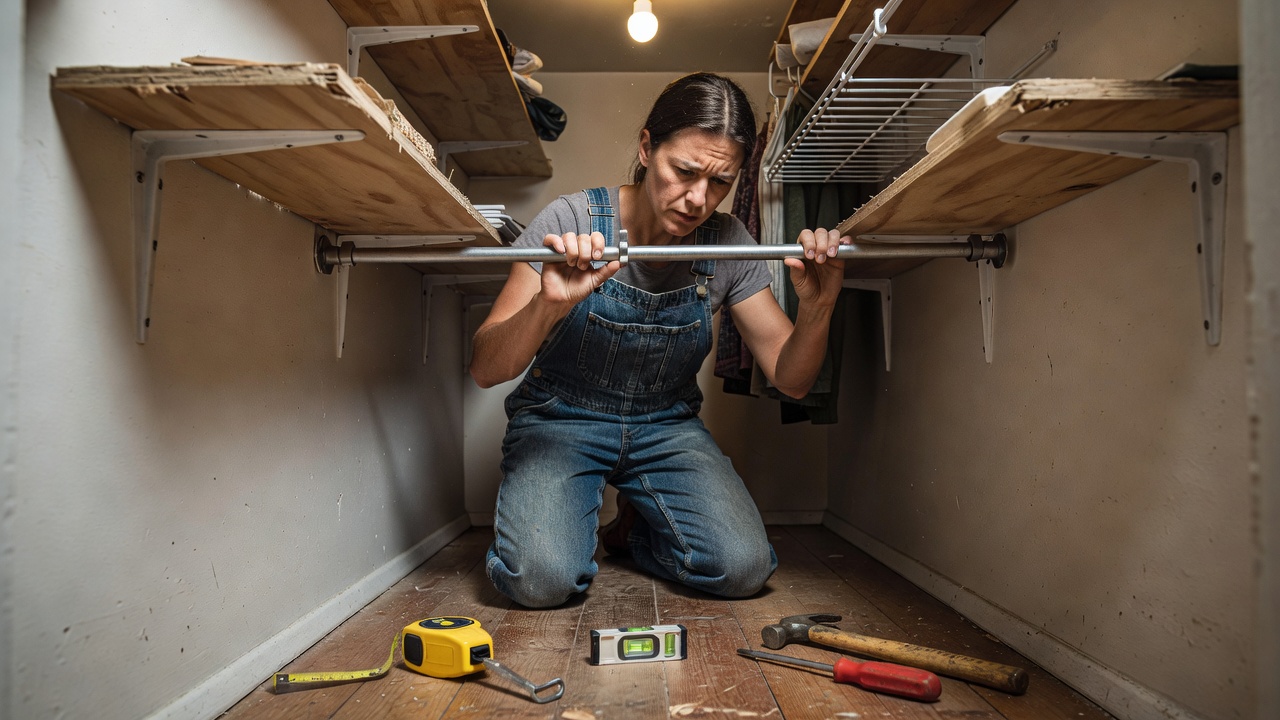
Project 1: Repurposed Crate Shelving System
Wooden crates sourced from markets or online giveaways form the backbone of this wall-mounted shelving unit. Begin by sanding all surfaces smooth to prevent splinters. Attach metal brackets to the back of each crate using wood screws, then mark level positions on the wall with a pencil and measuring tape. For uneven plaster walls, insert thin wooden shims behind brackets to create a stable plane. Mount the crates in a staggered grid pattern to hold shoes, folded sweaters, or accessories. This setup converts a disorganized floor area into tiered storage that keeps items visible and accessible. Beginners typically finish the project in two to three hours using only a drill, level, and sandpaper.
Project 2: Tension Rod Dividers for Narrow Closets
Tension rods provide an adjustable way to divide hanging space without permanent alterations. Measure the interior width at multiple heights, then install rods at staggered levels to separate short garments from longer ones. Add S-hooks for belts or scarves. The method excels in closets narrower than standard widths, where traditional shelving would crowd the floor. No drilling is required, making it ideal for renters or temporary fixes during home renovations. Completion time averages under one hour, and adjustments can be made seasonally as clothing needs change.
Project 3: Over-the-Door Fabric Organizers
Remnants of sturdy fabric or old curtains can be sewn or stapled into pocket-style panels that hang over closet doors. Cut rectangular sections, reinforce edges with hem tape, and create multiple pockets sized for accessories or folded items. Attach the panel using adhesive hooks or a tension rod across the door top. This addition doubles storage capacity in rooms where wall space is scarce. The project takes about three hours including sewing time and transforms a plain door into a functional display that reduces visual clutter inside the closet.
Project 4: Floating Pipe Clothing Racks
Plumbing pipes and flanges from hardware stores create industrial-style hanging racks that mount directly to wall studs. Cut pipes to desired lengths, sand ends, and secure flanges with heavy-duty screws. Install at varying heights to accommodate different garment types. In fixer-uppers with uneven walls, use rubber pads under flanges to compensate for gaps. The resulting rack offers sturdy support for coats and dresses while freeing floor area. Most users complete installation in two hours with basic tools like a hacksaw and wrench.
Project 5: Cardboard Drawer Dividers
Flattened shipping boxes become custom-fit dividers when scored and folded into compartments. Measure existing drawers, then cut and assemble grid patterns that keep socks, undergarments, or jewelry separated. Cover the cardboard with decorative paper for a finished appearance. This zero-cost solution prevents items from shifting during daily use and can be replaced easily if needs evolve. Assembly requires approximately one hour and no specialized tools beyond scissors and a ruler.
Project 6: Pallet Vertical Shoe Racks
Discarded wooden pallets can be disassembled and reassembled into angled shoe shelves. Remove slats carefully, sand rough edges, and attach them to vertical supports at a slight incline so shoes remain visible. Mount the unit against a side wall to utilize otherwise wasted space. In older homes with limited depth, this rack keeps footwear off the floor and improves air circulation. Construction takes three to four hours and yields a durable, rustic feature that complements many interior styles.
Project 7: Labeled Basket Wall System
Wire or woven baskets hung from a pegboard create flexible storage that can be rearranged. Label each basket with chalk tags or printed tags for quick identification of seasonal items or linens. Secure the pegboard to wall studs and add hooks at multiple levels. This approach addresses limited square footage by moving storage upward and allows easy rotation of contents throughout the year. Setup requires two hours and encourages consistent organization habits.
Project 8: Battery-Powered LED Lighting Strips
Adhesive LED strips with motion sensors brighten dark closet interiors without wiring. Cut strips to fit shelf undersides or rod lengths, then attach and pair with a small battery pack hidden behind trim. The added visibility helps prevent overlooked items and reduces the need for overhead lights. Installation is complete in under one hour and works especially well in older homes where electrical updates may be pending.
Addressing Common Fixer-Upper Challenges
Uneven walls and floors require shims, adjustable hardware, and filler strips to achieve level installations. Limited square footage benefits from door-mounted and vertical solutions that avoid floor encroachment. Always check for studs before mounting heavy items and patch small plaster holes with spackle prior to painting. These practical hacks ensure projects remain stable and attractive despite original construction imperfections.
Maintenance, Scaling, and Long-Term Value
Regular dusting and bracket inspections every six months keep systems functional. Projects can be scaled by repeating elements across multiple closets or adding matching accessories over time. Integrating stackable bins or clear containers further enhances usability. For additional inspiration on similar home improvements, consult resources such as This Old House and Family Handyman. Tool and material guidance is also available at Home Depot.
FAQ
How do I maintain these DIY closet projects over time? Wipe surfaces monthly and tighten any hardware annually to preserve stability.
Can these projects be scaled for larger homes? Yes, duplicate successful designs in additional closets or combine multiple ideas for comprehensive storage solutions.
How can smart storage be integrated for future value? Add battery-operated LED strips or modular bins that adapt as household needs change, ensuring the system remains relevant for years.
Conclusion
These eight budget-friendly DIY closet organization projects demonstrate how simple materials and thoughtful planning can transform challenging spaces in older homes. By addressing real structural issues with practical steps, beginners gain confidence while creating organized, efficient storage that adds daily convenience and home value.
No comments yet. Be the first!