 Fixated on Home
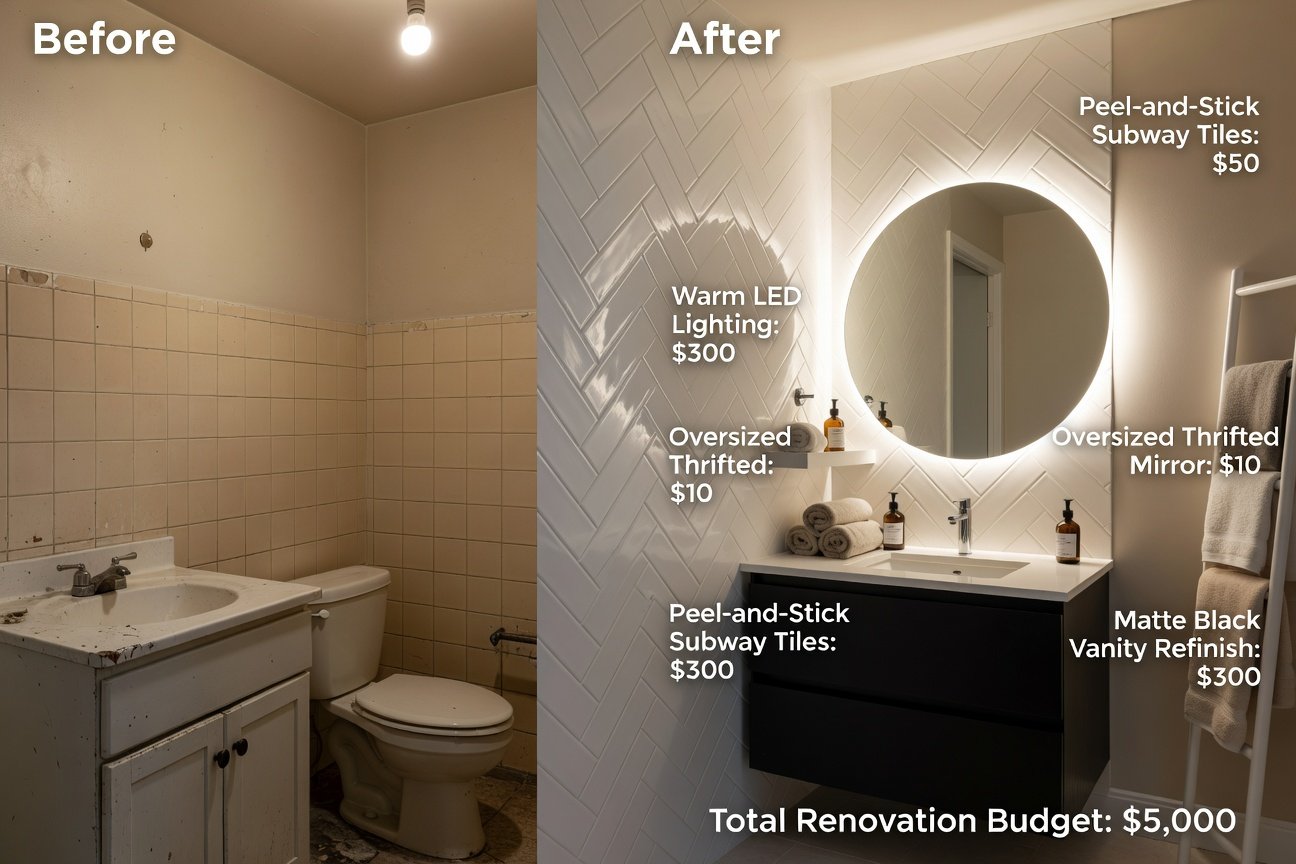
Transform Your Fixer-Upper Bathroom on a Shoestring Budget
Got a dated bathroom in your fixer-upper home that's draining your wallet dreams? You don't need a contractor or a fortune to achieve a fresh, spa-like vibe. This comprehensive DIY guide walks you through a complete bathroom renovation using smart, budget-friendly techniques like peel-and-stick tiles, vanity refinishing, and thrifted mirror upgrades. With minimal tools and a total materials list under $300, you'll maximize impact while keeping things beginner-friendly. Whether you're a first-time homeowner or a serial flipper, these hacks deliver professional results without the pro price tag.
We'll cover everything from demolition to finishing touches, including essential waterproofing tips and lighting upgrades. By the end, your bathroom will feel luxurious and modern—perfect for boosting your home's value or simply enjoying daily showers in style.
Why DIY a Bathroom Reno on a Budget?
Bathrooms are high-traffic spaces prone to wear, but full remodels can cost thousands. DIY fixer-upper hacks focus on high-impact changes: updating surfaces, fixtures, and ambiance without plumbing overhauls. Benefits include:
- Cost savings: Under $300 total vs. $5,000+ for pros.
- Customization: Choose spa-inspired neutrals or bold patterns.
- Quick turnaround: Weekend warrior project, 2-3 days max.
- Skill-building: Beginner steps build confidence for future projects.
Pro tip: Assess your space first. Measure square footage for floors/walls (typically 50-80 sq ft in small baths) and note trouble spots like moldy grout or chipped vanities.
Essential Tools and Materials List (Under $300 Total)
Gather these budget essentials from big-box stores like Home Depot or thrift shops. Focus on peel-and-stick for no-mess installs.
| Category | Items | Notes |
|---|---|---|
| Demo & Prep | Utility knife, scraper, painter's tape, drop cloths, TSP cleaner | Reuse household items. |
| Floors/Walls | Peel-and-stick vinyl tiles (100 sq ft), grout pen (optional) | Waterproof, self-adhesive. |
| Vanity | Chalk paint kit, orbital sander (or sandpaper), wax sealer | Thrifted vanity base. |
| Mirror & Lighting | Thrifted mirror, LED vanity lights, adhesive hooks | Flea market finds. |
| Waterproofing & Finishing | Silicone caulk, waterproof sealant, new towel bar | Prevents future leaks. |
Total stays under $300 by thrifting mirrors/vanities and buying multi-packs. No power tools required beyond a basic drill.
Step 1: Demolition and Prep Work
Start with a clean slate—safety first! Turn off water at the valve and cover fixtures with plastic.
- Remove old flooring: Score vinyl with a utility knife and peel up. For tile, use a scraper and heat gun if stubborn.
- Strip walls: Peel loose wallpaper or scrape paint. Wash with TSP solution for grease-free surfaces.
- Inspect subfloor/walls: Patch holes with spackle; sand smooth. Prime for adhesion.
Time: 4-6 hours. Mistake to avoid: Skipping deep cleaning—leads to peeling tiles later. Check This Old House for demo best practices.
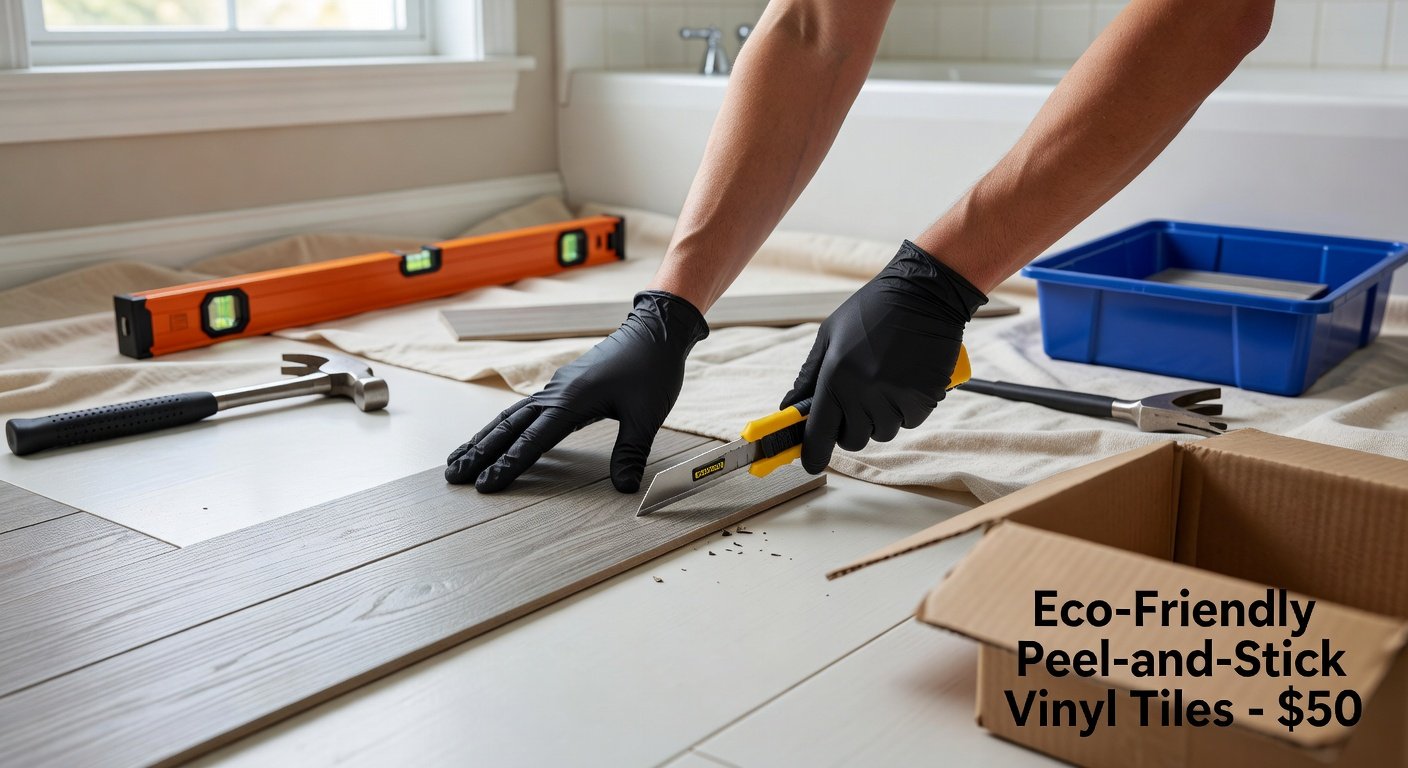
Step 2: Install Peel-and-Stick Tiles for Floors and Walls
Peel-and-stick tiles are a game-changer: waterproof, grout-free, and renter-friendly. Choose subway or hexagon patterns for spa vibes.
- Plan layout: Dry-fit tiles from the center out. Cut with utility knife on a cutting mat.
- Apply floors first: Clean subfloor, peel backing, press firmly. Roll with a rolling pin for seams.
- Wall accents: Start at the bottom, overlap edges slightly. Use a level for straight lines.
- Seal edges: Caulk along tub/shower with clear silicone.
Pro hack: Mix patterns for texture—metro tiles on walls, wood-look on floors. Lasts 10+ years with proper prep. For more tile tips, visit Family Handyman.
Step 3: Refinish Your Vanity for a Custom Look
Ditch the dated laminate—refinish for shaker-style elegance.
- Sand surface: 220-grit to degloss. Wipe dust.
- Prime and paint: Two coats chalk paint (matte black or soft gray). Dry 2 hours between.
- Distress lightly: Sand edges for vintage charm.
- Seal: Clear wax or polycrylic topcoat. Add new hardware ($10/set).
Thrift tip: Score vanities at Habitat ReStores. Transform oak '80s relics into matte modern masterpieces.
Step 4: Thrifted Mirror Upgrade and Lighting Magic
Swap builder-grade mirrors for oversized thrifted finds—add depth and light reflection.
- Mount mirror: Clean frame, use heavy-duty adhesive clips. Level with shims.
- Install lighting: Swap bulbs for LED strips or plug-in sconces. Position at eye level.
- Spa lighting hack: Dimmable warm LEDs (2700K) mimic hotel baths.
Avoid glare: Layer task + ambient lights. Budget lights from discount aisles outperform old fluorescents.
Step 5: Waterproofing, Fixtures, and Finishing Touches
Prevent moisture woes—the silent killer of bathrooms.
- Caulk everything: Tub, sink, baseboards with mold-resistant silicone.
- Seal grout lines: Pen or spray for peel-and-stick.
- Add storage: Floating shelves from scrap wood.
- Accessories: Thrifted baskets, new shower curtain, plants for spa zen.
Mistakes to avoid: Overlooking ventilation—run fan 20 mins post-shower. For waterproofing guides, see Bob Vila.
Common Beginner Mistakes and Pro Hacks
Mistakes:
- Rushing prep—causes bubbles/peeling.
- Wrong adhesive—use bath-specific.
- Poor lighting placement—test before mounting.
Hacks:
- Stencil walls under tiles for patterns.
- DIY floating vanity from IKEA hack.
- Smart mirror with LED defogger ($50 add-on).
Final Thoughts: Your Spa Retreat Awaits
Congrats—your fixer-upper bath is now a serene escape! This reno not only saves money but adds equity. Maintain with monthly caulk checks and enjoy the compliments. Ready for more? Tackle the kitchen next. Share your before/afters in comments!
No comments yet. Be the first!