 Fixated on Home
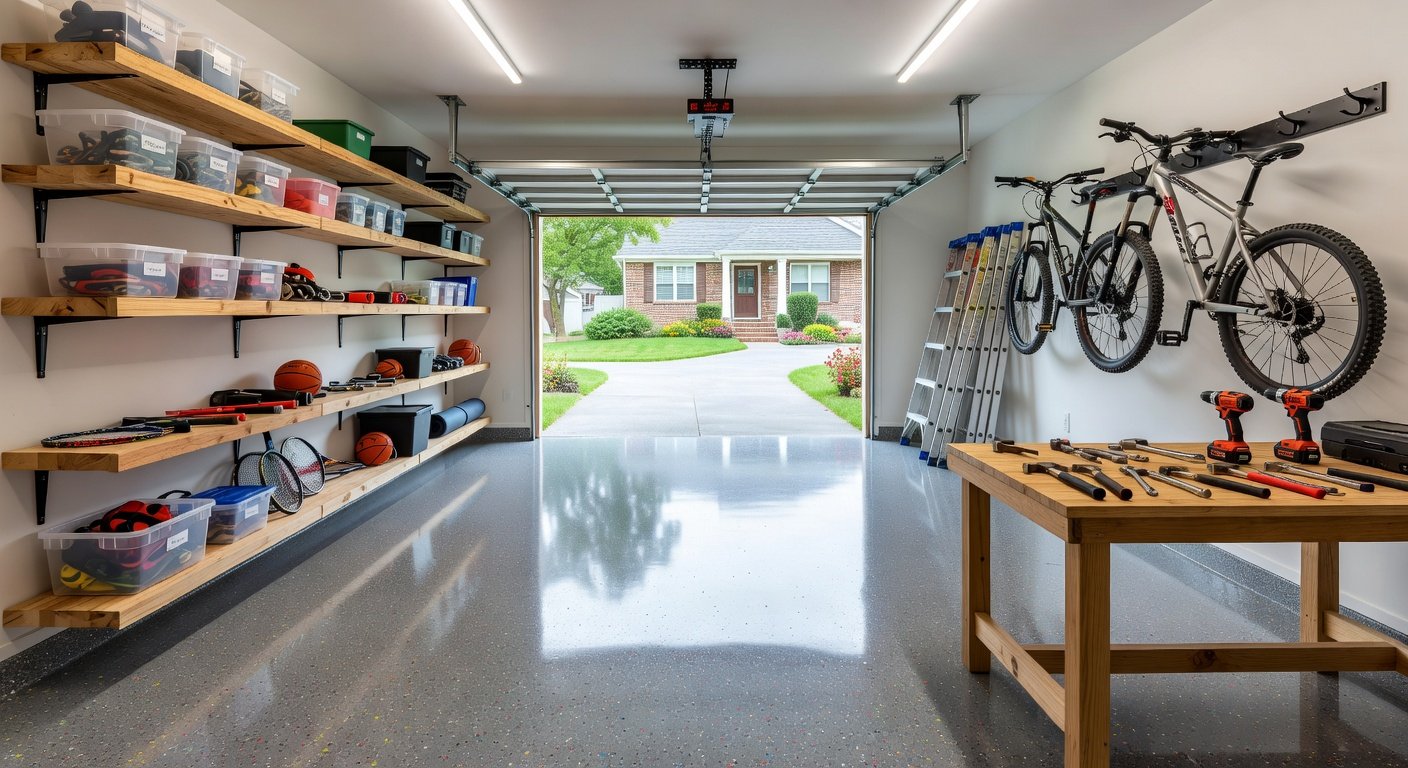
Why Transform Your Garage on a Shoestring Budget?
Your garage is more than a parking spot—it's prime real estate for storage, a workshop, or even a home gym. For fixer-upper homes, a cluttered, dim garage drags down curb appeal and functionality. The good news? You can achieve a stunning DIY garage renovation for under $350 in 2026, focusing on budget-friendly shelving, epoxy flooring, and lighting upgrades. This guide is tailored for home improvement beginners, with step-by-step instructions, material lists, essential tools, time-saving tips, and real before-and-after examples complete with cost breakdowns.
Expect to invest a weekend or two (8-12 hours total) and walk away with a organized, bright space that adds value to your home. According to home renovation experts, garage upgrades yield high ROI—up to 70% return on investment for storage and utility improvements. Let's dive in and turn your garage from chaos to chic.
Planning Your Budget Garage Reno: Total Cost Breakdown
Sticking to $350 means smart shopping at big-box stores like Home Depot or Lowe's. Here's a realistic breakdown:
- Shelving: $120 (DIY wall-mounted units)
- Epoxy flooring kit: $130 (covers 200 sq ft garage floor)
- Lighting upgrades: $80 (LED shop lights and strips)
- Misc (cleaners, tape, etc.): $20
Total: $350. Prices based on 2026 averages; shop sales for deals. Pro tip: Measure your garage first—standard single-car is 200-250 sq ft. Sketch a layout: shelving along walls, epoxy on the floor, lights overhead and under shelves.
Tools You'll Need (Mostly Rent or Borrow)
No need for a full workshop. Essentials under $50 if you don't own them:
- Drill/driver with bits
- Orbital sander or shop vac for prep
- Paint roller, brushes, mixing bucket
- Ladder, level, measuring tape
- Safety gear: gloves, goggles, respirator (critical for epoxy fumes—check EPA guidelines on VOCs)
Time-saving hack: Rent a floor grinder for $30/day if your concrete is rough.
Step 1: Install Budget-Friendly Shelving
Shelving maximizes vertical space, perfect for tools, bins, and sports gear. Skip pricey wire racks; go for plywood and 2x4s for sturdy, customizable units.
Materials List ($120):
- Two 8-ft 2x4s: $10
- Two 4x8 plywood sheets (3/4-inch): $60
- 3-inch wood screws (box): $15
- Wall anchors (for drywall): $15
- Sandpaper and wood filler: $20
Step-by-Step Installation (2-3 Hours):
- Mark heights: Stud finder locates wall studs every 16 inches. Mark shelves at 24, 48, and 72 inches from floor.
- Build frames: Cut 2x4s to span wall width (e.g., 8 ft). Screw horizontal ledgers into studs.
- Cut and sand plywood: Rip sheets to fit. Sand edges smooth.
- Mount shelves: Rest plywood on ledgers, secure with screws from underside. Add brackets for heavy loads (up to 200 lbs/shelf).
- Finish: Caulk gaps, paint or stain for a pro look.
Beginner tip: Use a laser level for perfect alignment. Common mistake: Skipping anchors in drywall—shelves will sag.
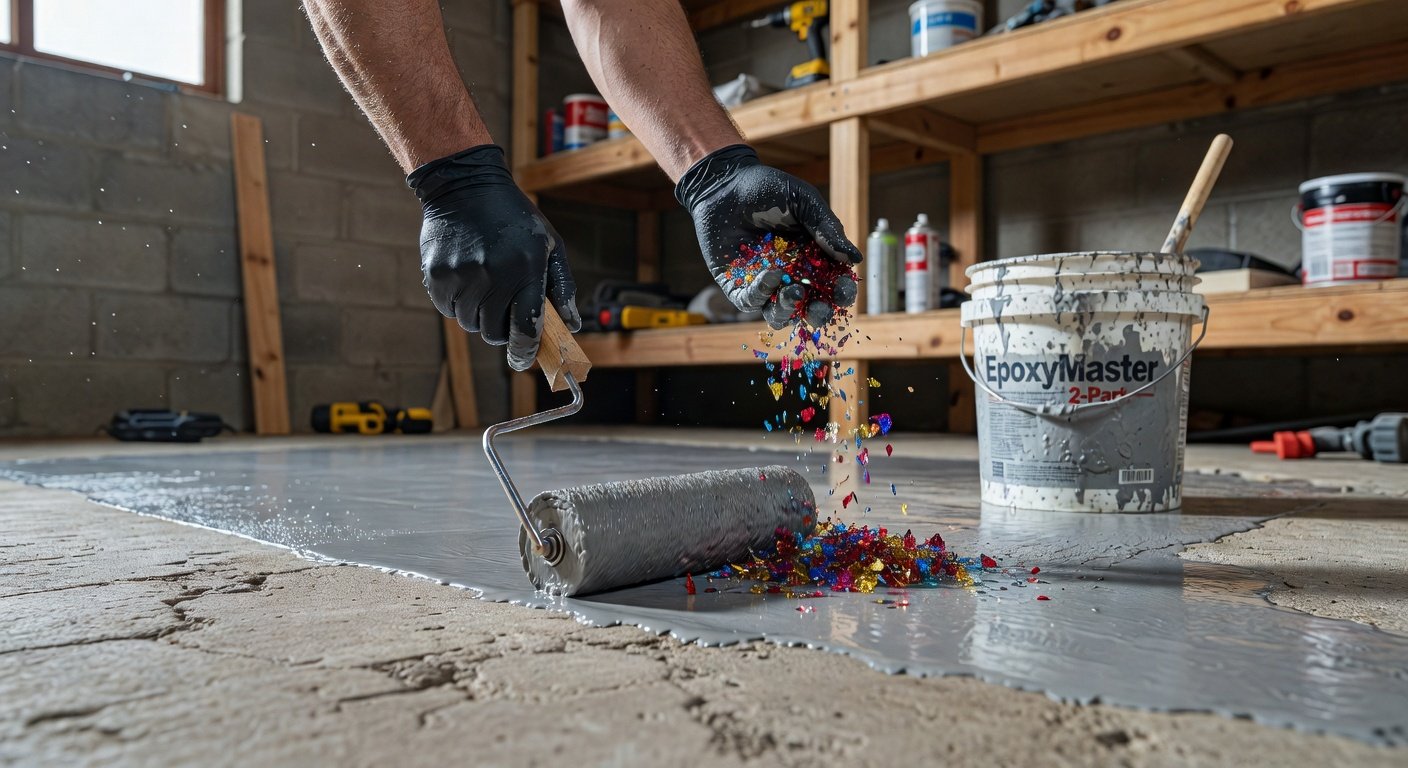
Step 2: Apply Epoxy Flooring for a Durable, Shiny Finish
Epoxy turns cracked concrete into a seamless, waterproof surface that's easy to sweep. It's garage gold for under $1/sq ft.
Materials List ($130):
Prep and Application (4-6 Hours + 24-Hour Cure):
- Deep clean: Sweep, degrease oil stains with TSP substitute. Rinse thoroughly.
- Etch surface: Mix etcher per instructions; scrub with stiff broom. Rinse 2-3 times—rough texture bonds epoxy.
- Dry and tape: 24 hours dry time. Mask walls and doors.
- Mix and roll: Two-part epoxy—mix fast (15-min pot life). Roll in thin coats with 3/8-inch nap roller. Broadcast flakes while wet for grip.
- Cure: Walkable in 24 hours; cars off for 72.
Safety first: Work in 60-80°F, good ventilation. Time-saver: Enlist a helper for mixing. Avoid: Applying over peeling paint—grind it off.
Real example: Sarah's 220 sq ft garage went from oil-stained eyesore to glossy showroom. Cost: $135. Before: Puddles and cracks. After: Bike parking perfection.
Step 3: Upgrade Lighting for Brightness and Efficiency
Poor lighting makes garages feel like caves. Swap fluorescents for LEDs saving 75% on energy—check U.S. Department of Energy efficiency tips.
Materials List ($80):
- Two 4-ft LED shop lights: $40
- LED strip lights (20 ft): $20
- Wire nuts, connectors: $10
- Heavy-duty extension cord: $10
Installation Steps (1-2 Hours):
- Plan layout: Central overheads + under-shelf strips.
- Mount shop lights: Chain or hook to joists; hardwire if comfy (or plug-in).
- Install strips: Peel-and-stick under shelves. Daisy-chain for one outlet.
- Test: 5000+ lumens total lights your space like daylight.
Tip: Motion-sensor add-ons ($15 extra) for hands-free. Mistake: Overloading circuits—use 15-amp breakers.
Time-Saving Tips and Common Pitfalls for Beginners
Tips:
- Prep everything Day 1; epoxy Day 2.
- Batch-shop: One store run.
- Weatherproof: Do epoxy in dry conditions.
- Organize as you go—label bins on new shelves.
Mistakes to Avoid:
- Rushing prep: Leads to peeling epoxy (70% failure cause).
- Cheap materials: Invest in quality epoxy kit.
- Forgetting safety: Respirator prevents health issues.
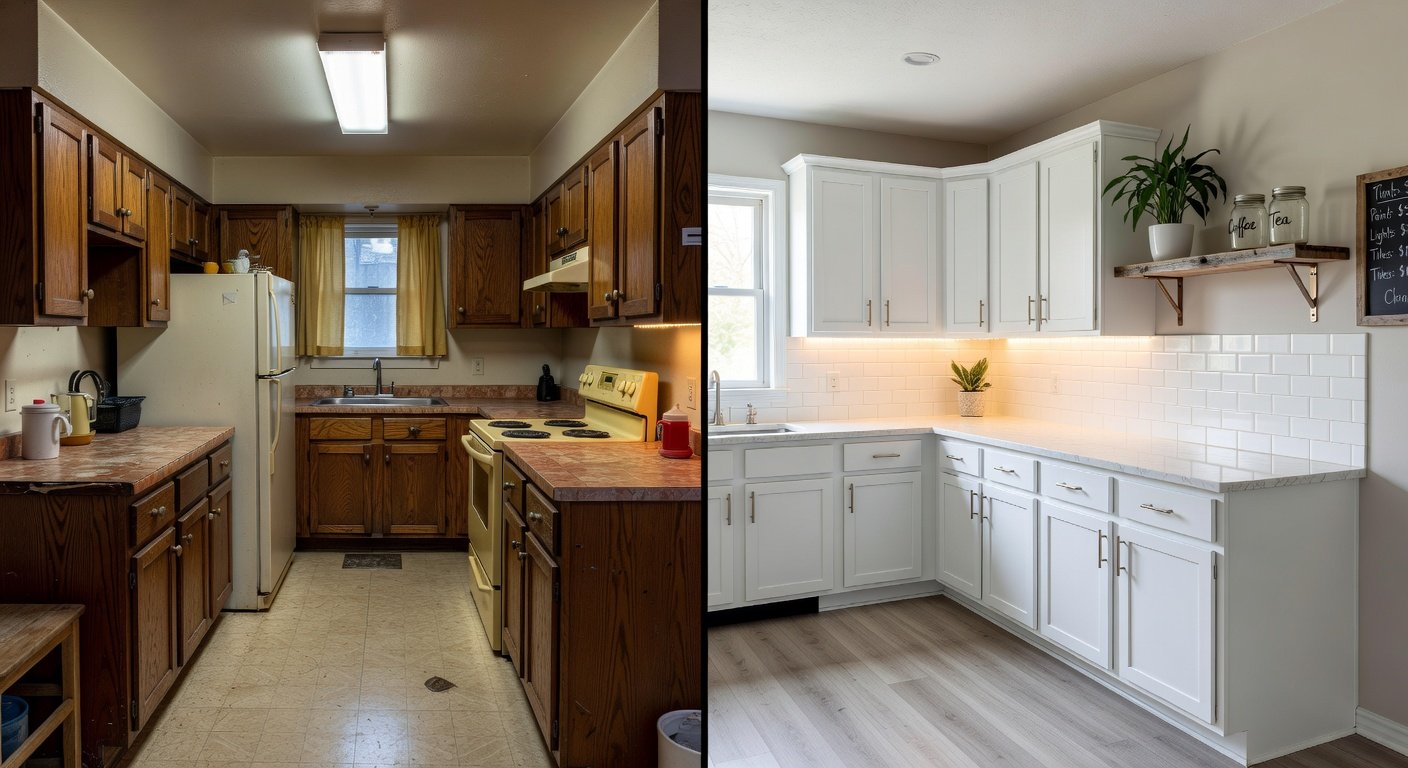
Real Before-and-After Transformations with Costs
Example 1: Mike's Single-Car Garage
Before: Cluttered, dark, dirty floor. After: Wall-to-wall shelves holding holiday decor, epoxy floor for easy cleaning, LED glow. Total: $320. Time: 10 hours. ROI: Sold tools cluttering living room.
Example 2: Family Workshop Reno
Before: Unused junk space. After: Kid bikes on shelves, epoxy for projects, under-cabinet lights. Cost: $345. Inspired family projects weekly.
These hacks scale—double for two-car garages under $700.
FAQs for DIY Garage Reno Newbies
Q: Can I DIY epoxy over old paint?
A: No—strip or etch aggressively.
Q: What's the best shelf wood?
A: 3/4-inch plywood beats particleboard.
Q: How long does epoxy last?
A: 5-10 years with proper care.
Q: Energy savings from LEDs?
A: 50-80% off electric bill.
Conclusion: Start Your Garage Glow-Up Today
With these under-$350 hacks, your fixer-upper garage becomes a functional gem in 2026. You've got the plans, costs, and tips—grab tools and transform. Share your before-afters; inspire the community! For more reno inspo, explore budget upgrades that boost home value effortlessly.
No comments yet. Be the first!