 Fixated on Home
Revamp Your Dated Kitchen on a Shoestring Budget
Got a fixer-upper kitchen that's stuck in the '80s? You don't need a full remodel to breathe new life into it. With smart DIY projects, you can transform cabinets, countertops, and lighting for under $400. This guide breaks it down step-by-step, including tool lists, cost-saving tips, and beginner tricks. Expect dramatic before-and-after results that rival pro jobs.
We'll focus on three high-impact areas: cabinet refinishing ($150), countertop overlays ($100), and lighting upgrades ($100), plus $50 for tools and supplies if you're starting from scratch. Total: under $400. These updates boost functionality, brightness, and style without gutting your space.
Tools and Materials You'll Need (Total ~$50 if Buying Basics)
- Screwdriver set and drill ($20)
- Sandpaper (various grits: 120, 220, 400) and sanding block ($10)
- Painter's tape, drop cloths, and brushes/rollers ($10)
- Cleaning supplies: TSP substitute, degreaser ($5)
- Measuring tape, level, and utility knife ($5)
Pro tip: Borrow tools from friends or check Home Depot's tool rental for cheap daily rates to save cash.
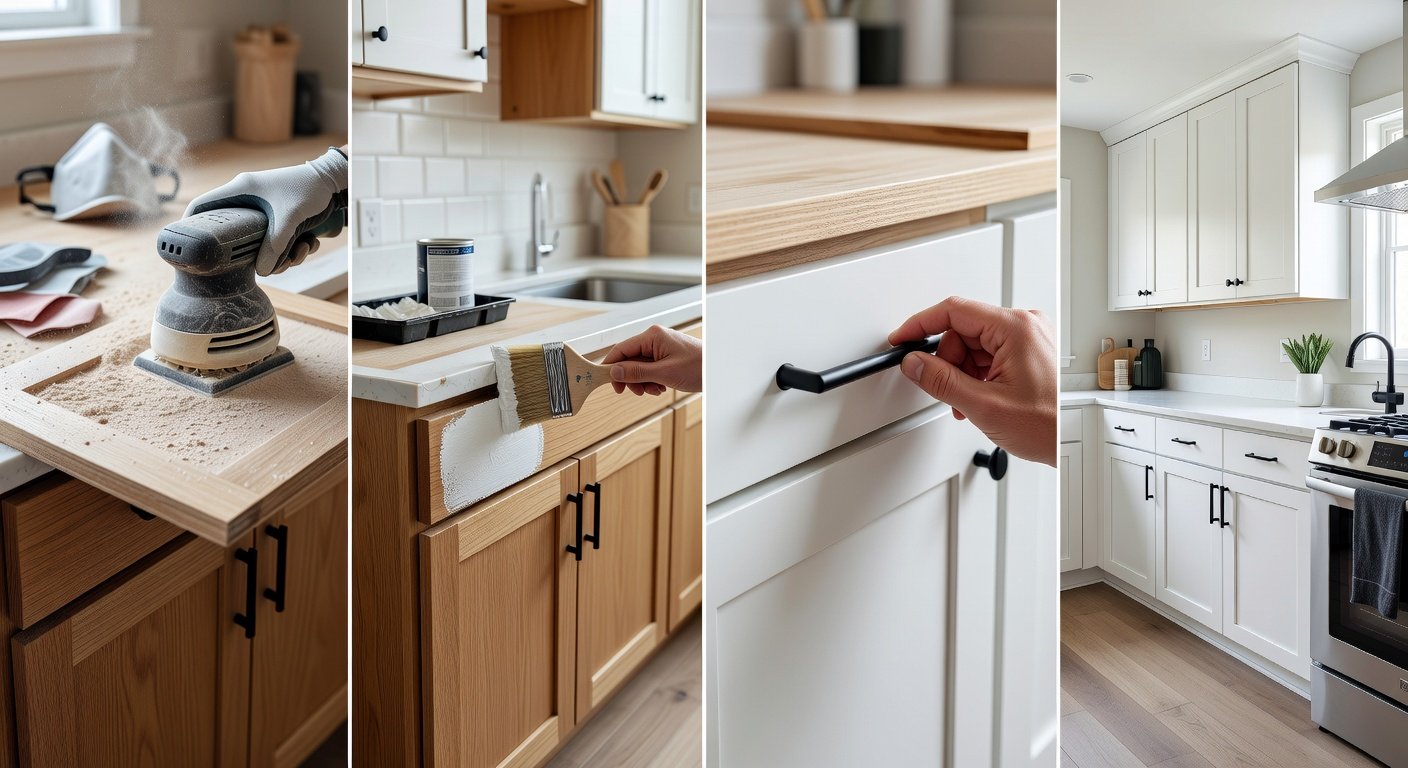
Step 1: Cabinet Refinishing – The Biggest Bang for Your Buck ($150)
Cabinets often make or break a kitchen's look. Skip replacement; refinish instead. This DIY takes a weekend and hides wear like scratches and faded finishes.
Prep Work (1-2 Hours)
- Empty cabinets and remove doors/ hardware. Label with tape for reassembly.
- Clean thoroughly with TSP or degreaser to cut grease—kitchens get grimy!
- Sand lightly (120-grit) to degloss, then smooth with 220-grit. Wipe dust with tack cloth.
Beginner trick: Work in a garage or cover floors. Ventilation is key; open windows.
Painting and Sealing (4-6 Hours + Dry Time)
- Prime with bonding primer (e.g., Zinsser BIN, $20/gallon covers 20 doors).
- Apply 2 coats of cabinet paint (chalky or enamel, $30/quart). Use a foam roller for smooth finishes.
- Distress lightly for a trendy shabby-chic look, then seal with polycrylic ($25).
- Reinstall hardware or spray-paint old knobs matte black ($10).
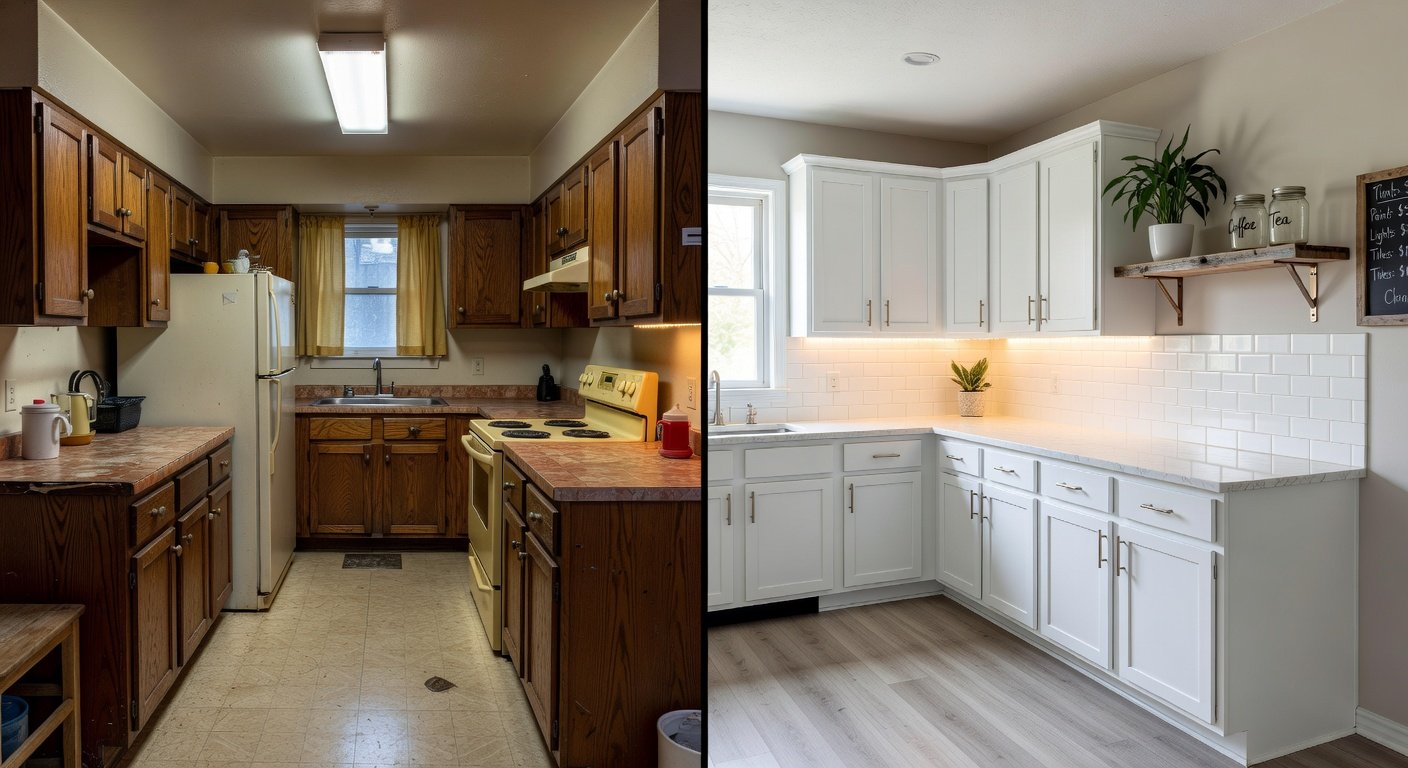
Cost breakdown: Primer $20, paint $40, sealer $25, sandpaper/supplies $15, hardware $50. Before: dingy oak. After: sleek white shaker-style.
The image above shows a real before-and-after of refinished cabinets—notice how matte black hardware pops against soft gray paint!
Step 2: Countertop Overlays – Instant Modern Upgrade ($100)
Ditch laminate horrors with peel-and-stick overlays or contact paper. No demo required.
Installation Steps (2-3 Hours)
- Clean and sand counters lightly. Repair chips with wood filler.
- Measure precisely; cut overlay sheets with utility knife using a straightedge.
- Peel, stick, and smooth from center out. Use a hairdryer to shrink bubbles.
- Seal edges with silicone caulk ($5) for durability.
Cost-saving tip: Shop sales at Lowe's for vinyl sheets mimicking quartz ($40/sheet). Faux marble looks high-end. Before: yellowed Formica. After: veined white quartz vibe.
Trick for beginners: Practice on a scrap piece. Overlays last 3-5 years; easy to swap later.
Step 3: Lighting Upgrades – Brighten and Modernize ($100)
Poor lighting darkens any kitchen. Swap fixtures for LEDs to save energy and add style.
Quick Swaps (1-2 Hours)
- Under-cabinet LEDs: Stick-on strips ($20/10ft). Plug-in or wire to outlet.
- Ceiling fixture: Replace fluorescent with flush-mount LED ($30). Turn off breaker first!
- Pendant lights over sink: Industrial bulbs in cages ($50/set). Use existing wiring.
Safety first: If unsure about wiring, consult an electrician. Cost: LEDs $40, fixtures $40, bulbs $20. Before: dim shadows. After: warm, task-ready glow.
Energy tip: LEDs cut bills 75%. Check for smart bulbs later if budget allows.
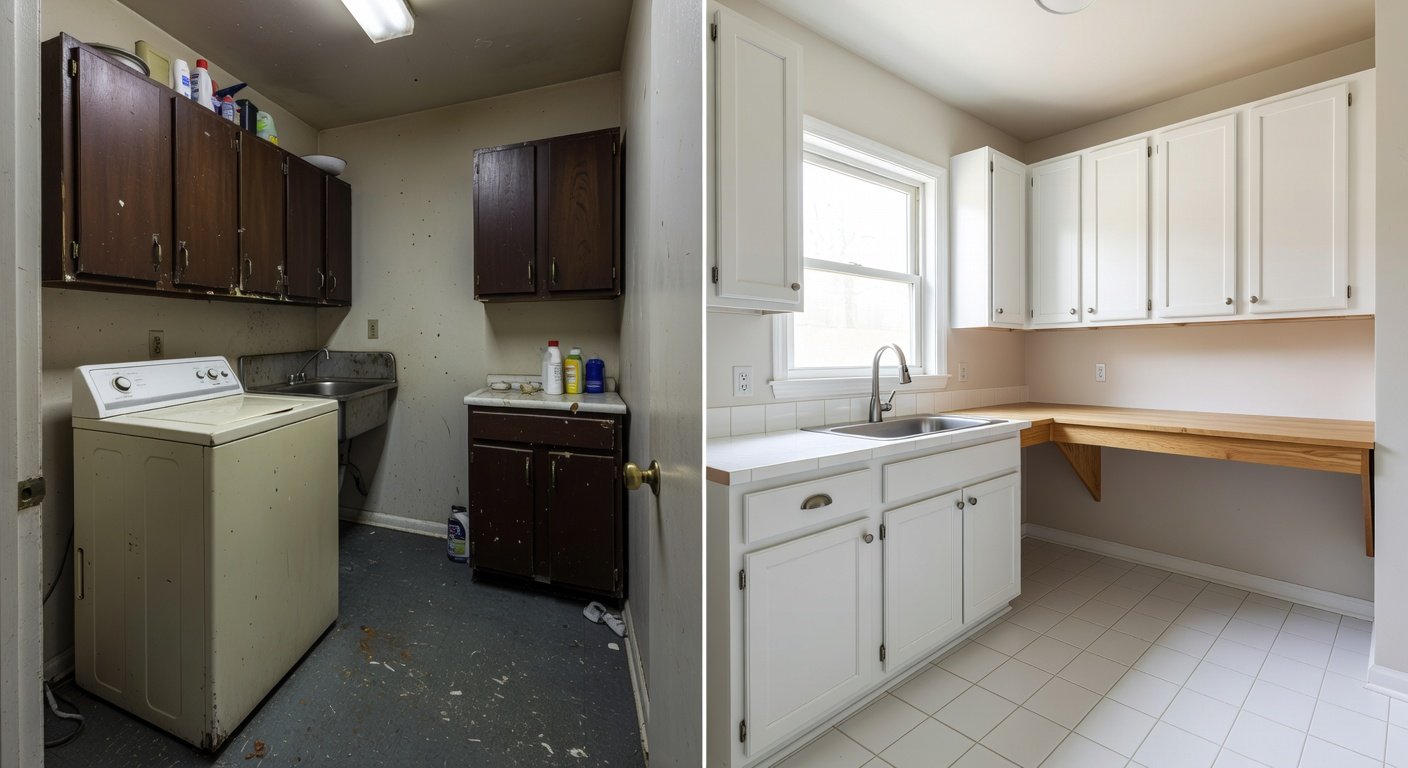
Real Before-and-After Transformations
Reader Sarah from Ohio: 'My '70s kitchen was avocado green. Post-DIY: crisp white cabinets, faux granite counters, and puck lights. Total $380. Neighbors think I hired pros!' Photos showed a 200% vibe lift.
Mike in Texas: Oak cabinets to navy, butcher-block overlay, pendants. 'Under $400, sold the house faster!' These stories prove small changes yield big impact.
Cost-Saving Tips and Beginner Tricks
- Shop Smart: Thrift hardware, buy paint samples first.
- Time-Savers: Refinish off-site; use sprayer rentals ($20/day).
- Common Pitfalls: Skip sanding? Paint peels. Rushing drying? Bumps.
- Extend Life: Use eco-friendly paints; follow EPA Safer Choice guidelines.
- Scale Up: Add peel-and-stick backsplash ($30) next.
Your fixer-upper awaits. Start prepping today—your dream kitchen is weekends away!
No comments yet. Be the first!