 Fixated on Home
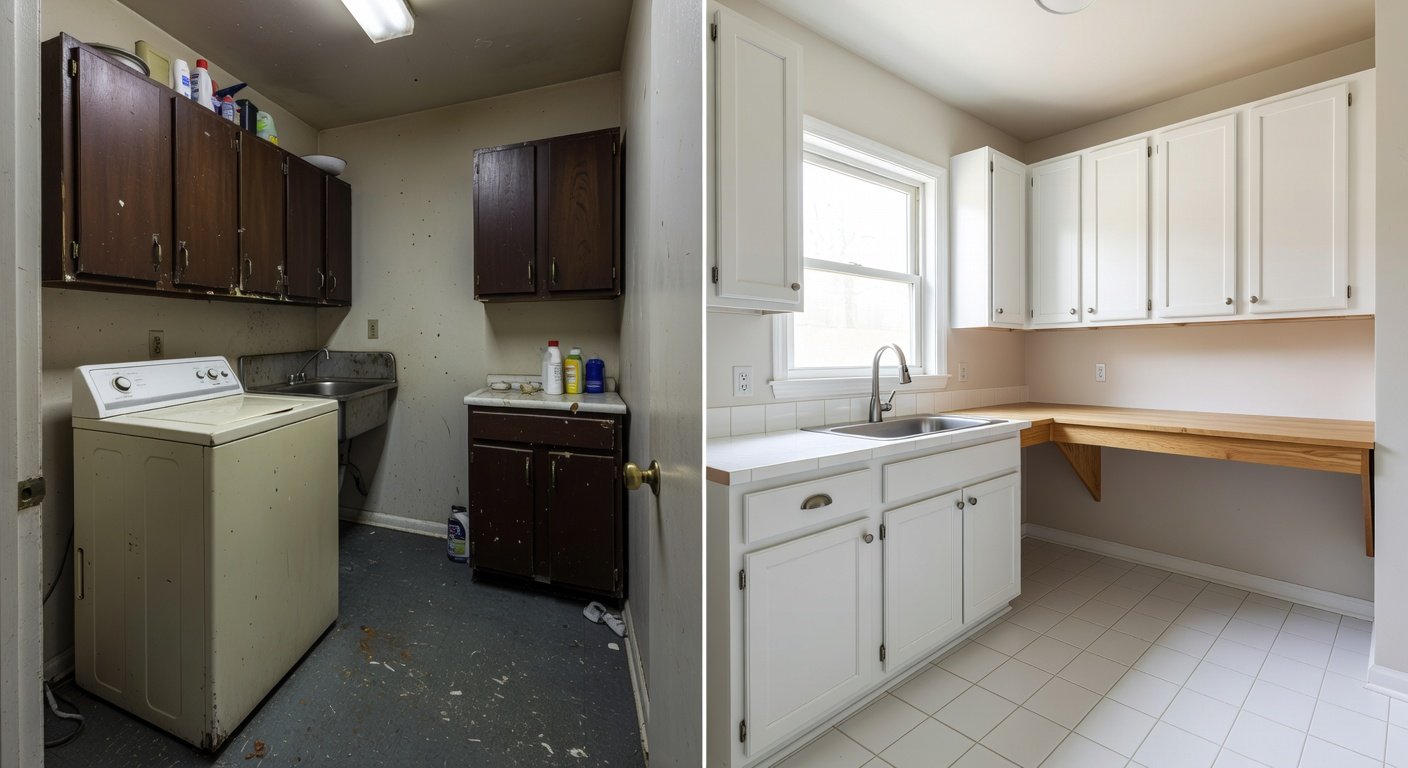
Revamp Your Laundry Room Without Breaking the Bank
Your laundry room doesn't have to be a drab, cluttered afterthought. Even if it's a fixer-upper with peeling floors and outdated fixtures, you can achieve a fresh, functional space using affordable DIY projects. This guide walks you through step-by-step transformations using budget-friendly materials like peel-and-stick tiles, repurposed cabinets, utility sink installs, folding stations, and clever storage solutions. With costs under $500, you'll see dramatic before-and-after results that inspire confidence in your home improvement skills.
Why a Laundry Room Makeover Matters
Laundry rooms often get overlooked, but a well-organized one saves time, reduces stress, and boosts home value. Imagine folding clothes on a dedicated counter instead of the dryer, or sorting delicates without bending over. These upgrades focus on utility and style, using items from thrift stores, discount retailers, and your garage.
Budget Breakdown
- Peel-and-stick tiles: $50–$100
- Repurposed cabinets: $0–$50 (free from curbside finds)
- Utility sink: $75–$150
- Folding station materials: $30–$60
- Storage solutions: $20–$50
- Total: Under $500
Shop smart at stores like Home Depot for essentials.
Step 1: Prep Your Space (1–2 Hours)
Start with a deep clean. Remove old shelves, declutter, and patch walls with spackle ($5). Sand rough spots and wipe down surfaces. Measure your room for materials—most projects fit standard 5x8-foot spaces. Before: Dingy linoleum and rusty pipes. Protect floors with drop cloths.
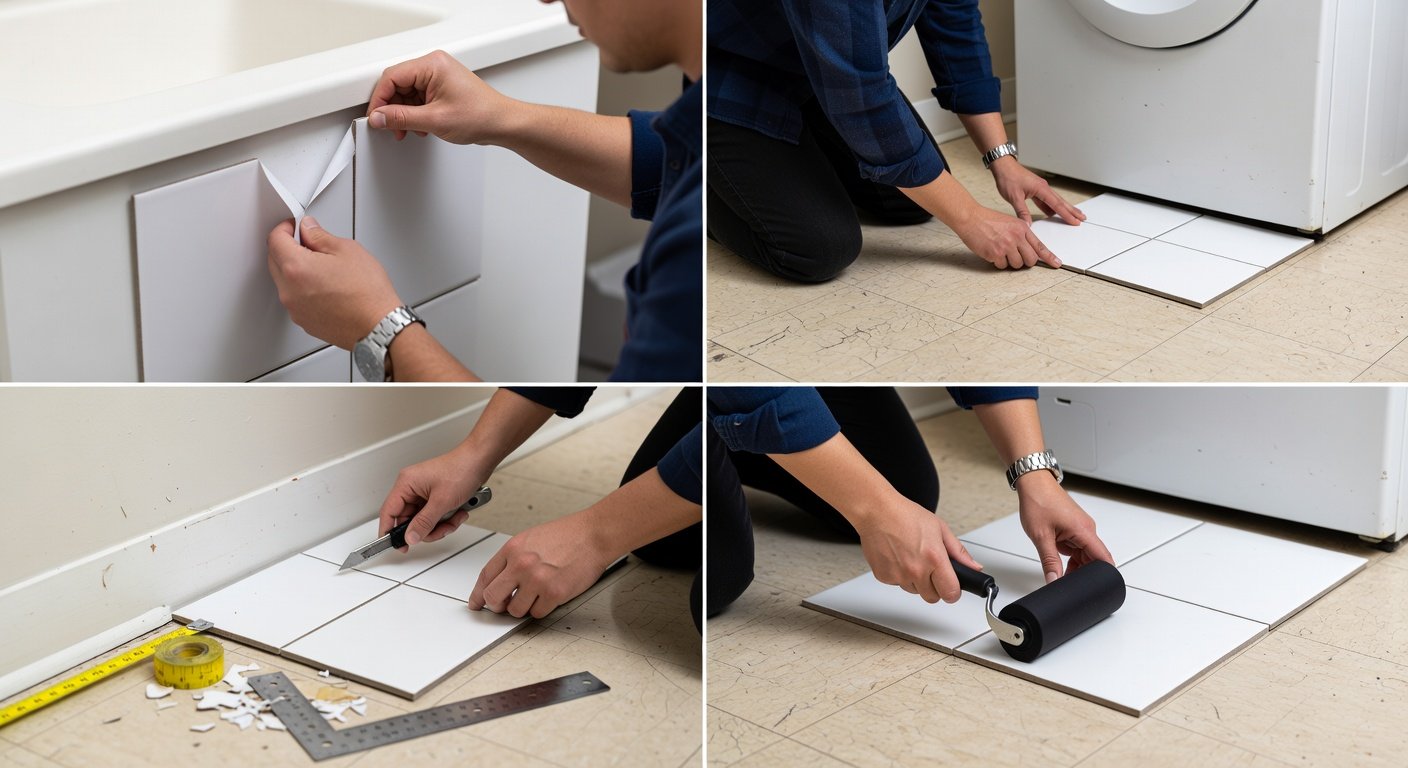
Step 2: Floor Upgrade with Peel-and-Stick Tiles
Peel-and-stick tiles are a game-changer for ugly floors—no grout, no mess.
- Clean and dry the floor thoroughly.
- Mark center lines with chalk for alignment.
- Peel and stick tiles row by row, cutting edges with a utility knife.
- Roll with a roller for adhesion.
Choose vinyl tiles mimicking subway or terrazzo patterns ($1–$2/sq ft). Time: 4 hours. Cost: $75. After: Glossy, waterproof floor that elevates the entire room.
Step 3: Repurpose Cabinets for Smart Storage
Hunt Facebook Marketplace or curbside for free kitchen cabinets. Sand, prime, and paint with cabinet-grade paint ($20).
- Install upper cabinets above the washer/dryer for detergent storage.
- Add pull-out drawers for socks and rags using sliders ($10).
- Label bins with chalkboard paint for easy sorting.
Mount securely to studs. This creates vertical storage without new buys. Check This Old House for mounting tips. Before: Piles of supplies on the floor. After: Neat, accessible organization.
Step 4: Install a Utility Sink
A deep sink handles pre-treating stains and soaking rugs.
- Select a freestanding or wall-mount model ($100).
- Shut off water, cap old lines if needed.
- Mount sink per instructions—use PVC pipes for drains.
- Connect hoses; test for leaks.
No plumbing experience? Use push-fit connectors. Time: 2–3 hours. Pro tip: Add a faucet with pull-out sprayer for $30 extra.
Step 5: Build a Folding Station
Turn counter space into a productivity hub.
- Buy a plywood sheet ($20) and 2x4s ($15).
- Cut to 5x2 feet; assemble frame.
- Attach hinges to flip up against the wall when not in use.
- Top with peel-and-stick countertop ($25) matching your tiles.
Screw into studs for stability. Add hooks below for irons and hampers. Before: No workspace. After: Ergonomic folding area that hides away.
Bonus: Lighting and Finishing Touches
LED shop lights ($20) brighten tasks. Add tension rods for hanging wet clothes and magnetic strips for tools. Paint walls in soft blues or grays ($30/gallon) for a spa feel. Mirrors or open shelving amplify space.
Cost-Saving Tips for Success
- Repurpose: IKEA hacks or pallet wood freebies.
- Buy remnants: Tiles and plywood offcuts are cheap.
- DIY tools: Rent from hardware stores or borrow.
- Seasonal sales: Black Friday for appliances.
- Energy savings: Insulate pipes to cut bills.
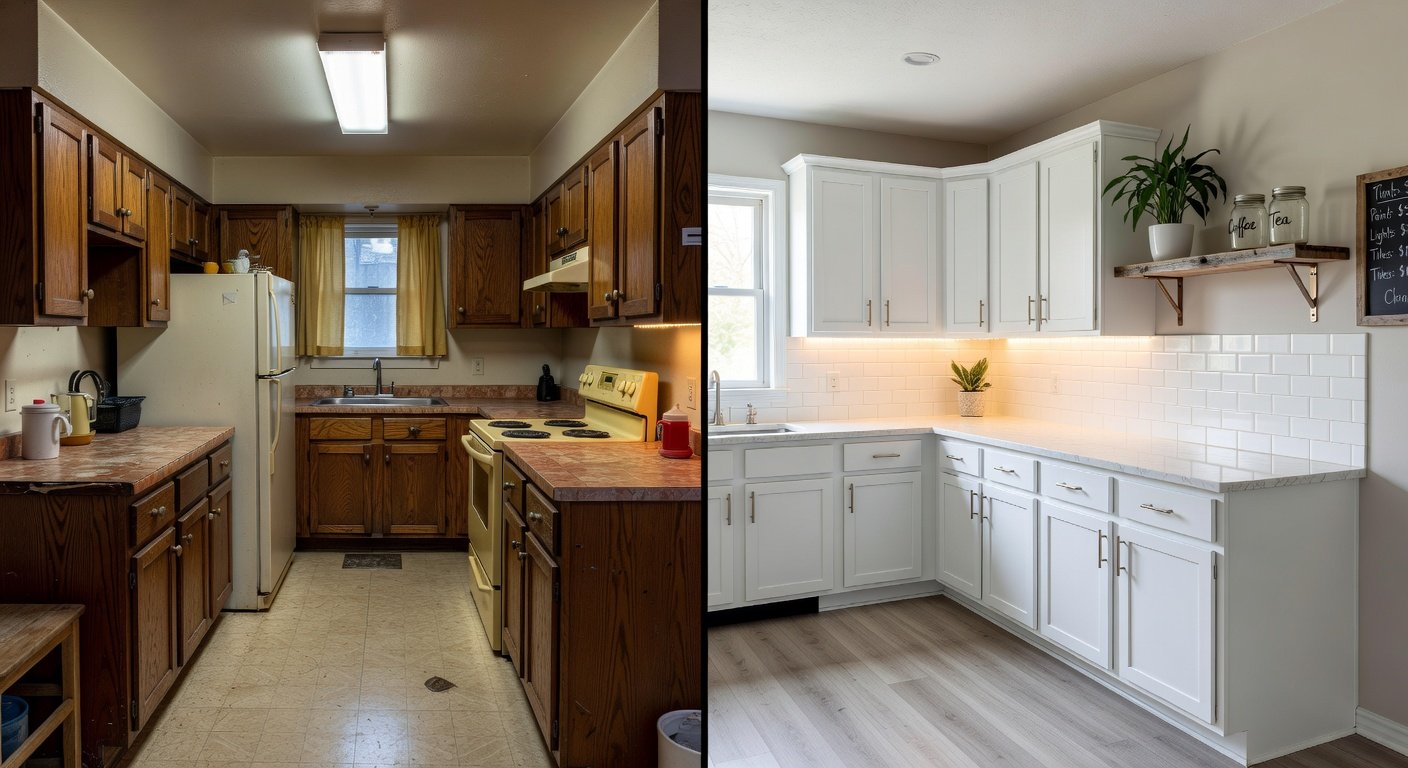
Before-and-After Transformations
Picture this: Before—cracked tiles, exposed pipes, chaos. After—sleek floors, custom storage, efficient workflow. One reader shared: "My $300 reno made laundry enjoyable!" Share your pics in comments.
Final Thoughts
These projects prove big changes come small budgets. Tackle one weekend at a time for stress-free wins. Your laundry room will be the envy of friends—functional, stylish, and all DIY. Ready to start?
No comments yet. Be the first!