 Fixated on Home
Introduction to Breakfast Nooks in Modern Kitchen Renovations
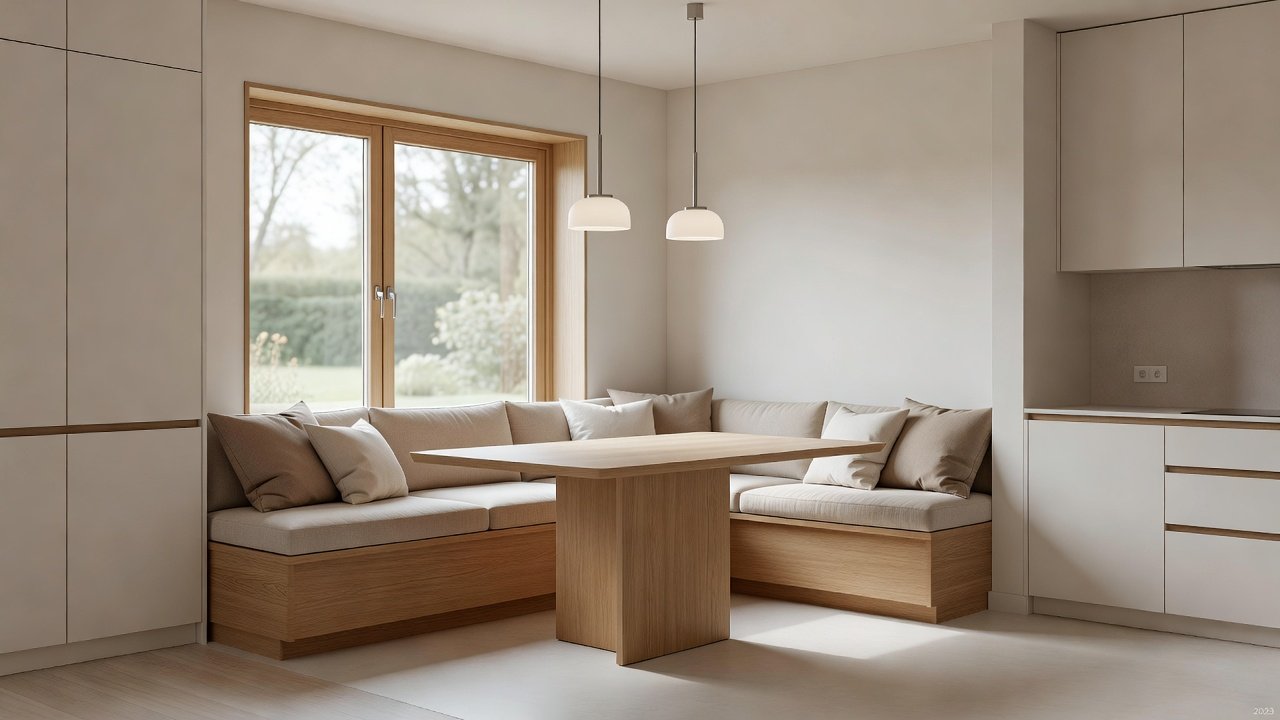
Homeowners renovating kitchens often overlook underused corners that can transform into cozy breakfast nooks. These spaces enhance daily living by providing dedicated areas for meals, work, or relaxation while boosting overall home design appeal. Integrating a breakfast nook during a remodel maximizes functionality without sacrificing style, especially in contemporary settings where clean lines and efficient use of space are priorities. A well-designed nook can serve multiple purposes, from quick family breakfasts to informal work sessions or even casual entertaining. In today's modern kitchen renovations, homeowners seek ways to blend comfort with sleek aesthetics, making the breakfast nook an ideal addition that elevates both usability and visual interest.
This guide explores layout planning, material choices that align with remodeling trends, space-saving furniture, and seamless integration with existing cabinetry. Real-world examples, a straightforward installation process, and style comparisons help homeowners make informed decisions for lasting upgrades. By focusing on these elements, you can create a nook that feels intentional and harmonious with the rest of your renovated space.
Planning Your Breakfast Nook Layout
Effective layout starts with assessing available corner space. Measure the area to ensure the nook fits comfortably without crowding walkways. In smaller kitchens, L-shaped designs work well, while larger spaces accommodate U-shaped or linear benches. Consider natural light sources like windows to create an inviting atmosphere. Align the nook with traffic flow to maintain an open feel in the renovated kitchen. Think about electrical needs early, such as outlets for charging devices or powering small appliances. Factor in ventilation and proximity to the main cooking area to keep the space practical for everyday use. Professional input from a designer can help optimize the layout for both form and function.
Key Considerations for Different Kitchen Sizes
For compact kitchens, prioritize vertical elements like tall backs on benches to define the area without expanding the footprint. In medium-sized spaces, incorporate built-in elements that double as storage. Larger kitchens allow for more elaborate configurations, including curved designs or extensions that wrap around islands.
Selecting Materials That Complement Your Remodel
Choose materials that match modern cabinetry finishes. For benches, opt for durable woods like oak or walnut paired with upholstered cushions in neutral tones. Countertops in quartz or marble provide easy maintenance and visual continuity. Lighting plays a key role—install pendant fixtures or recessed LEDs above the seating area for ambiance. These selections ensure the nook feels like a natural extension of the kitchen rather than an afterthought. Explore sustainable options such as reclaimed wood or eco-friendly fabrics to align with current remodeling preferences. Durability is essential, especially in high-traffic areas where spills and daily wear are common.
Space-Saving Furniture Options
Built-in benches maximize storage with lift-up seats or drawers underneath. Pair them with compact tables that fold or extend as needed. Wall-mounted seating or banquettes free up floor space in tight renovations. Modular pieces allow customization to fit irregular corners while maintaining a sleek, contemporary profile. Consider banquette styles with hidden compartments for linens or kitchen gadgets. Foldable chairs or stools can supplement seating when guests arrive without cluttering the area daily. These choices help maintain a minimalist look while delivering maximum utility.
Integrating the Nook with Existing Cabinetry
Blend the nook into cabinetry by using matching wood tones and hardware. Extend upper cabinets around the seating zone or install floating shelves for display. This creates visual harmony and adds storage without expanding the footprint. Professional designers recommend aligning bench heights with countertop levels for a unified look during the renovation process. Custom millwork can tie the elements together, ensuring the nook enhances rather than disrupts the overall cabinetry flow.
Real-World Before-and-After Transformations
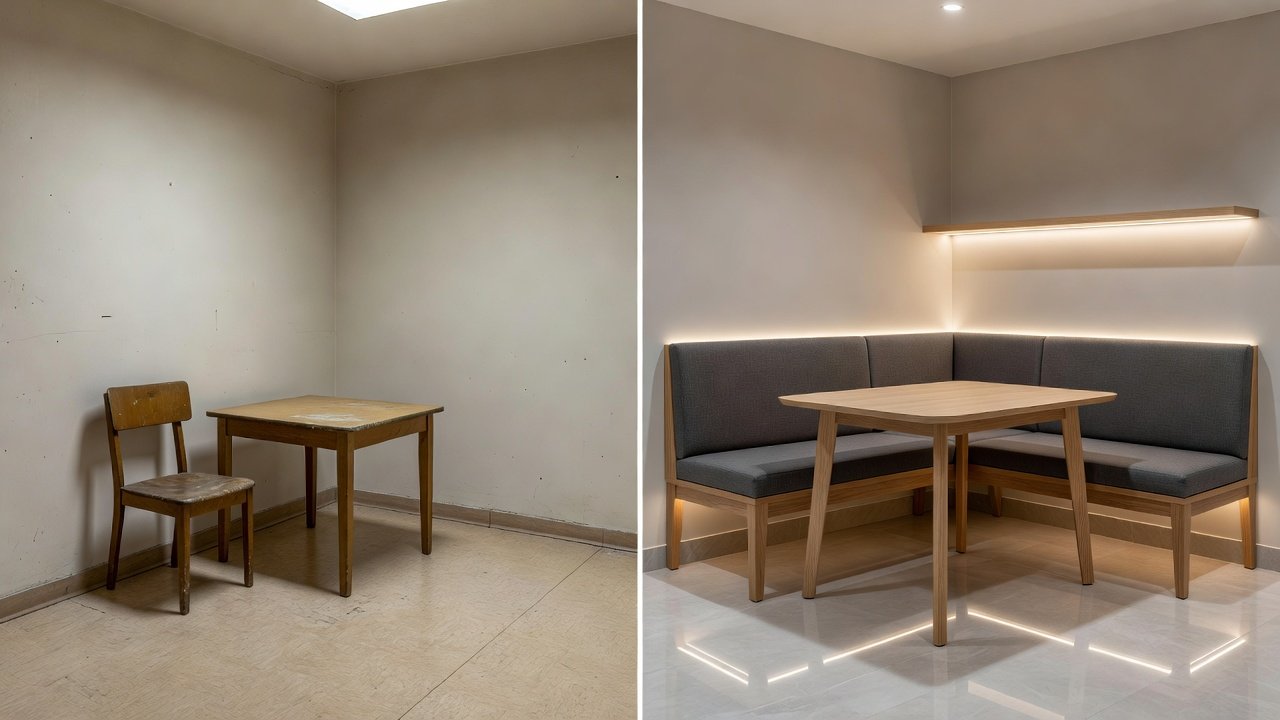
Example 1: A cramped corner in a suburban home became an L-shaped nook with built-in storage, turning wasted space into a family breakfast spot. The transformation included adding soft-close drawers and a quartz tabletop that matched the kitchen island, resulting in a cohesive design that improved daily routines. Example 2: Urban apartment renovation added a window-facing bench that doubled as extra seating for guests. Before the update, the corner held only a small plant; afterward, it featured custom cushions and integrated USB ports for modern convenience. Example 3: Mid-century kitchen update featured a curved banquette integrated with island cabinetry for seamless flow. The project used matching veneers and LED strip lighting to create a high-end feel without major structural changes. Example 4: Compact loft remodel used fold-down tables and slim benches to create a multifunctional zone without altering major layouts. This approach preserved valuable floor space while introducing a stylish dining alternative.
Comparison of Nook Styles for Different Home Sizes
- Small homes: Compact corner benches with wall-mounted tables save space and suit apartments under 1,000 square feet. Pros include easy installation and low material costs; cons involve limited seating capacity.
- Medium homes: L-shaped designs with storage offer versatility for families in 1,500-2,500 square foot properties. These provide excellent balance of comfort and functionality but may require more precise measurements.
- Large homes: U-shaped or island-adjacent nooks provide luxury seating areas in expansive kitchens over 3,000 square feet. They excel in entertaining scenarios yet demand careful planning to avoid overwhelming the room's proportions.
Simple 5-Step Installation Guide
- Measure and mark the corner space accurately, double-checking for level surfaces and any obstructions like outlets or vents.
- Build or assemble the bench frame to fit the dimensions, using quality lumber or prefabricated kits for stability.
- Secure the structure to walls and floor for stability, ensuring all anchors meet local safety standards.
- Install cushioning, upholstery, and any integrated lighting, testing electrical components before final placement.
- Finish with paint, stain, or hardware to match the kitchen, applying protective sealants for longevity.
Additional Tips for Success
Pay attention to color schemes that reflect modern trends, such as soft grays or warm beiges. Incorporate plants or artwork to personalize the space. Regular maintenance, including vacuuming cushions and wiping surfaces, keeps the nook looking fresh. Explore resources on sites like Houzz for inspiration and Better Homes & Gardens for practical remodeling advice.
FAQ on Costs and Maintenance
Common questions include how nooks impact renovation budgets and upkeep. Maintenance typically involves regular cleaning of surfaces and occasional fabric care for cushions. Materials like treated woods and laminates hold up well in high-use kitchens. Consult professionals for custom builds to ensure compliance with local building codes. Another frequent concern is durability—selecting high-quality finishes reduces long-term wear. Homeowners also ask about adding electrical features; this requires early planning during the renovation phase. Finally, many wonder about resale value; well-executed nooks often appeal to buyers seeking functional modern homes.
Conclusion
Adding a breakfast nook elevates modern kitchen renovations by creating cozy, functional zones. With thoughtful planning and quality materials, these additions deliver daily enjoyment and increased home value. Explore options that suit your space for a personalized result that stands the test of time.
No comments yet. Be the first!