 Fixated on Home
Introduction to Phased Outdoor Renovations
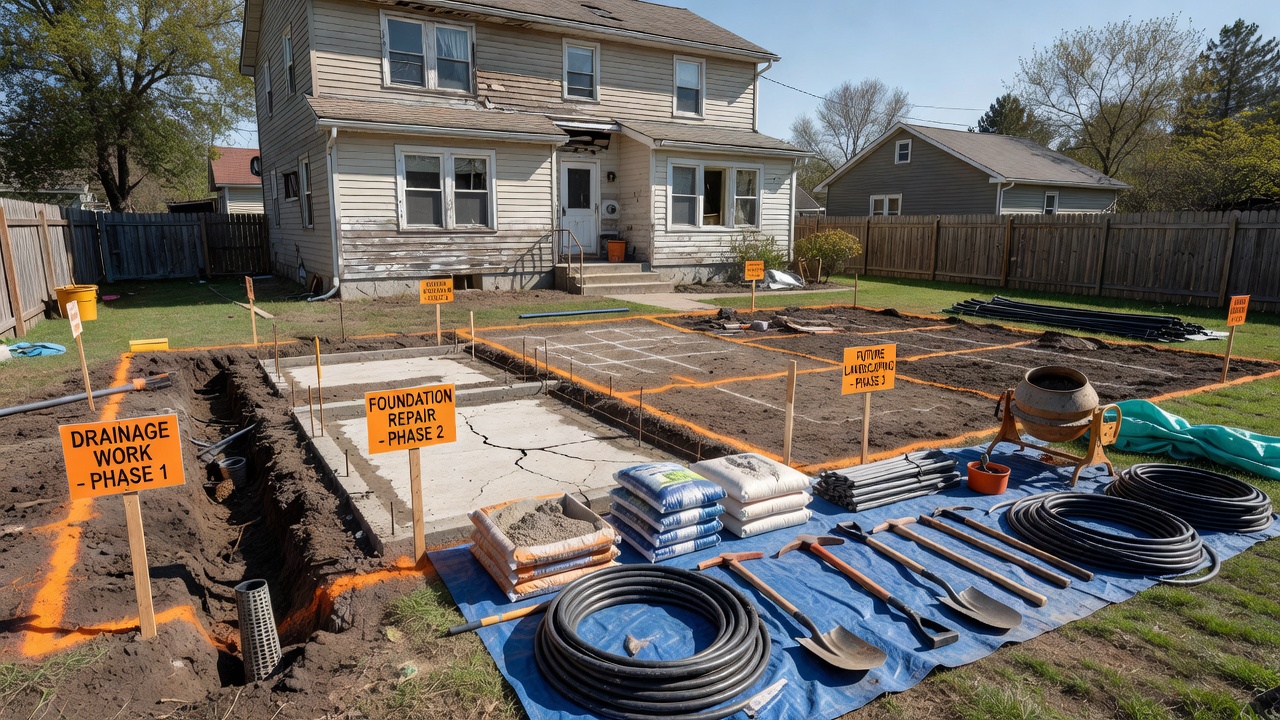
Fixer-upper homes frequently present outdoor spaces requiring extensive attention, ranging from drainage failures and uneven terrain to aging structures and neglected landscaping. Attempting a complete overhaul in a single effort commonly results in budget overruns, safety hazards, weather-related delays, and projects that remain unfinished for years. Effective phasing breaks these outdoor renovations into logical, sequential stages that prioritize structural integrity and functionality before moving to visual enhancements. This methodical strategy reduces daily disruption to household routines while building lasting property value throughout 2026 and beyond.
Homeowners who adopt phased planning consistently achieve better outcomes because each stage builds upon the previous one with clear checkpoints. Whether the property features a small urban yard or a sprawling suburban lot, understanding the order of operations prevents expensive corrections later. The following sections provide a complete framework for DIY success, including assessment techniques, decision matrices, detailed timelines, and real examples drawn from typical fixer-upper scenarios.
Initial Site Assessment for Outdoor Projects
Every successful renovation begins with a comprehensive evaluation of existing conditions. Start by mapping the entire outdoor area on graph paper or using a free digital tool, noting slopes, existing utilities, mature trees, and problem zones such as standing water after rain. Measure dimensions accurately and test soil composition with an inexpensive kit to determine drainage capacity and nutrient levels. Photograph every corner from consistent vantage points and record measurements of fences, patios, and outbuildings for future reference.
Factor in local environmental variables including prevailing wind directions, seasonal sun paths, and wildlife patterns that could affect plant choices or structure placement. Review updated 2026 municipal codes regarding setbacks, stormwater management, and native plant requirements. This initial investment of time uncovers subsurface issues such as old septic lines or buried debris that would otherwise surface mid-project. Professional surveyors can supplement DIY efforts when boundaries are unclear, ensuring all subsequent phases align with legal property lines.
Prioritization Based on Budget and Impact
Develop a clear ranking system that weighs urgency against available resources. Structural concerns such as foundation cracks, failing retaining walls, or inadequate grading must receive top priority because they safeguard the home itself. Secondary items include utility upgrades like irrigation or lighting infrastructure. Aesthetic improvements such as decorative plantings or outdoor furniture come last once the foundation is secure.
Construct a simple spreadsheet matrix with columns for task description, estimated labor hours, material cost range, and potential property value increase. Assign scores from one to five for both impact and feasibility, then sort accordingly. Early phases should target quick wins like debris removal or fence repairs that deliver immediate visual improvement and build momentum. This prioritization prevents the common trap of spending heavily on visible elements while critical infrastructure remains neglected.
Sequential Steps: Foundation Work Before Aesthetics
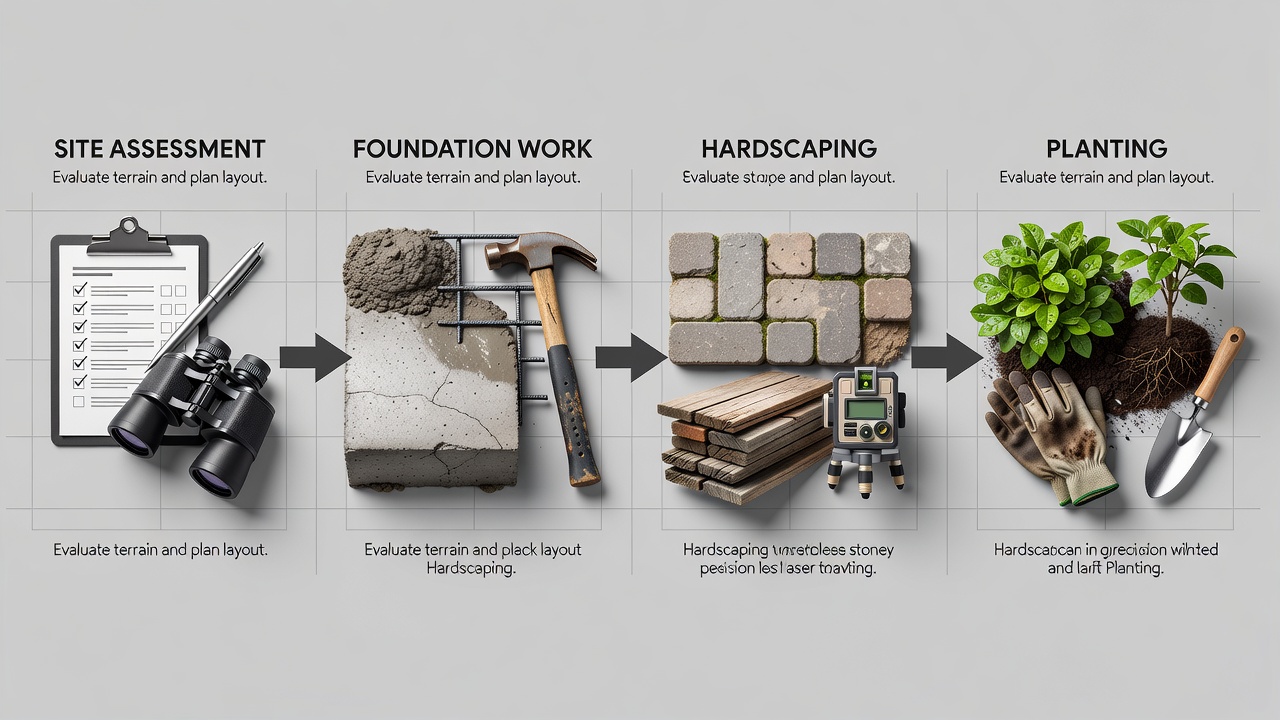
Follow a strict order that protects new work from later construction activity. Phase one always addresses grading, excavation, and drainage systems to direct water away from the foundation. Once grading is complete, install any underground utilities including electrical conduits or irrigation lines. Hardscaping elements such as patios, walkways, and decks form the next layer because they require stable sub-bases. Only after these elements cure and settle should homeowners proceed to fencing, lighting, and soft landscaping.
Each step includes verification checkpoints. After drainage installation, simulate heavy rainfall with a hose to confirm flow direction. Allow concrete or paver bases to cure fully before adding weight. This sequence eliminates the need to dismantle finished surfaces when hidden problems appear. Deviating from the order frequently leads to cracked patios or flooded gardens within the first year.
Real-World Examples of Phased Timelines
One suburban three-bedroom fixer-upper completed its outdoor transformation over 14 months across four distinct phases. Spring 2026 focused on clearing invasive vines and installing French drains along the rear foundation. Summer introduced a 12-by-16-foot deck with proper footings. Fall added privacy fencing and basic sod. The following spring brought layered perennial beds and low-voltage lighting. Total disruption remained minimal because each phase concluded before the next began.
A hillside property followed a two-year schedule. Year one concentrated on erosion control using terraced retaining walls and native ground cover. Year two added stone pathways, a fire pit area, and raised vegetable beds. The staggered timeline accommodated heavy winter rains without damaging new plantings. Both examples demonstrate how realistic seasonal windows and buffer periods between phases produce durable results.
DIY Versus Phased Professional Approaches
DIY phasing grants complete creative control and eliminates labor markups, yet demands accurate scheduling and physical stamina. Professional teams excel at navigating permits and operating specialized equipment but increase overall expenditure. Many successful projects blend approaches by managing demolition and basic grading personally while subcontracting electrical or masonry work that requires licensed expertise.
Timeline comparisons reveal meaningful differences. Weekend-only DIY phasing typically spans 12 to 18 months depending on weather. Phased professional crews can finish core structural elements in six to nine months. Decision factors include personal skill level, available weekends, and tolerance for ongoing site activity. Hybrid models often strike the best balance for most homeowners.
Integration of Home Improvement Tools
Equip each phase with appropriate tools to maintain efficiency. Early structural work benefits from compact rental equipment such as plate compactors and mini-excavators. Mid-phases require accurate cutting tools including circular saws and masonry blades. Finishing stages call for precision items like laser levels and cordless finish nailers. Maintain a dedicated storage area that travels between phases to avoid lost time searching for equipment.
Safety remains non-negotiable. Always use eye protection, hearing guards, and steel-toe boots. Digital project management apps help track material deliveries and phase completion dates. Integrating these resources reduces rework and keeps the overall timeline intact across changing seasons.
Practical Checklists and Cost-Saving Tips
- Photograph and measure every existing feature before demolition begins.
- Obtain all required permits at least four weeks prior to each phase start.
- Salvage usable materials such as bricks, lumber, or pavers for later phases.
- Schedule major purchases during end-of-season clearances when possible.
- Coordinate material deliveries to arrive only days before needed to minimize storage.
- Perform soil tests annually to adjust amendments before planting phases.
- Label all underground lines with tracer wire for future reference.
These practices compound savings by preventing duplicate purchases and rework. Focus spending on durable base layers rather than temporary fixes that require replacement.
Common Mistakes to Avoid
Many DIY renovators rush aesthetic layers before confirming drainage performance. Others underestimate permitting timelines, causing mid-project halts. Over-ordering materials without phase-specific staging leads to waste and clutter. Ignoring seasonal weather windows frequently damages partially completed work. Reviewing these pitfalls before beginning helps maintain momentum and budget discipline.
FAQ on Permits and Seasonal Timing in 2026
What permits are typically required for outdoor renovations?
Structural additions, electrical installations, and major grading usually require permits. Contact your local building department early and reference general guidance available through HUD. Requirements vary by municipality and can affect phase sequencing.
When is the best time to start phases in 2026?
Foundation and drainage work align best with spring and early summer. Planting and finishing elements perform well in early fall. Always build weather buffers into the schedule to handle unexpected delays.
How do seasonal restrictions affect timelines?
Many areas limit construction noise during evenings and weekends or restrict activity during extreme heat or freeze periods. Review local ordinances through EPA resources on environmental timing considerations.
Can phases span multiple years without issues?
Yes, provided each phase reaches a stable stopping point with protected unfinished edges. Proper tarping and drainage maintenance between seasons prevents deterioration of completed work.
Conclusion
Phased outdoor renovations convert challenging fixer-upper properties into functional, attractive extensions of the home. By committing to thorough assessment, logical prioritization, and disciplined sequencing, DIY enthusiasts achieve results that rival professional outcomes while controlling costs and stress. Begin with a detailed site walk this season and map your 2026 project using the strategies outlined above for sustainable, lasting improvements.

No comments yet. Be the first!