 Fixated on Home
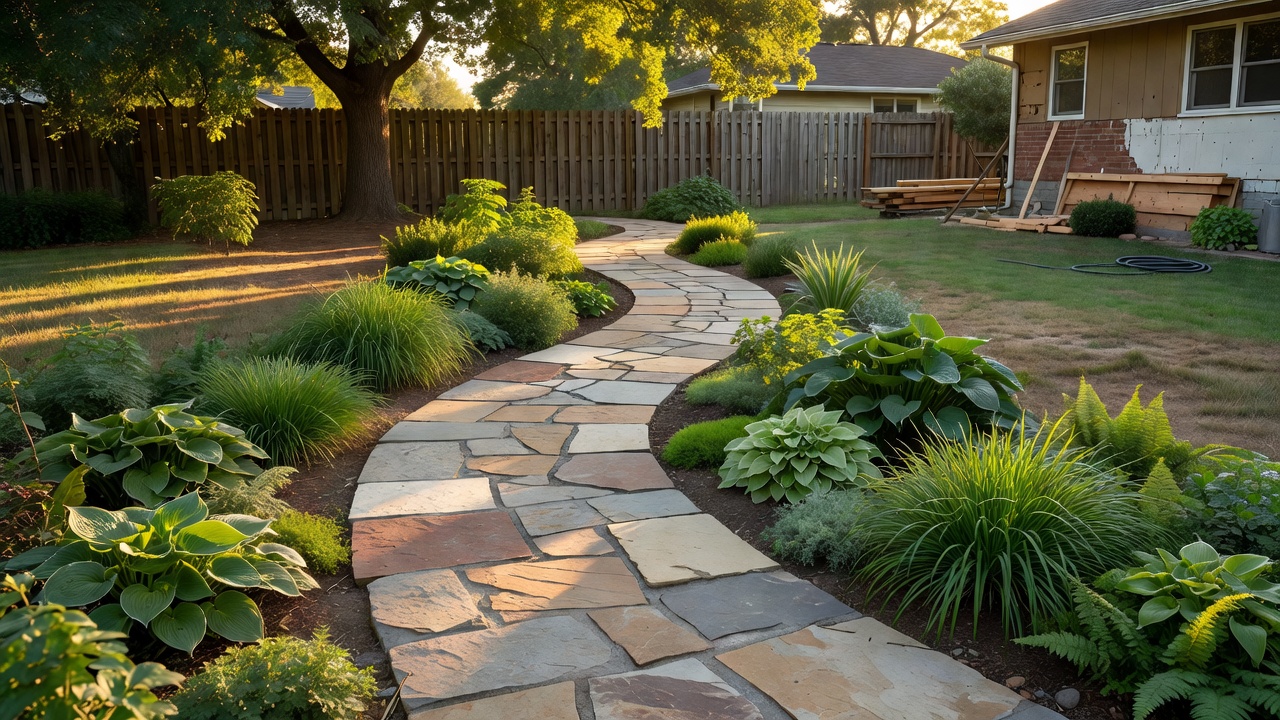
Introduction to DIY Stone Pathways in Fixer-Upper Projects
Homeowners tackling outdoor renovations in 2026 often seek budget-friendly ways to boost curb appeal. A DIY stone pathway delivers practical value by connecting garden areas, improving accessibility, and enhancing landscape flow without professional labor costs. This guide covers everything from material choices to long-term maintenance, drawing on real 2026 renovation examples where homeowners transformed neglected yards into inviting spaces. Search intent for these projects centers on affordability and ease. Projects typically stay under $500 when using basic supplies and reclaimed or bulk materials as of 2026-07-25 estimates. Focus remains on site preparation, proper drainage, and design flexibility to suit straight or curved layouts that integrate seamlessly with existing homes and gardens.
Choosing the Right Materials: Natural vs Manufactured Stone
Material selection forms the foundation of any successful pathway. Natural stones like flagstone or river rock offer organic textures and durability, while manufactured pavers provide uniform sizing and lower maintenance. In 2026 fixer-upper projects, many homeowners mixed both for cost savings and visual interest. Natural stone excels in blending with existing landscaping, whereas manufactured options simplify installation on uneven terrain. Key considerations include climate resistance and slip resistance. Always source stones locally to reduce transport expenses and environmental impact. Compare weights carefully, as heavier natural stones require stronger base preparation. For instance, flagstone offers a rustic charm ideal for woodland-style yards, but its irregular shapes demand more fitting time during installation. Manufactured concrete pavers, on the other hand, come in consistent thicknesses that speed up the process for beginners.
Essential Tools and Safety Tips
Successful builds start with the right equipment. Recommended tools include a shovel, tamper, level, rubber mallet, and landscape fabric. Safety gear such as gloves, knee pads, and eye protection prevents common injuries during digging and lifting. Measure and mark the path layout first using stakes and string. Excavate to a consistent depth of 4-6 inches depending on stone thickness. Compact the soil thoroughly before adding base layers. Always check for underground utilities before digging. Work in pairs for heavier stones to avoid strain. Additional tools like a wheelbarrow for moving materials and a garden hose for testing drainage can make the process smoother. Beginners should practice on a small test section to build confidence before tackling the full length.
- Measure and mark the path layout first using stakes and string.
- Excavate to a consistent depth of 4-6 inches depending on stone thickness.
- Compact the soil thoroughly before adding base layers.
- Use a tamper or plate compactor for even pressure across the base.
- Keep a first-aid kit nearby for minor cuts or scrapes.
Site Preparation and Drainage Considerations
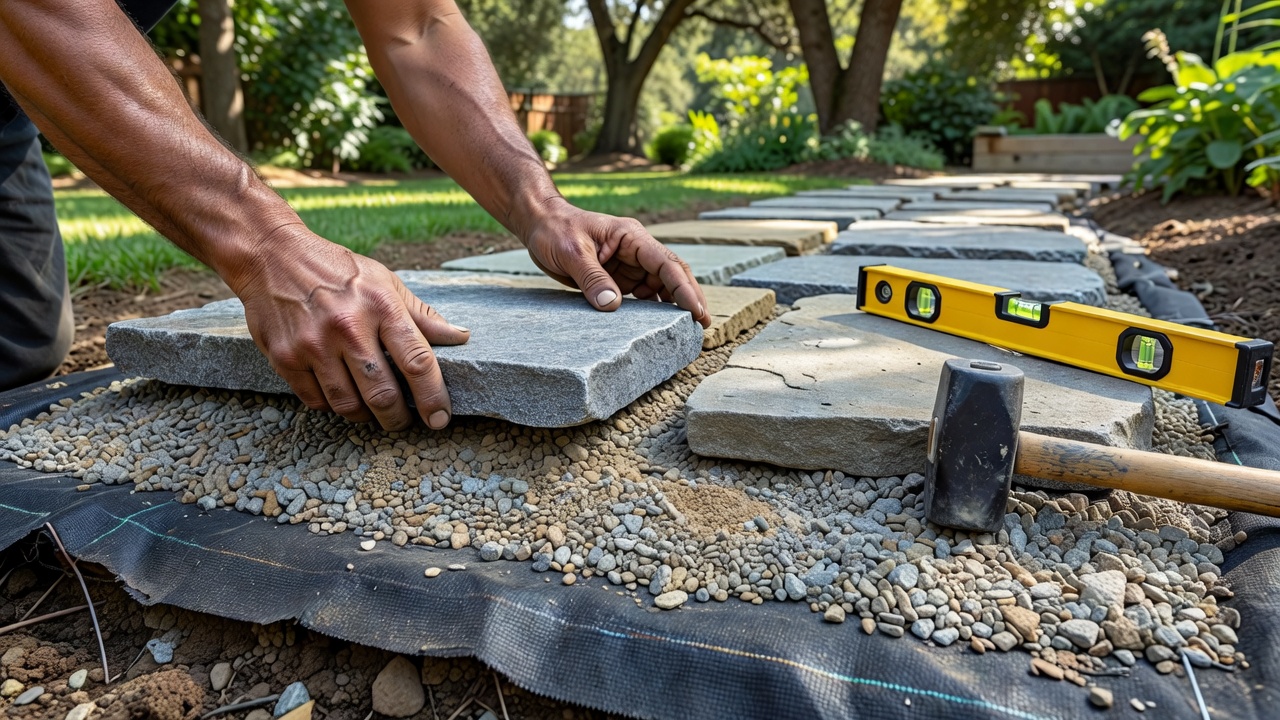
Proper site prep ensures longevity. Begin by clearing vegetation and grading the area for natural water flow. Incorporate a 2-3 inch gravel base topped with sand for stability and drainage. Poor drainage leads to shifting stones and puddling, a frequent issue in 2026 renovations where heavy rains exposed shortcuts. Install landscape fabric between soil and gravel to block weeds. Slope the path slightly (1-2%) away from structures. For more on managing stormwater, consult the EPA. Consider soil type as well—clay-heavy soils may need extra gravel depth to prevent water pooling. Test the area after a rainstorm to identify low spots that require adjustment before stone placement begins.
Step-by-Step Installation Process
Follow these stages for reliable results. First, outline the path and excavate. Add and compact the gravel base, then spread sand for leveling. Position stones tightly, tapping with a mallet for even surfaces. Fill gaps with polymeric sand or soil for plant integration. Curved designs require flexible edging, while straight layouts suit formal gardens. Test the surface underfoot before finalizing. Break the process into manageable daily tasks if working alone. For example, complete excavation one day and base preparation the next to allow proper compaction time. Edge the path with metal or plastic borders to contain materials and maintain clean lines over time.
Advanced Tips for Stable Installation
After placing stones, walk the entire length multiple times to settle them naturally. Add more sand or gravel beneath any rocking pieces. In areas with freeze-thaw cycles common in many 2026 regions, deeper bases help prevent heaving. Seal natural stones with a breathable protector if desired for easier cleaning later.
Design Variations and Real 2026 Examples
Curved pathways create organic movement through flower beds, while straight ones provide efficient access to patios. One 2026 suburban renovation used mixed flagstone for a winding path, integrating seamlessly with native plants. Another project featured manufactured pavers in a linear design to complement modern landscaping. These variations maximize visual appeal while addressing functional needs like foot traffic and pet access. Homeowners also experimented with stepping-stone styles for informal areas or wider paths for wheelbarrow access. A third example involved combining stones with mulch borders to create a low-maintenance transition zone between lawn and garden beds.
Cost Estimates and Budget Planning
Quality pathways remain achievable under $500 with careful sourcing as of 2026-07-25 project reports. Bulk gravel and sand keep expenses low, and DIY labor eliminates contractor fees. Track costs by phase: materials, tools, and finishing touches. Homeowners in recent projects reported success by purchasing remnants from local suppliers. Prioritize essential items first and reuse tools from other home projects to stretch the budget further.
Maintenance Routines and Troubleshooting FAQ
Regular maintenance preserves appearance. Sweep debris seasonally and reapply joint sand annually. Inspect for settling after winter thaws. For additional outdoor guidance, refer to resources from the U.S. Forest Service and USDA.
Common Questions
How do I fix shifting stones? Re-compact the base and reset affected pieces, then refill joints.
What if weeds appear? Improve fabric coverage and consider polymeric sand for better weed resistance.
Can the path integrate with existing landscaping? Yes, by edging with matching plants and mulch while preserving natural drainage patterns.
How often should I seal the stones? Apply a protective sealant every two to three years for natural stone to maintain color and resist stains.
What tools help with curved layouts? Flexible edging strips and a garden hose for marking smooth curves work well.
Integrating the Pathway with Existing Landscaping
Successful pathways enhance rather than disrupt the yard. Blend edges with ground cover plants or low shrubs. Position lighting along the route for evening safety and ambiance. In 2026 examples, homeowners paired pathways with rain gardens to manage runoff while adding ecological benefits. Consider sight lines from windows to ensure the path adds visual interest year-round.
Conclusion
Building a DIY stone pathway empowers fixer-upper owners to achieve professional-looking results affordably. With attention to preparation, drainage, and design, these projects enhance property value and enjoyment for years. Start small, follow the steps, and enjoy the transformation of your outdoor space.
No comments yet. Be the first!