 Fixated on Home
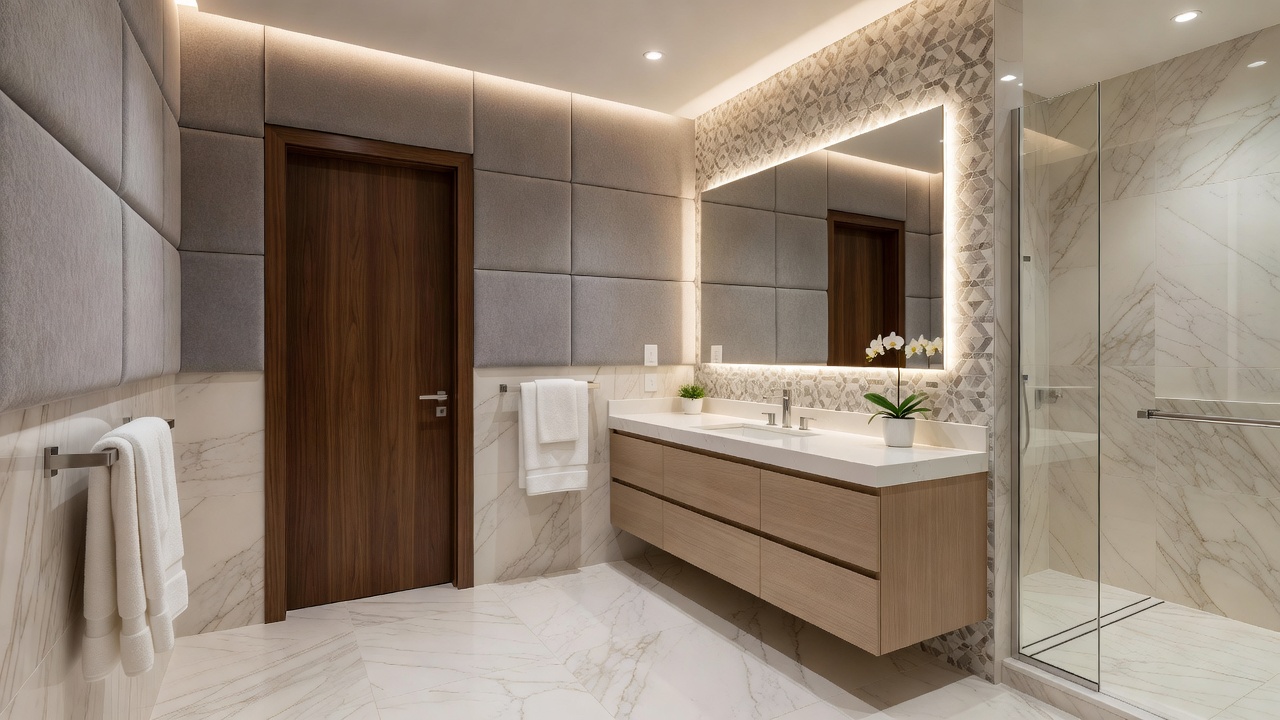
Why Soundproofing Matters in Modern Bathroom Remodels
Bathroom noise travels easily through shared walls, floors, and ceilings in today's homes, disrupting privacy and daily routines. In a 2026 remodel, integrating soundproofing aligns with interior upgrades and home decor goals while delivering lasting comfort. Homeowners searching for renovation ideas often seek solutions that improve acoustics without requiring full structural overhauls. The constant hum of showers, flushing toilets, and conversations can echo through lightweight construction common in modern builds, leading to reduced relaxation and even neighbor complaints in multi-unit dwellings. Effective soundproofing addresses both airborne sounds like voices or music and structure-borne noises from pipes or footsteps, creating a more serene environment that supports mental well-being and property value.
Investing in these upgrades during remodeling also future-proofs the space against increasing urban density and open floor plans that amplify sound transmission. By focusing on targeted treatments rather than complete gut renovations, homeowners achieve noticeable results efficiently.
Selecting Materials for Optimal Acoustic Performance
Material choice forms the foundation of any soundproofing project. Focus on dense, absorptive products that block and dampen sound waves. Mass-loaded vinyl, acoustic drywall, and fiberglass insulation rank among top performers for bathroom environments due to their moisture resistance. When comparing options, consider STC ratings, which measure sound transmission class; higher numbers indicate better blocking performance. For instance, combining mass-loaded vinyl with standard insulation can outperform single-layer approaches by creating multiple barriers that absorb and reflect sound energy.
When selecting tiles or flooring, opt for thicker porcelain or ceramic options paired with sound-dampening underlayment. These choices complement modern decor trends while providing measurable noise reduction. Always verify compatibility with humid bathroom conditions to prevent mold issues. Additional materials like acoustic caulk for sealing gaps and viscoelastic damping compounds add layers of protection without altering aesthetics. Homeowners should evaluate local availability and installation requirements to streamline the remodel process.
Wall and Ceiling Treatments for Maximum Privacy
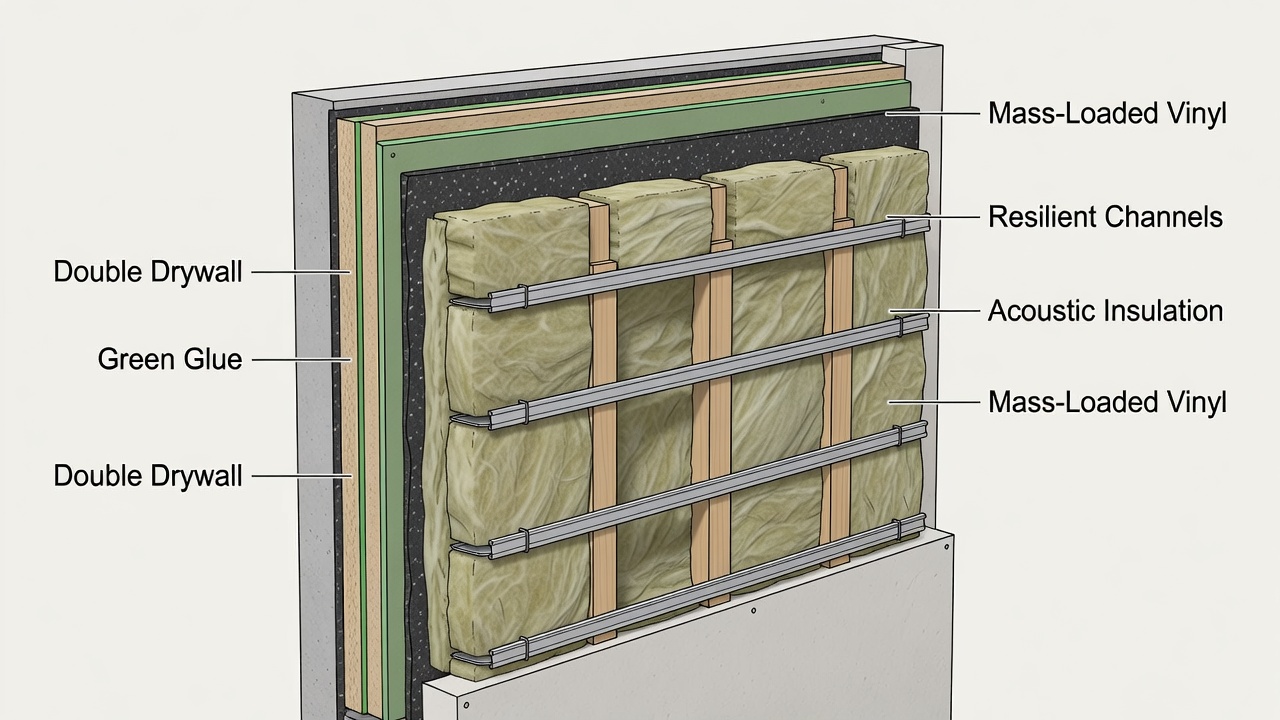
Walls and ceilings are primary paths for sound transmission. Start by adding resilient channels to decouple drywall from framing, then layer acoustic insulation between studs. Double drywall with green glue viscoelastic compound creates a robust barrier that significantly lowers decibel levels. Installation begins with removing existing finishes if necessary, followed by attaching channels perpendicular to studs, filling cavities with insulation, applying the compound between drywall sheets, and securing everything with appropriate fasteners. This method works well in both new construction and retrofits during remodeling.
For ceilings, similar techniques apply, especially in multi-story homes. Consider adding a suspended acoustic ceiling system if height allows. These treatments integrate seamlessly with lighting and ventilation upgrades during remodeling. Expanded coverage might include treating soffits or bulkheads around ducts to prevent flanking paths where sound sneaks around primary barriers. Real-world applications show that thorough sealing at junctions between walls and ceilings prevents up to 30 percent of residual noise leakage.
Door Upgrades That Enhance Sound Isolation
Standard hollow-core doors allow substantial noise leakage. Replace them with solid-core doors featuring acoustic seals and automatic door bottoms. These upgrades provide an immediate privacy boost and pair well with stylish hardware that matches your decor scheme. When choosing doors, prioritize models with higher STC ratings and ensure frames are reinforced to support added weight. Installation involves precise measurements for weatherstripping and sweeps that compress tightly against thresholds.
Frame gaps should be minimized using weatherstripping designed for sound control. Many homeowners report noticeable quieting after this single change, making it a high-impact, low-disruption step. Additional enhancements include adding door gaskets around the perimeter and considering pocket door alternatives with acoustic liners if space permits. These modifications maintain accessibility while delivering superior isolation.
Ventilation Solutions That Preserve Acoustic Integrity
Proper airflow prevents moisture buildup, yet fans and ducts can become noise highways. Choose quiet exhaust fans rated under 1 sone and install them with insulated ducting and backdraft dampers. Inline fans positioned away from the bathroom further reduce sound transfer. Integration with existing HVAC systems requires careful routing to avoid transmitting vibrations through shared ducts.
Combine these with acoustic louvers or silencers on intake vents. The result maintains air quality while supporting your soundproofing objectives and aligning with energy-efficient home upgrades. Expanded options include variable-speed fans that operate quietly at lower settings during off-peak hours and whole-house ventilation strategies that balance pressure without creating new noise paths.
Practical Steps for Implementation
- Assess current noise issues by testing with a decibel meter during peak household activity and documenting problem areas like shared walls or pipe runs.
- Consult a remodeling professional to evaluate structural feasibility, including load-bearing considerations and code compliance for moisture barriers.
- Prioritize treatments based on budget and disruption level, starting with doors and seals before progressing to walls and ceilings.
- Install materials in stages, ensuring proper sealing at every joint and overlap to eliminate flanking paths.
- Test acoustics post-installation using sound measurements and adjust as needed before applying final finishes like paint or tile.
- Incorporate decor elements such as textured wall coverings or strategic furniture placement that further absorb residual sound.
Real-World Before-and-After Examples
One suburban family transformed a noisy shared-wall bathroom by adding mass-loaded vinyl and solid-core doors. Pre-remodel conversations from adjacent rooms were clearly audible; afterward, only faint murmurs remained, transforming morning routines into peaceful experiences. Another urban condo project focused on ceiling treatments, dramatically cutting noise from upstairs neighbors while updating the space with contemporary tiles and lighting that enhanced visual appeal. A third example involved a multi-bathroom renovation where ventilation silencers were added alongside wall decoupling, resulting in a 50 percent perceived reduction in pipe noise according to occupant feedback.
Mistakes to Avoid During Soundproofing Projects
Common pitfalls include neglecting to seal all gaps, which allows sound to bypass even the best materials, or choosing non-moisture-resistant products that lead to mold growth. Overlooking flanking transmission through floors or adjacent rooms can undermine efforts. Always plan for integration with electrical and plumbing updates to avoid rework. Comparing methods side-by-side reveals that DIY approaches suit simple seal upgrades, while complex wall assemblies benefit from expert execution to ensure longevity and performance.
FAQ
Is DIY soundproofing feasible for bathrooms?
Many steps, such as adding seals or basic insulation, suit confident DIYers. Complex wall or ceiling work typically benefits from professional installation to ensure proper moisture barriers and code compliance.
How does soundproofing affect maintenance?
Acoustic materials designed for bathrooms resist humidity when properly installed. Regular cleaning of seals and fans keeps performance optimal without special routines beyond standard upkeep.
Can soundproofing be added without major demolition?
Yes. Door replacements, surface-applied mass-loaded vinyl, and targeted ceiling panels allow meaningful improvements with minimal disruption to existing structures.
What role does decor play in overall noise reduction?
Textured rugs, heavy curtains, and upholstered furnishings complement structural treatments by absorbing echo, enhancing both privacy and aesthetic goals in the remodeled space.
For further reading on noise control standards, explore resources from the EPA, building science guidelines at NIST, and housing acoustics information from HUD.

No comments yet. Be the first!