 Fixated on Home
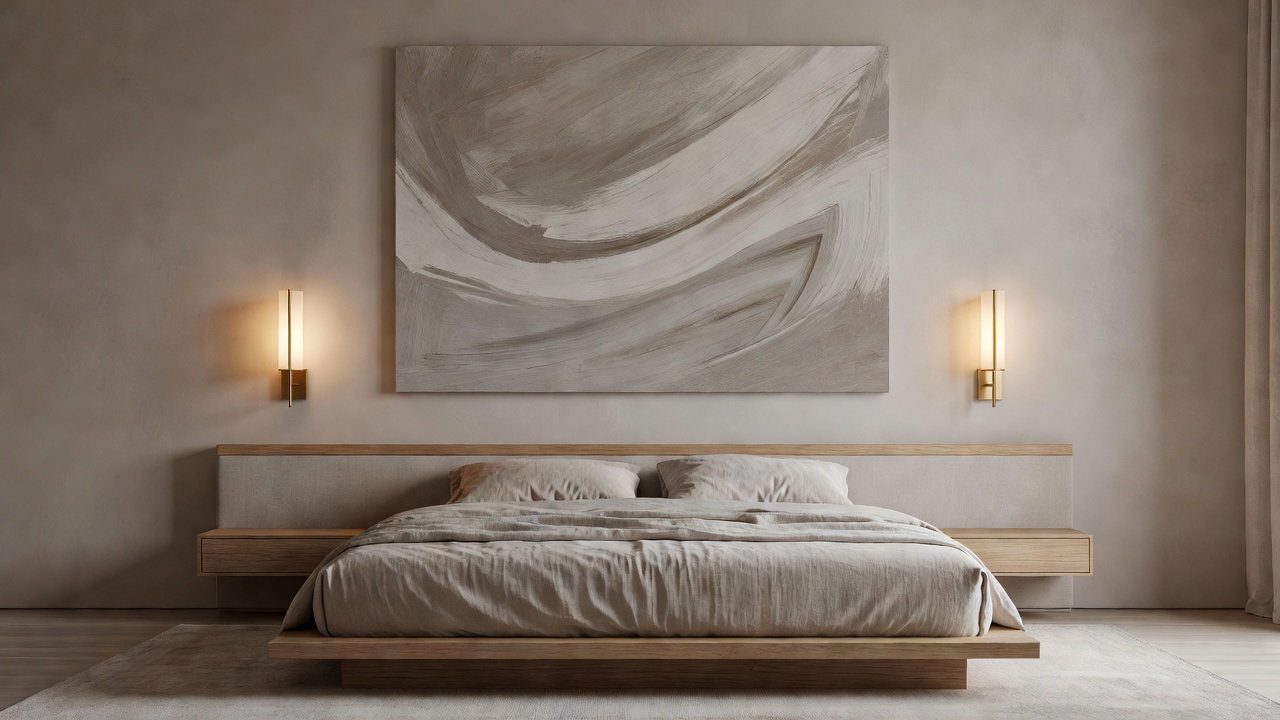
Introduction: Personalizing Your Bedroom with Art in 2026
Modern bedroom renovations in 2026 emphasize personalization through curated art collections that reflect individual taste while aligning with current design trends. Homeowners are increasingly integrating artwork to create cohesive, modern aesthetics that tie into broader home upgrades such as smart lighting systems and sustainable materials. This comprehensive guide provides practical, step-by-step advice for selecting styles, optimal placement, and display techniques tailored to different room sizes, ensuring your space feels both functional and inspiring. Whether you are updating a master suite or refreshing a guest room, thoughtful art curation elevates the entire renovation process.
Aligning Art with 2026 Bedroom Design Trends
2026 trends favor organic shapes, muted earth tones, and mixed textures that evoke calm and sophistication. Choose abstract pieces with soft geometric forms or nature-inspired photography to complement minimalist furniture and neutral palettes. Consider how art interacts with textures like linen bedding or wooden accents for visual harmony. Large-scale works in soft neutrals pair beautifully with built-in storage solutions and floating nightstands now popular in renovations. Explore museum collections for inspiration on timeless pieces that adapt to evolving styles. Incorporate elements like textured canvases or mixed-media works that echo the tactile qualities of new sustainable fabrics and finishes trending this year.
Selecting Art Styles That Complement Your Space
Start by assessing your bedroom's existing elements. For contemporary designs, opt for large-scale canvases with subtle color gradients that mirror the soft lighting schemes common in 2026 interiors. Eclectic styles work well in transitional rooms, mixing vintage prints with modern sculptures to add layers of interest. Always prioritize pieces that enhance rather than overwhelm the space, ensuring they support a serene atmosphere conducive to rest. Consider scale relative to your bed size and window placement. For example, a single oversized landscape photograph can anchor a room with floor-to-ceiling curtains, while a series of smaller botanical prints suits rooms with patterned rugs or upholstered headboards.
Optimal Placement Strategies Around Furniture and Lighting
Position artwork at eye level, typically 57 to 60 inches from the floor to the center of the piece. Above the bed, leave 6 to 12 inches of space between the headboard and frame bottom for balance. In smaller rooms, cluster smaller works in a gallery wall formation to avoid crowding while creating a dynamic focal point. Account for furniture scale and natural sightlines from entry points and seating areas. Measure twice before drilling to prevent unnecessary wall damage during renovations. Consider traffic flow so pieces do not interfere with dresser drawers or closet access. 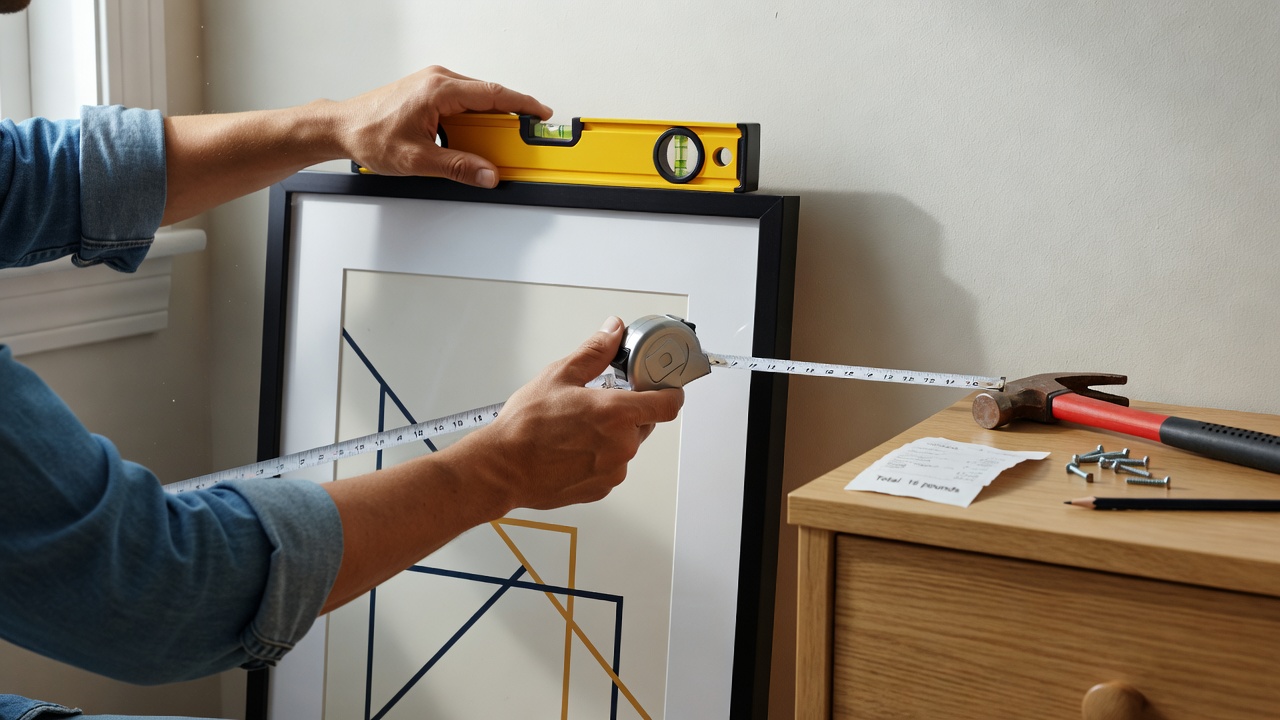
Integrating Art with Color Schemes and Textures
Match artwork hues to your room's dominant colors while introducing subtle contrasts for interest. For textured walls finished with limewash or grasscloth, select framed pieces with clean edges to create focal points that stand out. Test swatches and lighting conditions before finalizing selections to ensure seamless integration during renovations. Layering art behind the bed with matching throw pillows in complementary tones creates a pulled-together look that feels intentional and modern.
Budget-Friendly Sourcing Options
Explore local galleries, online marketplaces, and artist cooperatives for affordable originals or high-quality prints. Thrift stores and estate sales often yield unique finds that add character without high costs. Social media platforms now connect homeowners directly with emerging artists offering commission work at accessible price points. Focus on quality over quantity to build a meaningful collection gradually, rotating pieces seasonally to keep the space fresh without additional purchases.
DIY Hanging Techniques for Secure Displays
Use a level, measuring tape, and appropriate anchors based on wall type. For drywall, employ toggle bolts for heavier pieces while standard picture hooks suffice for lighter prints. Mark positions with painter's tape first, then drill pilot holes. Always double-check weight limits and distribute load evenly across multiple hooks for stability. For renters or temporary installations, adhesive strips designed for artwork provide damage-free alternatives that hold up to 16 pounds per pair when applied correctly.
Comparing Professional Framing Options
DIY frames suit simple prints, but professional services offer acid-free matting and UV-protective glass ideal for valuable works. Compare materials like wood versus metal for durability and style match. Professional framing ensures longevity, especially for pieces exposed to varying humidity levels. Many framing studios now offer virtual consultations, allowing you to preview how different moldings will look against your specific wall color before committing.
Lighting Tips to Highlight Pieces Without Glare
Install adjustable LED picture lights or recessed fixtures with dimmers to accentuate art. Position lights at 30-degree angles to minimize reflections. Avoid direct overhead lighting that creates hotspots; instead, use layered ambient sources for even illumination that enhances colors and details. Smart bulbs compatible with voice assistants allow you to adjust brightness and color temperature throughout the day, protecting delicate pigments while creating the perfect mood for evening relaxation.
Step-by-Step Examples for Different Room Sizes
- Small Bedrooms (under 150 sq ft): Select 2-3 vertical pieces above the bed and one statement work on an adjacent wall. Use lightweight frames to maintain openness. Position the largest piece centered over the headboard and flank it with narrower vertical works to draw the eye upward, making the ceiling feel higher.
- Medium Bedrooms (150-250 sq ft): Create a balanced gallery wall opposite the bed with mixed sizes, ensuring 2-3 inches between frames for cohesion. Include one horizontal piece to break up vertical lines and add breathing room around furniture groupings.
- Large Bedrooms (over 250 sq ft): Incorporate floor-standing sculptures alongside wall art, dividing the space into zones with thematic groupings that flow into seating areas. Use oversized diptychs above a reading chair to anchor the relaxation zone separately from the sleeping area.
Protecting Art from Humidity and Achieving Visual Balance
Monitor room humidity with a hygrometer, aiming for 40-50% levels to prevent warping. Use sealed frames and avoid placing pieces near windows or vents. For balance, vary heights and sizes while maintaining a central focal point that draws the eye naturally across the room. In humid climates, consider silica gel packs inside frames or dehumidifiers integrated into your HVAC system during summer months.
Common Mistakes to Avoid During Installation
Many homeowners hang art too high or crowd pieces too closely together. Another frequent error is ignoring the room's architectural features such as crown molding or built-in shelving. Always step back frequently during the hanging process to assess the overall composition from multiple angles before securing everything permanently.
Conclusion: Creating a Cohesive Modern Aesthetic
By thoughtfully curating and displaying art, you elevate your 2026 bedroom renovation into a personalized sanctuary. These strategies ensure your space feels complete, tying artwork seamlessly into broader home improvements for lasting appeal and functionality.
FAQ
How do I protect artwork from bedroom humidity?
Use climate-controlled framing and maintain consistent humidity levels around 45%. Avoid bathrooms or kitchens adjacent to the bedroom and consider adding a small dehumidifier if levels fluctuate seasonally.
What creates visual balance in art displays?
Distribute pieces evenly by size and color, using the rule of thirds for placement relative to furniture and architectural features. Group odd numbers of items for dynamic yet balanced arrangements.
Can I mix different frame styles successfully?
Yes, but maintain a unifying element such as consistent mat colors or similar frame widths to prevent a disjointed appearance. Limit yourself to two or three frame finishes maximum within one room.
How often should I rotate my art collection?
Rotate pieces every six to twelve months to keep the space feeling fresh and to protect works from prolonged light exposure. Store unused pieces in archival boxes away from direct sunlight.
No comments yet. Be the first!