 Fixated on Home
Introduction to Budget Open-Concept Renovations in Fixer-Uppers
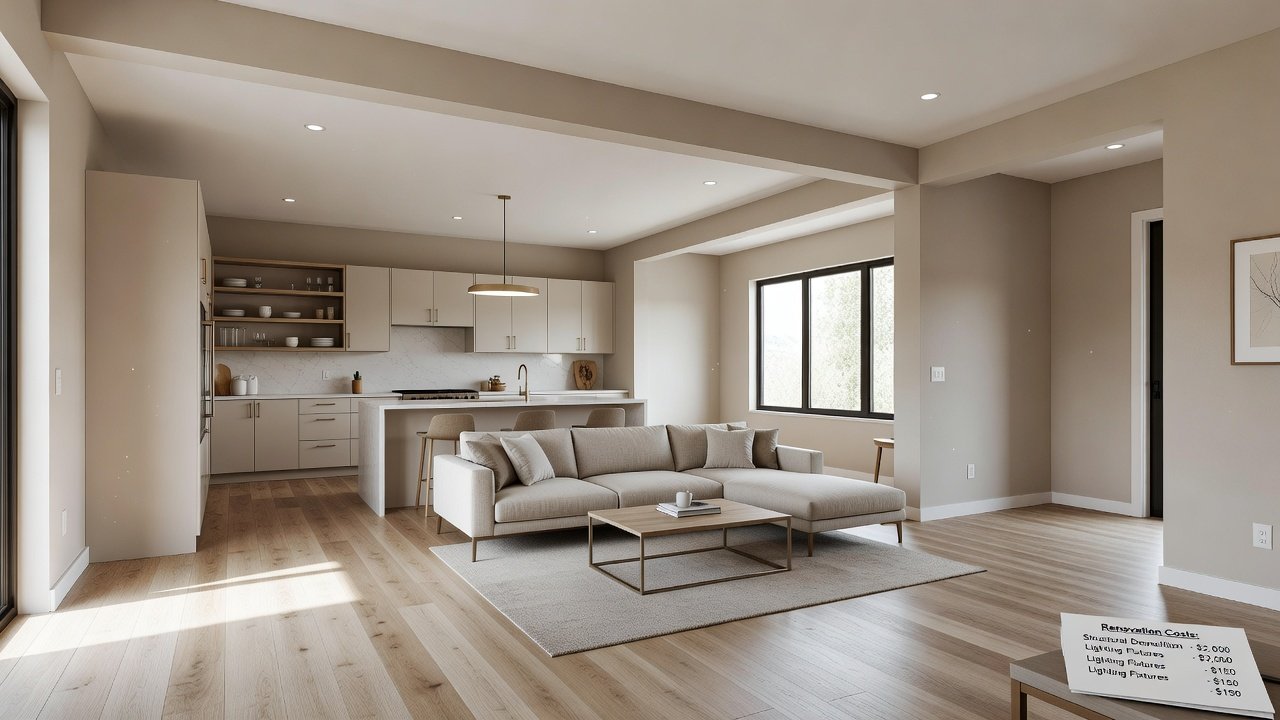
Creating an open-concept layout in an older home can dramatically improve flow, natural light, and perceived value. For 2026, homeowners are prioritizing high-ROI transformations that avoid expensive structural overhauls. This guide focuses on budget techniques to remove non-load-bearing or carefully supported walls while staying under $2,000 total, drawing from real fixer-upper projects. Whether you're a beginner or tackling your first major DIY reno, understanding the process helps maximize results aligned with current trends in multifunctional living spaces. Open-concept designs continue to rank high in buyer preferences because they make smaller homes feel larger and more inviting without requiring a complete teardown.
Step 1: Structural Assessment Before Any Demolition
Before picking up a sledgehammer, assess whether the wall is load-bearing. Start with a visual inspection: check for walls running perpendicular to floor joists or supporting upper floors. Hire a structural engineer for a quick consultation if unsure—many offer virtual reviews for under $150. Measure door and window placements, and note any HVAC, electrical, or plumbing runs within the wall. Document everything with photos for permit applications. Skipping this step risks costly repairs or safety issues later. Walk through the home multiple times at different times of day to observe how light and traffic move. Pay special attention to any signs of previous modifications, such as added beams or patched ceilings that might indicate earlier structural work. If the home was built before 1978, test for lead paint and asbestos using certified kits before disturbing any surfaces.
DIY Demolition Safety Protocols
Safety comes first in any wall removal project. Wear proper PPE including goggles, gloves, dust masks rated N95 or higher, and steel-toe boots. Shut off power and water to the affected area. Use a reciprocating saw for precise cuts rather than brute force to minimize dust and debris. OSHA guidelines emphasize fall protection and proper tool handling even for residential work. Ventilate the space well and contain dust with plastic sheeting to protect the rest of the home. Always have a fire extinguisher nearby when working near wiring. Additional precautions include posting clear warning signs, keeping children and pets out of the work zone, and having a first-aid kit on hand. Work with a partner when possible so one person can monitor for hazards while the other operates tools. After demolition, thoroughly clean the area with a HEPA vacuum to reduce lingering particles that could affect indoor air quality.
Material Swap Options for Load-Bearing Walls
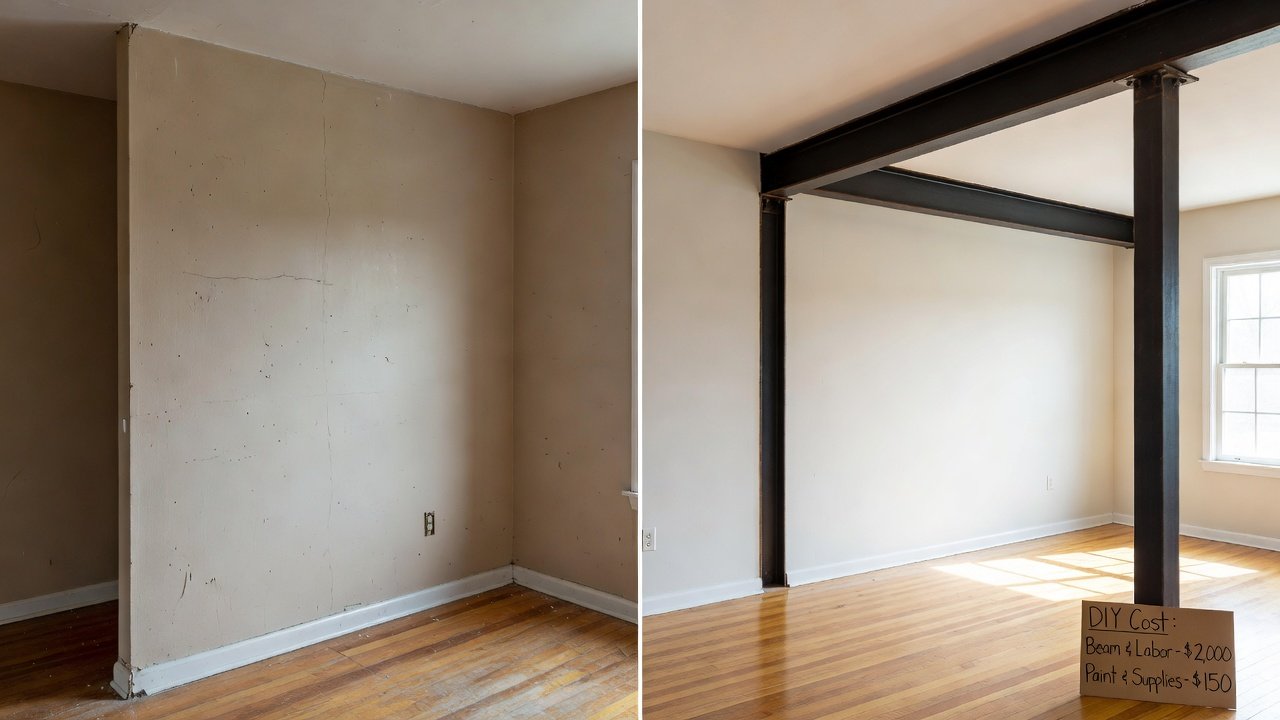
When a wall must stay for structural reasons, consider beam swaps using affordable materials like laminated veneer lumber (LVL) or steel. These can be installed with basic carpentry skills after temporary supports are in place. Alternatives include decorative columns or half-walls that maintain openness while providing support. Compare costs: wood beams often run cheaper than steel but require finishing. Integrate with existing elements like crown molding or flooring transitions for a seamless look. Test load calculations with an online beam calculator from reputable sources before purchasing. In practice, many DIYers choose LVL beams because they resist warping and can be painted or stained to match surrounding trim. For homes with vaulted ceilings, a flush beam installation hides the support within the ceiling plane, preserving clean lines. Always double-check local building codes for required beam sizing and fastening methods before finalizing your material list.
Phased Timeline for a Successful Reno
- Week 1: Planning and Permits – Obtain necessary permits from your local building department. Research 2026 code updates for seismic or energy efficiency. Create a detailed materials list and order items that may have longer lead times such as custom beams.
- Week 2: Assessment and Prep – Complete structural checks and gather materials like temporary jacks, beams, and patching supplies. Set up dust barriers and staging areas for tools to keep the workspace organized.
- Week 3: Demolition – Remove the wall safely over 2-3 days, focusing on one section at a time. Label and save reusable lumber or trim pieces for later projects around the house.
- Week 4: Installation and Finishing – Install supports, patch floors/ceilings, and paint to match existing decor. Sand and texture new drywall to blend seamlessly with older surfaces.
- Week 5: Final Touches – Add lighting, furniture rearrangement, and cleanup for the reveal. Test all electrical and HVAC systems before declaring the project complete.
Cost Breakdowns and High-ROI Strategies
Focus on reusing existing materials where possible, such as salvaged lumber for temporary supports. Shop sales at big-box stores for beams and drywall. Prioritize areas with the biggest visual impact, like combining kitchen and living spaces. Track expenses weekly to avoid overruns. Real projects show that strategic wall removal can increase home value significantly when kept budget-conscious. Consider renting rather than buying specialty tools like rotary hammers or beam lifts for short-term use. Source secondhand materials from local salvage yards for items like trim or hardware. These approaches keep spending low while delivering professional-looking results that stand up to daily use.
Before-and-After Comparisons from Real Projects
One common example involves a 1960s ranch home where removing a central hallway wall opened the living area to the kitchen. The result: a 30% increase in usable space perception with minimal new construction. Another fixer-upper converted a small dining room into an extension of the family room using a beam swap, creating better traffic flow for entertaining. A third project in a 1940s bungalow removed a partial wall between the living room and a former office, resulting in a flexible workspace that could double as a guest area. These transformations highlight how modest changes yield modern, airy interiors without full gut renovations. Homeowners consistently report improved daily living experiences after such updates, especially when the new layout supports family gatherings and remote work needs simultaneously.
Integration with Existing Home Elements
Blend new openings with original features like hardwood floors by using matching transitions. Update lighting to recessed LEDs for even illumination across the new space. Tie in smart home upgrades if desired, but keep the focus on structural work first. Ensure HVAC vents are rerouted efficiently to maintain comfort in the expanded area. Match paint colors exactly by taking samples to a local store for computer matching. Preserve character details such as original baseboards by carefully removing and reinstalling them around the new opening. This attention to detail makes the renovation look intentional rather than like an afterthought.
Tools and Materials Checklist
- Reciprocating saw with demolition blades
- Temporary support jacks and posts
- Stud finder and level
- Dust containment plastic and tape
- Beam materials (LVL or steel)
- Drywall, joint compound, and tape
- Safety gear (goggles, masks, gloves)
- LED lighting fixtures for the new space
Common Pitfalls and How to Avoid Them
Many first-time renovators underestimate the amount of dust generated or fail to account for hidden utilities. Always locate and mark every wire, pipe, and duct before cutting. Another frequent issue is choosing the wrong beam size, which can lead to future sagging. Consult load tables or a professional for verification. Finally, rushing the finishing stage often leaves visible seams; take time to apply multiple thin coats of compound and sand between layers for a flawless surface.
FAQs on Permits and Common Pitfalls
- Do I need a permit? Most wall removals affecting structure require one—check with your municipality early to avoid fines.
- What if I hit unexpected wiring? Stop work immediately and consult a licensed electrician; never DIY electrical reroutes.
- How do I avoid sagging ceilings? Always use proper temporary shoring and verify beam sizing with calculations.
- Are there 2026 trends to follow? Emphasize sustainable materials and multi-use zones for long-term appeal.
Common mistakes include underestimating dust control or ignoring load paths, leading to future repairs. Plan for contingencies like extra drywall compound. CDC recommendations on indoor air quality provide additional guidance for post-renovation cleanup. For inspector referrals, many homeowners turn to InterNACHI resources.
Conclusion
With careful planning and adherence to safety standards, budget open-concept renovations in fixer-uppers deliver impressive results. By following the phased approach and focusing on high-impact, low-cost techniques, you can achieve a spacious, modern home that aligns with 2026 homeowner preferences. Start small, verify every step, and enjoy the transformed space for years to come.
No comments yet. Be the first!