 Fixated on Home
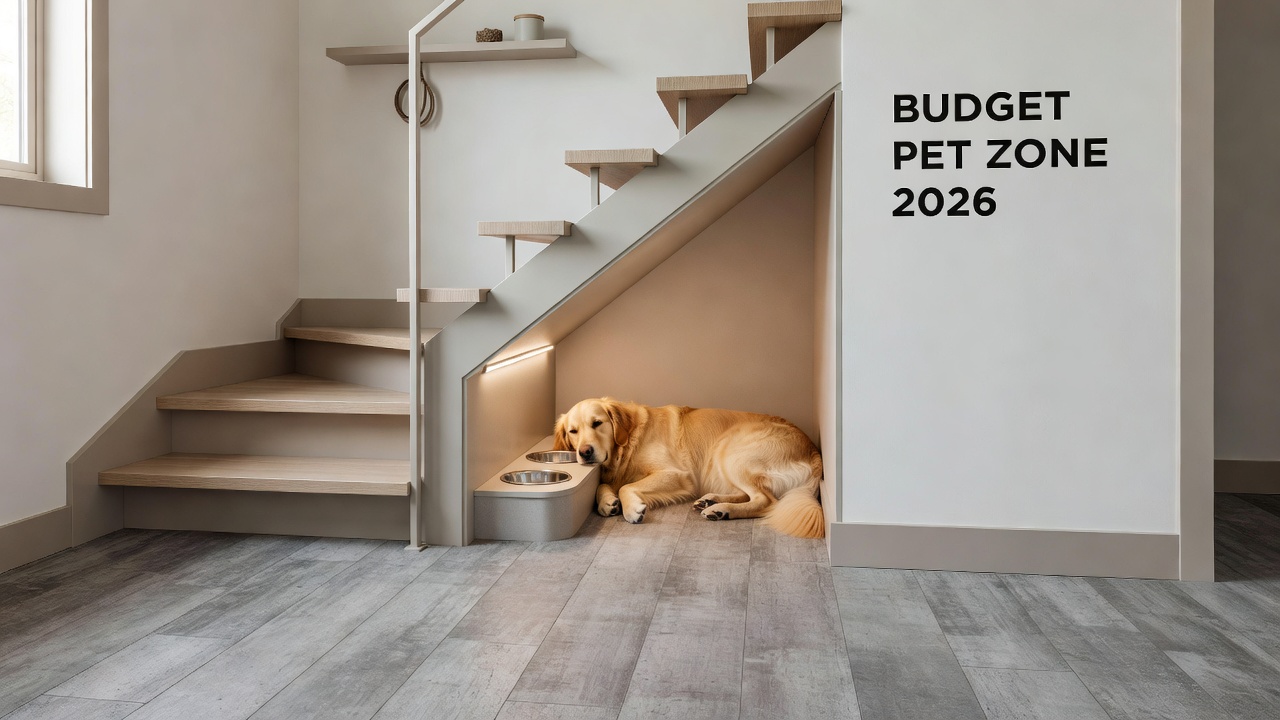
Introduction to Budget Pet Zones in Fixer-Uppers
Fixer-upper homes present a unique opportunity to customize living spaces for every family member, including pets. In 2026, many homeowners are discovering that thoughtful pet-friendly renovations can transform underutilized areas into functional zones while staying within strict budgets. This comprehensive guide explores practical remodeling strategies that prioritize durability, safety, and affordability. By focusing on elements like chew-resistant flooring, custom feeding stations, and secure enclosures, you can create inviting pet areas that enhance daily routines and contribute to overall home value. The emphasis remains on maximizing existing structures during renovation projects, ensuring that furry companions feel at home without requiring extensive professional intervention.
Pet integration during fixer-upper work requires careful planning around construction timelines and material choices. Homeowners often face challenges such as protecting new surfaces from damage and maintaining a safe environment amid dust and tools. Successful projects begin with assessing the property's layout to identify natural spots for pet zones, such as corners in living areas or spaces beneath staircases. This approach not only accommodates pets but also appeals to future buyers who value pet accommodations. Throughout this article, we will break down each component with step-by-step instructions, material comparisons, and real-world examples drawn from typical fixer-upper scenarios.
Selecting Chew-Resistant Flooring on a Budget
Flooring forms the foundation of any successful pet zone because it must endure daily wear from claws, spills, and play. Popular budget-friendly options include luxury vinyl plank, sealed concrete, and rubber tiles, each offering distinct advantages for fixer-uppers. Luxury vinyl plank provides a waterproof surface that mimics hardwood without the vulnerability to scratches. Sealed concrete suits industrial-style renovations and requires minimal upkeep once properly treated. Rubber tiles deliver excellent traction and cushioning, reducing joint strain for active pets.
When comparing materials, consider installation complexity and long-term maintenance. Vinyl plank installs quickly over existing subfloors using click-lock systems, making it ideal for DIY enthusiasts. Concrete demands thorough cleaning and sealing but lasts for decades. To install vinyl plank, first measure the room accurately, lay down a moisture barrier, and work from one corner outward while maintaining expansion gaps. Always select products labeled as pet-friendly to ensure resistance to chewing. Homeowners who have completed similar projects report that choosing the right underlayment prevents noise transmission and adds an extra layer of protection against accidents.
Creating Custom Feeding Stations
Custom feeding stations elevate pet dining areas from simple bowls on the floor to integrated features that reduce clutter and mess. These stations can be built using basic plywood, brackets, and existing cabinetry remnants salvaged during renovations. Elevated platforms help prevent neck strain in larger dogs, while built-in storage drawers keep food and treats organized. Position the station near a water source but away from high-traffic paths to minimize disruptions.
For a simple wall-mounted version, attach sturdy brackets to studs, add a shelf with raised edges, and finish with pet-safe sealant. Variations include pull-out drawers for multiple pets or corner units that utilize awkward spaces. Incorporate non-slip mats underneath to catch spills. This customization not only improves hygiene but also blends seamlessly with kitchen or utility room aesthetics common in fixer-uppers. Real examples show how such stations transform chaotic feeding times into orderly routines, especially in homes with multiple animals.
Installing Safe Fencing and Enclosures
Secure fencing defines pet boundaries both indoors and outdoors, preventing escapes during renovation phases and providing dedicated play areas afterward. Options range from lightweight indoor gates to more robust wooden or chain-link panels for yards. Focus on smooth, rounded edges to avoid injuries and choose heights appropriate for your pet's jumping ability. Indoor enclosures can utilize temporary tension rods or permanent framed panels that match room decor.
Outdoor installations benefit from anchoring posts into existing concrete or soil while incorporating self-closing gates. Compare prefabricated kits, which offer speed, against custom builds that allow better integration with landscaping. Always test enclosures for stability before introducing pets. This step ensures safety throughout the project and creates lasting value by making the property more versatile for pet owners.
Step-by-Step DIY: Building an Under-Stair Pet Nook
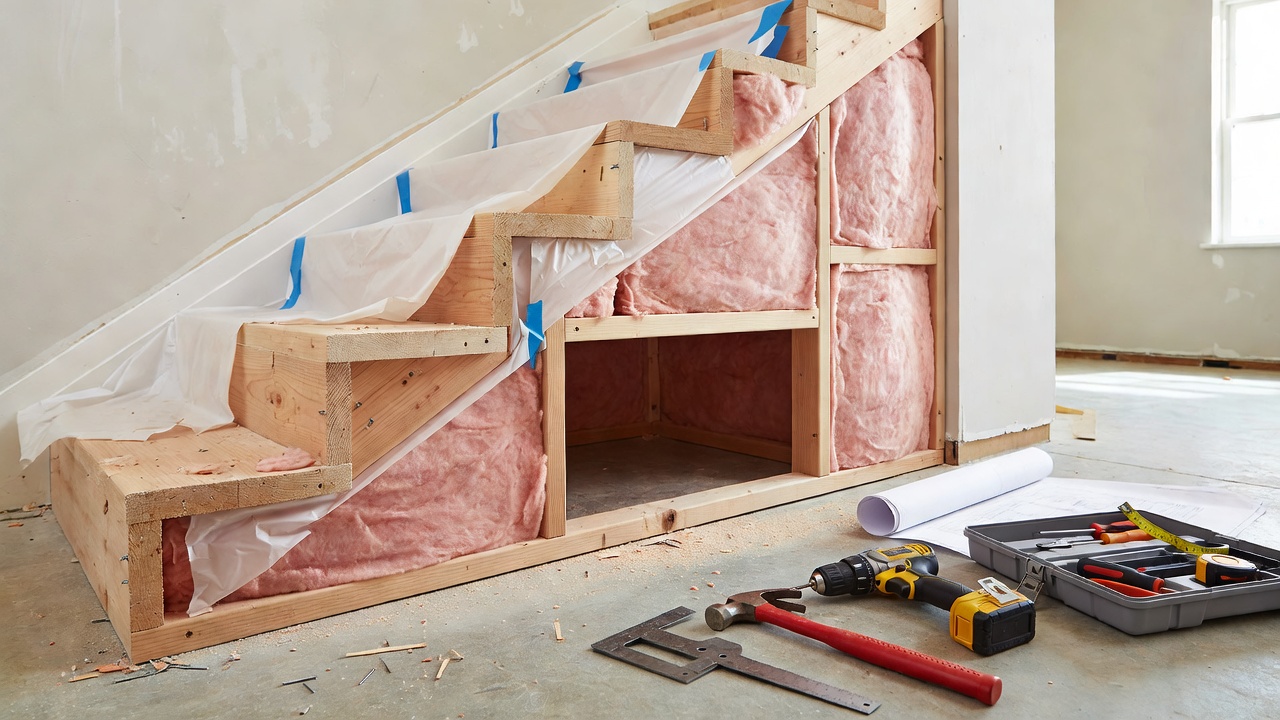
Under-stair spaces often remain overlooked in fixer-uppers yet offer ideal dimensions for private pet retreats. Begin by clearing the area and taking precise measurements of height, width, and depth. Next, construct a basic frame using 2x4 lumber for walls, floor, and ceiling supports, ensuring adequate ventilation openings. Add insulation panels for temperature control and line interior surfaces with chew-resistant plywood or metal sheeting.
Install a gentle ramp or low step for easy access, then finish with durable bedding and a small night-light. Tools required include a saw, drill, level, and measuring tape. Variations might incorporate built-in shelving for toys or a removable panel for cleaning access. This project typically requires a weekend of focused work and transforms wasted space into a cozy haven that pets quickly claim as their own. Before-and-after transformations frequently highlight how these nooks increase the perceived functionality of the entire home.
Budget Material Sourcing and Cost Comparisons
Sourcing materials affordably involves visiting salvage yards, using online marketplaces for remnants, and selecting versatile products that serve multiple purposes. Vinyl and rubber often outperform tile in ease of DIY installation and pet comfort, while reclaimed wood can add character when properly sealed. Homeowners should prioritize moisture resistance and low volatile organic compound finishes to protect air quality during and after construction.
Pet Safety During Home Improvement Projects
Construction activities introduce hazards such as dust, sharp tools, and chemical fumes that can harm pets. Create temporary barriers with plastic sheeting and designate quiet zones away from work areas. Schedule noisy tasks during times when pets can be relocated to a safe environment, and always use low-VOC paints and adhesives. Providing familiar bedding and toys in a separate room helps reduce stress. These precautions maintain pet well-being and prevent project delays caused by accidents.
Maintenance Tips and Real Fixer-Upper Examples
Regular maintenance extends the life of pet zones through weekly cleaning routines and periodic inspections for wear. Vacuuming with pet-specific attachments and using enzymatic cleaners addresses odors effectively. Examples from renovated properties demonstrate how simple additions like under-stair nooks and feeding stations create before-and-after contrasts that boost both livability and market appeal. One typical case involved converting a cluttered basement corner into a multi-pet area using salvaged materials, resulting in easier daily management and positive feedback during home showings.
Mistakes to Avoid
- Skipping surface sealing, which leads to rapid deterioration from spills.
- Choosing overly complex designs that exceed DIY skill levels and budgets.
- Ignoring pet-specific behaviors like chewing corners during material selection.
- Failing to plan for future growth, such as accommodating additional pets.
FAQ Section
- How do I ensure pet safety during reno? Use tarps, temporary gates, and supervise closely while opting for non-toxic materials.
- What is the ROI on pet upgrades? They increase appeal to buyers with pets, often recouping costs through faster sales and higher offers.
- Can these projects stay under budget? Yes, by sourcing reclaimed materials and focusing on DIY labor throughout the process.
- Which flooring works best for active dogs? Rubber tiles or luxury vinyl plank provide the necessary durability and traction.
- How long does an under-stair nook take to build? Most homeowners complete the basic version in one to two weekends with standard tools.
Conclusion
Integrating pet zones into fixer-uppers maximizes home value and family happiness through strategic, affordable improvements. With thoughtful planning around flooring, feeding areas, fencing, and custom nooks, these upgrades deliver lasting benefits. Start with an assessment of your space, prioritize durable materials, and enjoy the enhanced living environment alongside your pets. For additional resources on pet safety and home projects, consult ASPCA, CDC Healthy Pets, and The Humane Society.
No comments yet. Be the first!