 Fixated on Home
Introduction to Budget Plumbing Fixes in Fixer-Uppers
Homeowners tackling fixer-upper properties in 2026 often face plumbing challenges that can derail budgets if not handled strategically. Leaks and outdated pipes are among the most common issues, but with the right approach, these can be addressed affordably while boosting overall home value. This guide provides practical, step-by-step advice tailored to tight budgets, helping you integrate plumbing upgrades into broader remodeling plans for maximum return on investment. Understanding the full scope of plumbing problems in older homes allows you to prioritize repairs that deliver the highest impact without unnecessary spending. Many fixer-uppers built before 1980 contain galvanized steel or polybutylene piping that deteriorates over time, leading to slow leaks that damage floors, walls, and foundations if ignored.
Identifying problems early prevents water damage and costly repairs down the line. Whether you're dealing with dripping faucets or corroded galvanized pipes from decades past, understanding the scope is essential before diving into repairs. A systematic inspection combined with budget-conscious material choices can transform a problematic plumbing system into a reliable one that supports your entire home improvement vision.
Spotting Common Plumbing Issues in Older Homes
Fixer-uppers frequently feature aging infrastructure. Look for signs like water stains on ceilings, low water pressure, or musty odors indicating hidden leaks. Outdated materials such as polybutylene or old steel pipes are prone to failure and should be prioritized for replacement during renovations. In addition to visible clues, pay attention to fluctuating water temperatures or unusual noises from pipes when faucets are turned on, as these often signal internal corrosion or loose connections.
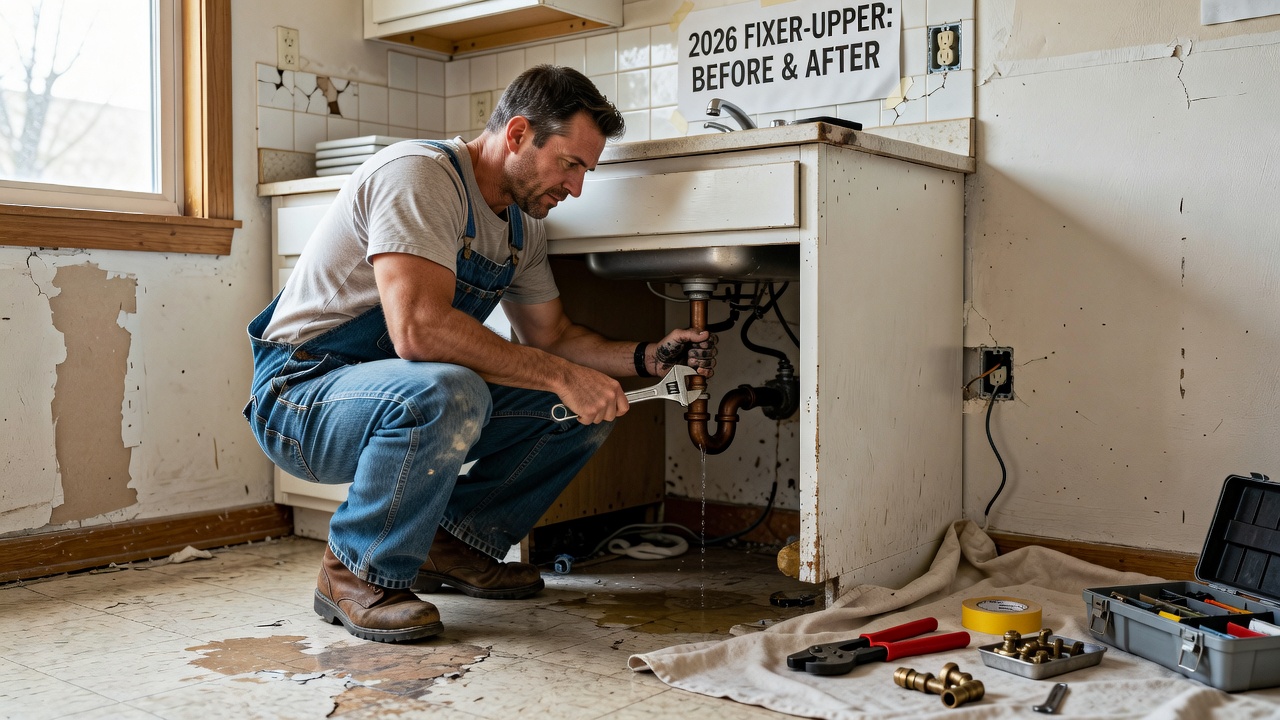
Conduct a thorough inspection by checking under sinks, around water heaters, and in basements. Use a moisture meter for accurate detection without expensive equipment. Addressing these early aligns with smart home improvement strategies to avoid cascading problems in kitchens or bathrooms. Real-world 2026 examples include a 1950s bungalow where undetected basement leaks caused mold growth; early detection with basic tools allowed the owners to replace only the affected sections rather than the entire system. Another case involved a 1970s ranch home where low pressure stemmed from mineral buildup in galvanized pipes, resolved through targeted upgrades that improved flow throughout the house.
Essential Tools for Budget-Friendly Repairs
Stock your toolkit with versatile, affordable items that handle most leak and pipe tasks. Focus on multi-purpose tools that serve multiple functions across projects, ensuring you stay within modest spending limits while achieving professional results. Start with basics that every homeowner should own and gradually add specialized items as needed for specific jobs.
- Adjustable wrenches for various fittings – these grip multiple sizes and reduce the need for a full set of fixed wrenches
- Pipe cutters for clean cuts on copper or PEX – provide smooth edges that ensure leak-free connections
- Plumber's tape and epoxy putty for quick seals – ideal for temporary and permanent fixes on threaded joints
- Flashlight and mirror for tight spaces – essential for visibility under cabinets or behind appliances
- Adjustable pipe wrench and basin wrench – help reach awkward angles during faucet or valve replacements
- Deburring tool – removes sharp edges after cutting pipe to prevent damage to new fittings
These selections support efficient work without overspending, allowing funds to go toward materials instead. Always clean and store tools properly after each use to extend their lifespan across multiple renovation projects.
Step-by-Step DIY Leak Repairs
Begin by shutting off the water supply to the affected area and draining remaining water from the lines. For minor leaks at joints, clean the surface thoroughly before applying sealant or replacing washers. Replace worn washers in faucets as a first line of defense against drips, taking care to match the exact size and material. When dealing with pipe sections, measure twice before cutting to minimize waste and ensure proper alignment.
Transition to modern PEX tubing where possible for its flexibility and ease of installation in tight fixer-upper spaces. Always test repairs by turning water back on gradually and monitoring for issues over several hours. In one 2026 kitchen remodel, a homeowner followed this process to fix a pinhole leak in a copper line by cutting out the damaged section and installing a PEX transition fitting, completing the job in under two hours. Safety considerations include wearing eye protection during cuts and ensuring adequate ventilation when using sealants.
Cost-Saving Material Swaps and Pipe Upgrades
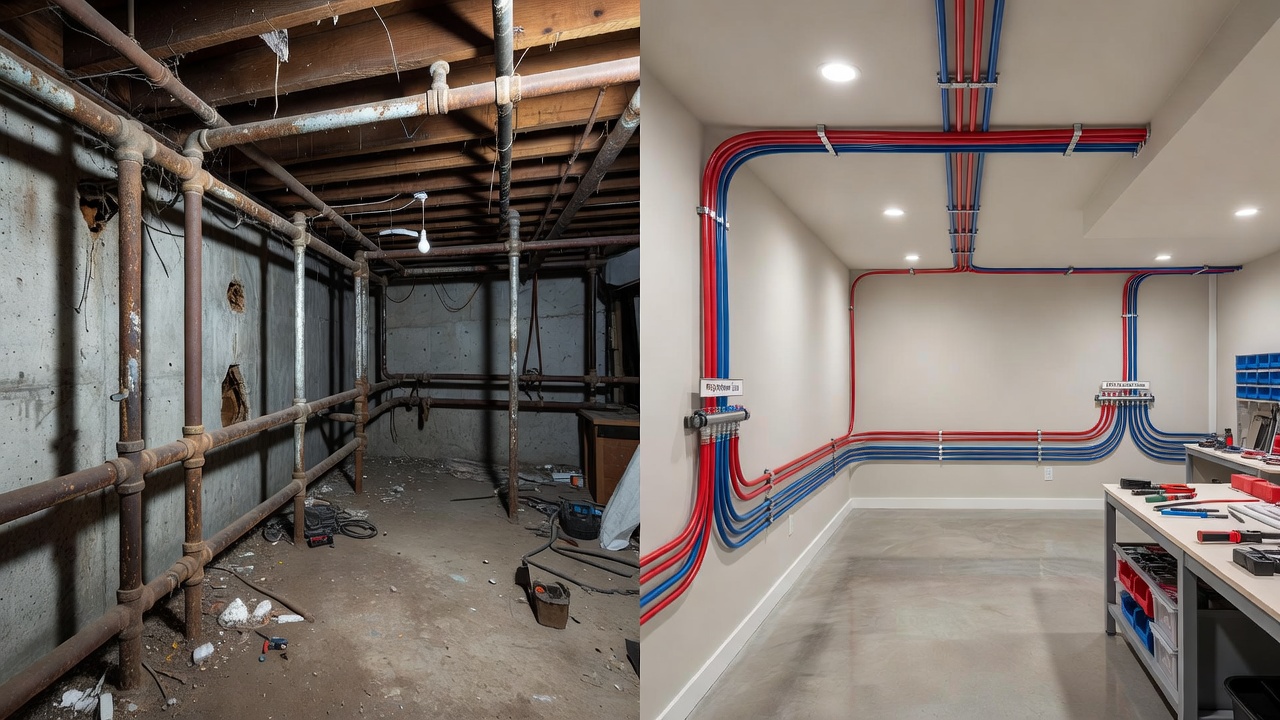
Swap expensive traditional materials for durable alternatives like PEX or CPVC that perform well under pressure while keeping expenses low. These options integrate seamlessly with existing systems and reduce long-term maintenance needs. PEX offers superior freeze resistance compared to rigid copper, making it especially suitable for unheated areas in fixer-uppers. CPVC provides a good balance for hot water lines where higher temperature tolerance is required.
Before-and-after examples from recent 2026 projects show how replacing galvanized pipes in laundry rooms transformed high-maintenance areas into reliable, efficient spaces. Homeowners reported fewer disruptions and better water flow after these targeted upgrades. Comparing material options reveals that PEX requires fewer fittings overall, which simplifies installation and lowers the chance of future leak points. Always verify local building codes before making swaps, as some areas have specific requirements for material transitions.
Mistakes to Avoid During Plumbing Repairs
Common errors include overtightening connections, which can crack fittings, or neglecting to flush lines after repairs, leaving debris that causes clogs. Another frequent mistake is using incompatible materials that lead to corrosion at joints. Always double-check measurements and test for leaks before closing up walls or cabinets. Skipping the shutoff step can result in flooding, so label your main water valve clearly for quick access during emergencies.
When to Call Professional Plumbers
While many fixes are DIY-friendly, complex issues like main line problems or extensive corrosion warrant expert help. Pros can assess hidden damage quickly, preventing bigger expenses. Balance your skills with project scope to decide when outsourcing makes sense for safety and compliance. Red flags include sewage odors, multiple simultaneous leaks, or any work involving gas lines or electrical components near plumbing.
Integrating Plumbing Upgrades with Overall Home Strategies
Plumbing repairs should align with larger renovation goals such as kitchen or bathroom remodels. For instance, updating pipes during a bathroom remodel allows for better fixture placement and improved water efficiency. This coordinated approach maximizes property value and minimizes repeated disruption to living spaces. Document all changes with photos and notes for future reference or when selling the home.
Preventing Future Problems: FAQ
How often should I check for leaks? Inspect visible pipes monthly and schedule annual professional reviews for older homes to catch issues before they escalate.
What materials resist corrosion best on a budget? PEX is a top choice for its longevity and straightforward installation in renovations, offering excellent resistance to scale and rust.
How do plumbing upgrades fit into overall home strategies? They enhance ROI by improving functionality and appeal, especially when paired with kitchen or bathroom remodels that buyers prioritize.
What are signs that a leak is more serious than it appears? Persistent dampness, mold growth, or unexplained increases in water bills indicate the need for professional evaluation beyond surface-level fixes.
Can I mix old and new pipe materials safely? Yes, with proper transition fittings, but always follow manufacturer guidelines to avoid galvanic corrosion between dissimilar metals.
How can I improve water efficiency during upgrades? Install low-flow aerators and consider a whole-house water filter to extend the life of new piping while reducing utility costs.
Conclusion
With careful planning and these techniques, budget plumbing renovations in fixer-uppers become manageable and rewarding. Prioritize prevention, use quality budget materials, and know your limits to create a more efficient home. For additional guidance, consult resources from the EPA on water efficiency, the U.S. Department of Housing and Urban Development for renovation best practices, and the CDC for health considerations related to water damage and mold prevention.

No comments yet. Be the first!