 Fixated on Home
Introduction: Turning an Outdated Shed into Valuable Space
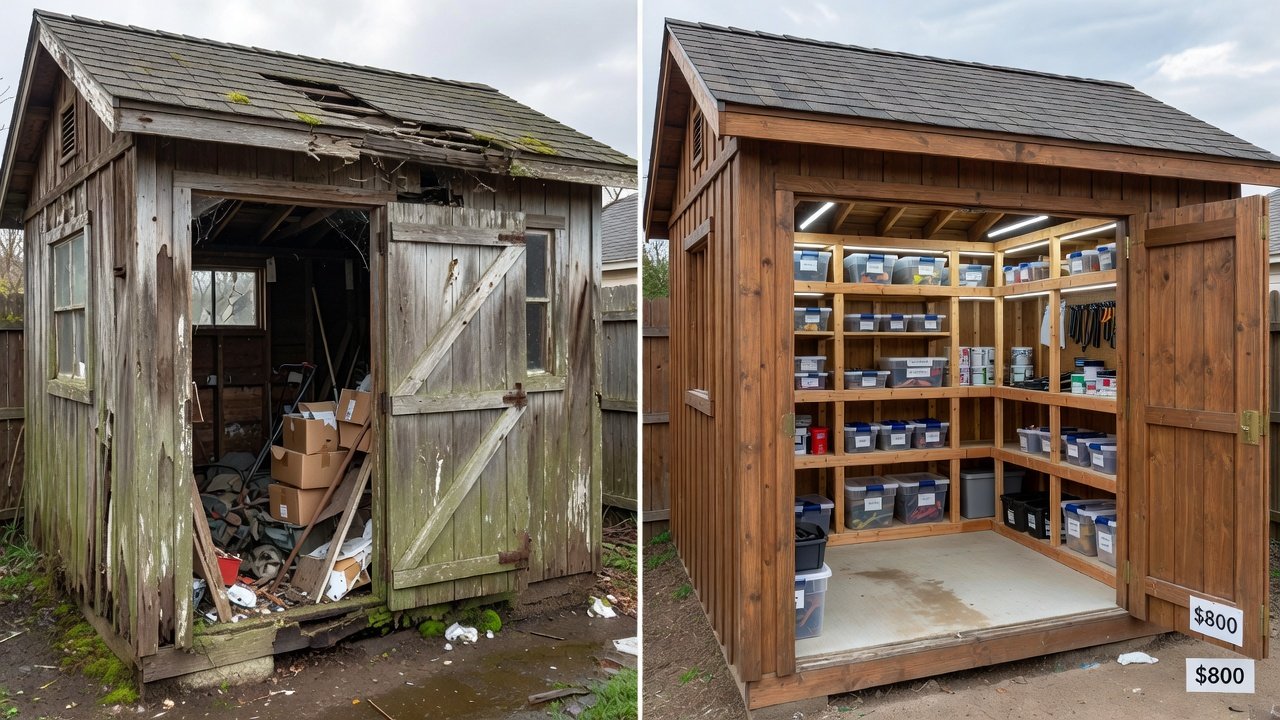
Many homeowners overlook backyard sheds as prime candidates for renovation. With a fixer-upper approach focused on storage upgrades, you can create organized, weather-resistant space without major structural overhauls or breaking the bank. This guide covers affordable strategies for 2026, emphasizing practical tips that maximize utility while staying under typical budget thresholds. Search intent for shed renovations often centers on real-world constraints like limited funds and beginner-level skills. We prioritize non-invasive changes such as material swaps and simple upgrades that deliver noticeable improvements in functionality and protection from the elements.
Whether your goal is extra storage for seasonal items, a dedicated workspace for hobbies, or simply reclaiming order in your yard, a phased approach ensures steady progress. Real examples show how modest investments in time and materials transform neglected structures into reliable assets. Focus remains on solutions that avoid heavy construction permits where possible while enhancing everyday usability.
Assessing Your Shed Before Starting
Begin by evaluating the current condition. Check for rot, leaks, and foundation stability. Measure interior dimensions to plan storage solutions like shelving or wall-mounted systems. Document before photos for motivation and reference during the project. Walk around the exterior to note roof condition, door alignment, and any visible gaps that allow water intrusion. Inside, test floor strength by applying gentle pressure and look for mold or insect damage that could affect long-term storage plans. This assessment phase prevents surprises later and helps prioritize which upgrades deliver the highest return on effort.
Phased 5-Step Renovation Process
- Step 1: Clear and Clean – Remove debris, old shelving, and clean surfaces thoroughly. Use a shop vacuum and mild detergent solution to eliminate dust and mildew. This creates a safe workspace and reveals hidden issues like loose nails or cracked boards.
- Step 2: Material Swaps – Replace damaged panels or flooring with affordable plywood or metal alternatives suited for storage. Select exterior-grade materials that resist warping and match existing siding for a cohesive look.
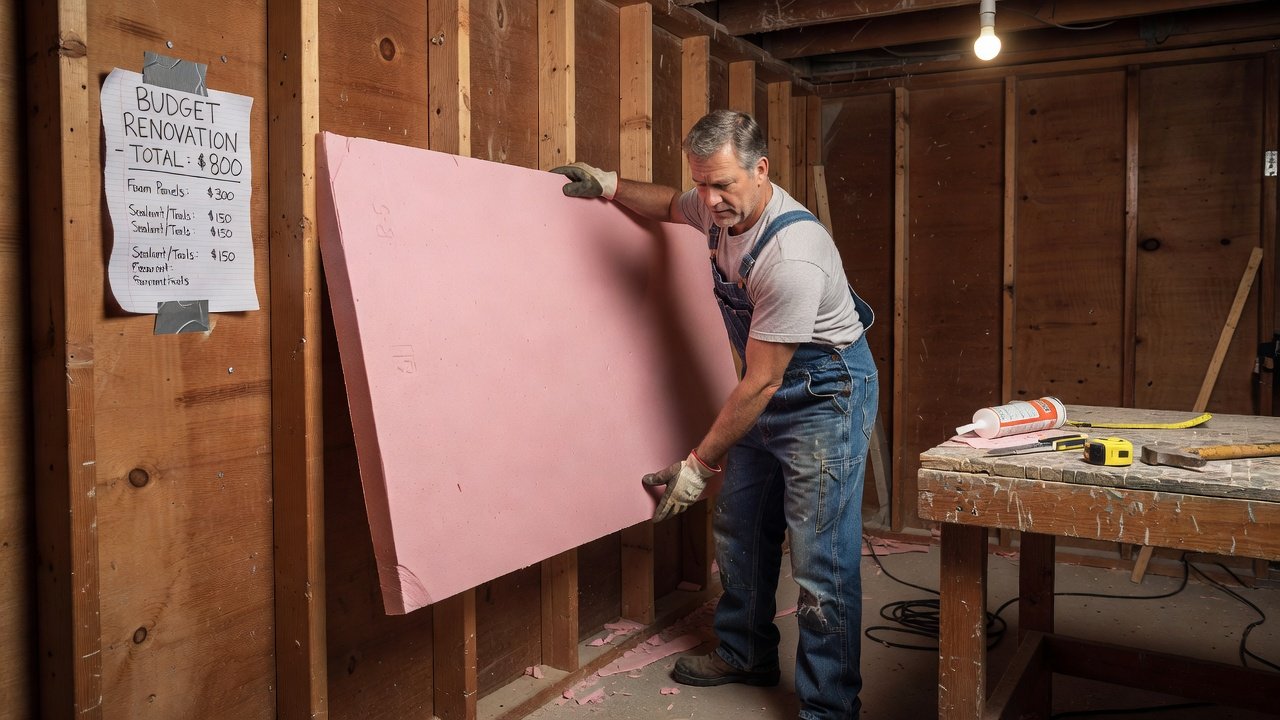
- Step 3: Insulation Hacks – Add foam boards or reflective barriers to regulate temperature without professional installation. Cut panels to fit snugly between studs and secure with construction adhesive for a draft-free environment.
- Step 4: Lighting Upgrades – Install LED fixtures or solar-powered options for better visibility and energy savings. Position lights over work areas and storage zones to reduce shadows and improve safety during evening use.
- Step 5: Weatherproofing Steps – Apply sealants, improve ventilation, and secure doors/windows against moisture. Install drip edges along the roofline and add weatherstripping to doors for year-round protection.
Each phase builds on the last, allowing you to pause as needed and tackle sections during available weekends.
Material Swaps and Insulation Hacks
Swap rotting wood for pressure-treated lumber or composite boards. These options hold up better against ground moisture and seasonal temperature swings. For insulation, rigid foam panels cut to fit between studs provide effective thermal barriers. Reflective bubble wrap serves as a quick secondary layer on ceilings to bounce back heat in summer. These hacks keep costs low while improving year-round usability for tools, equipment, or a small workspace. Consider adding vapor barriers on walls if your shed sits in a humid climate to prevent condensation buildup on stored items.
Lighting and Weatherproofing Upgrades
Upgrade to motion-sensor LEDs for safety and convenience. Battery or solar models eliminate the need for wiring in most cases. Weatherproofing involves caulking gaps, adding drip edges, and ensuring proper roof flashing. Energy efficiency resources from the U.S. Department of Energy offer guidance on selecting suitable materials that also reduce long-term energy demands if you add climate control later.
Cost Breakdowns and DIY vs. Minimal Pro Help
Typical projects stay under $800 when focusing on DIY methods (as of 2026-10-22). Breakdowns allocate funds to materials like insulation, sealants, and basic tools. DIY saves significantly compared to hiring help, though minimal pro assistance for electrical elements can prevent costly mistakes. Compare options based on your skill level and timeline. Many beginners handle the full project themselves after watching short instructional videos, while others budget a small portion for a handyman visit to handle tricky door alignments or heavy lifting.
Before-and-After Examples
One example transformed a leaky 10x12 shed into a dry storage area with added shelving and insulation. The owner reported easier access to gardening tools and no more water-damaged boxes after one season. Another converted a cluttered space into a hobby workspace by prioritizing lighting and weather seals. Before photos showed dark corners and warped flooring; after images revealed bright, organized zones with pegboards for tools. These cases highlight how targeted changes yield functional results that increase property appeal.
Common Mistakes to Avoid
- Skipping foundation checks leading to ongoing issues with uneven floors and shifting walls.
- Overlooking ventilation, causing condensation problems that damage stored belongings over time.
- Choosing incompatible materials that fail in outdoor conditions and require premature replacement.
- Ignoring door and window seals, which allows pests and moisture to enter despite other upgrades.
Maximizing Storage and Organization
Install adjustable shelving along walls to keep floor space clear for larger items. Use overhead racks for seasonal equipment and label bins for quick retrieval. Wall-mounted pegboards keep frequently used tools visible and accessible. These organizational strategies turn limited square footage into highly efficient storage without adding square footage.
Ongoing Maintenance Tips
Schedule seasonal inspections to reapply sealants and check for new leaks. Keep gutters clear if your shed has them, and trim nearby vegetation to reduce moisture retention. Regular upkeep extends the life of your upgrades and prevents small problems from escalating.
FAQ
Do I need permits for shed renovations?
Many areas require permits for structural changes; check local regulations early. Minor cosmetic upgrades often qualify for exemptions, but adding electrical outlets usually triggers review.
What basic tools do beginners need?
Start with a hammer, screwdriver set, measuring tape, level, and caulk gun. Safety gear like gloves and goggles is essential. OSHA guidelines provide additional safety reminders for home projects.
How long does the project typically take?
A phased approach allows completion over several weekends for most DIYers working part-time.
Can I add electricity safely on a budget?
Solar-powered lights and battery systems avoid wiring permits in many jurisdictions while providing adequate illumination.
What if my shed has a dirt floor?
Lay down gravel or inexpensive plywood over a vapor barrier to create a usable surface for storage without major excavation.
Conclusion
A budget shed renovation delivers practical storage gains and workspace potential through methodical, low-cost steps. By following the phased process and focusing on material quality and weather protection, you achieve lasting results that enhance your property. Start with assessment, proceed one phase at a time, and enjoy the organized outcome for years ahead.
No comments yet. Be the first!