 Fixated on Home
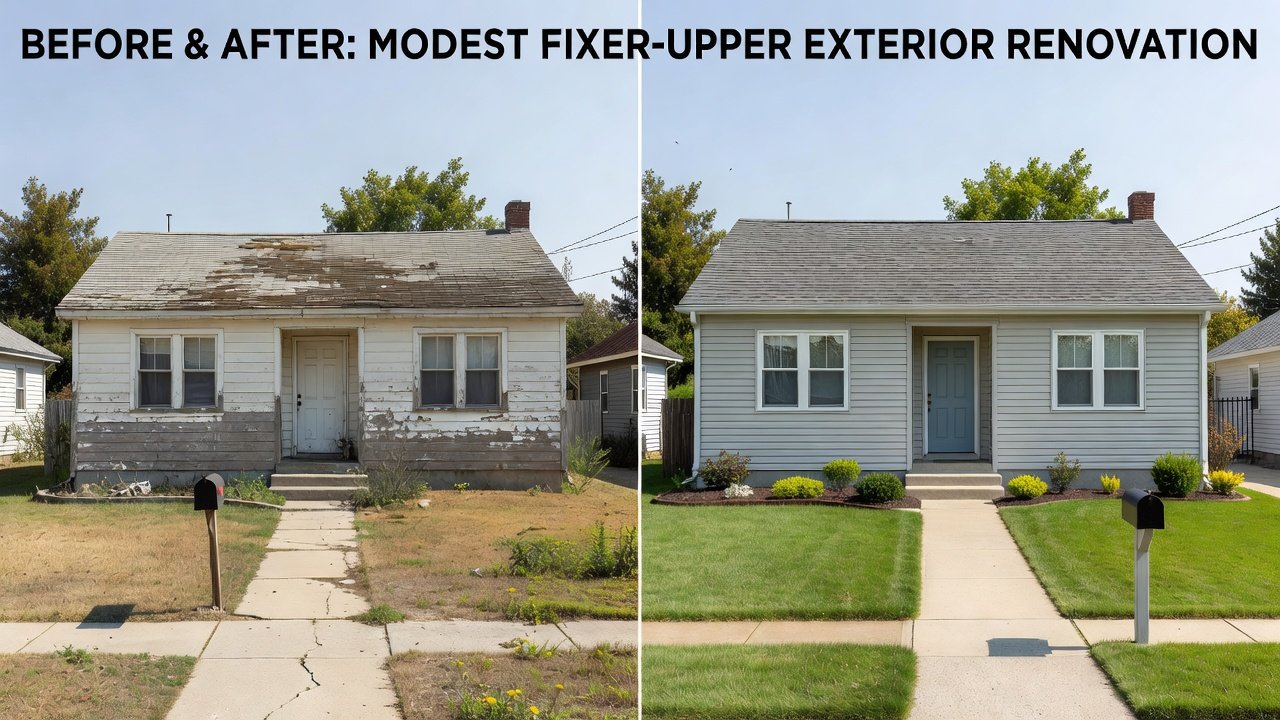
Budget Siding Reno: Fixer-Upper Exterior Updates for 2026
Transforming the exterior of a fixer-upper home doesn't require a massive budget. With smart choices in siding materials and careful planning, homeowners can achieve impressive curb appeal while keeping costs manageable. This guide focuses on practical strategies for 2026, helping you select durable options that withstand weather and deliver long-term value. Budget-conscious renovators often discover that thoughtful siding updates not only protect the home from the elements but also significantly increase its market appeal without requiring luxury-level spending.
Assessing Your Current Siding Condition
Before selecting new materials, evaluate the existing siding thoroughly. Start by inspecting for cracks, warping, moisture damage, or peeling paint during daylight hours for better visibility. Use a moisture meter to check behind panels, especially on north-facing walls where dampness often accumulates due to reduced sun exposure. Note any signs of rot in the underlying structure, as these must be repaired first to ensure the new siding lasts for decades. Document findings with photos to track progress and share with contractors if needed. Walk around the entire perimeter, paying close attention to areas near gutters, windows, and the foundation where water tends to collect. Check for soft spots by pressing gently on suspect areas and look for insect damage or mold growth that could compromise the new installation. This initial assessment phase prevents costly surprises midway through the project and ensures your chosen siding adheres properly to a sound base.
Affordable Siding Options for Fixer-Uppers
Three standout materials balance cost, durability, and aesthetics for budget-conscious projects: vinyl, wood composite, and fiber cement. Vinyl offers quick installation and low maintenance, making it ideal for quick turnarounds on older homes. Wood composite provides a natural look with better resistance to insects than traditional wood, while still allowing for customization through painting. Fiber cement delivers superior fire resistance and longevity, suiting homes in varied climates including areas prone to high winds or hail. Each option enhances resale value when installed correctly. Consider local climate factors, such as high humidity or freeze-thaw cycles, when deciding which material will perform best over time. Vinyl tends to expand and contract with temperature changes, so proper fastening is essential. Wood composite blends often include recycled content, appealing to environmentally aware homeowners. Fiber cement requires careful handling due to its weight but resists fading and rotting exceptionally well.
Material Comparison Overview
- Vinyl: Lightweight, color options available, easy to clean with a hose, and resistant to many common stains.
- Wood composite: Eco-friendly blends, paintable surfaces, moderate weight, and good thermal performance in moderate climates.
- Fiber cement: Heavy but strong, textured finishes mimicking wood or stucco, excellent for regions with extreme weather patterns.
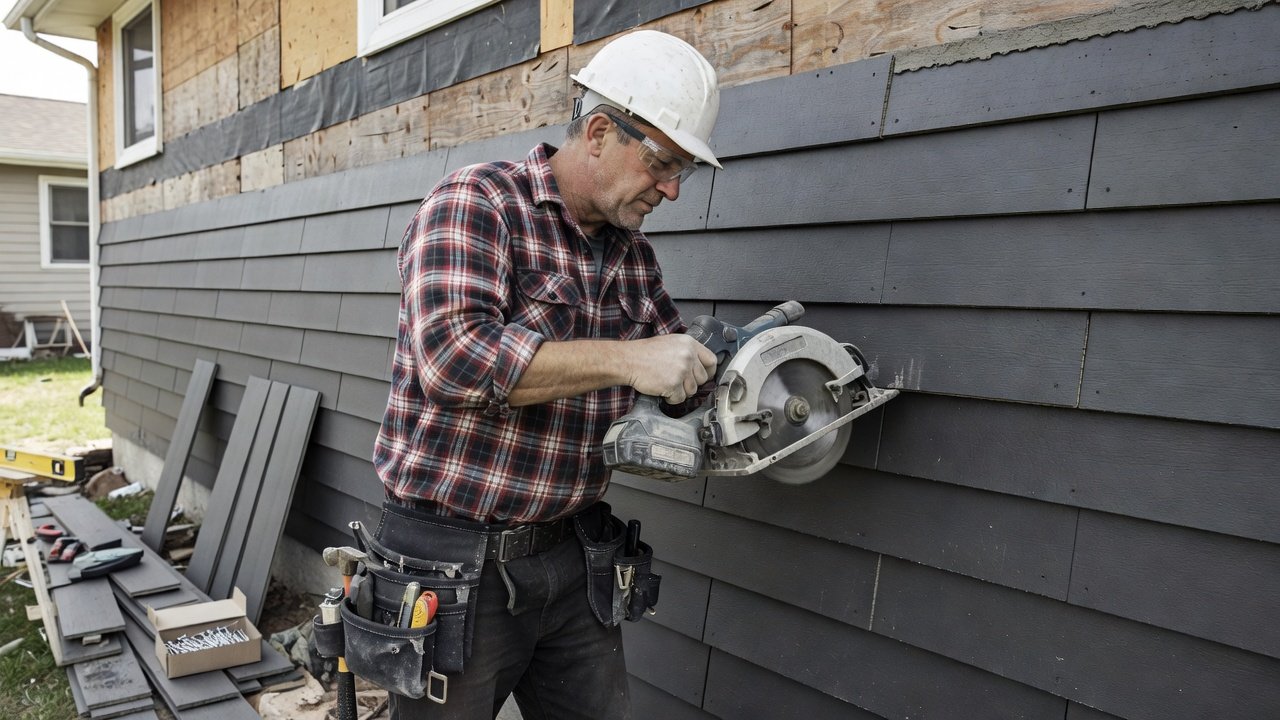
DIY Installation Steps Versus Hiring Professionals
Many homeowners tackle siding updates themselves to save on labor. For DIY success, gather tools like a circular saw, level, nail gun, hammer, utility knife, and measuring tape. Begin by removing old siding carefully to avoid damaging the sheathing underneath, then apply house wrap for added protection against wind-driven rain. Install panels starting from the bottom, ensuring overlaps direct water away from the home. Always follow manufacturer guidelines for expansion gaps to prevent buckling during seasonal changes. Work in sections, checking level frequently, and secure each piece with corrosion-resistant fasteners. However, hiring pros may be wiser for complex roofs, two-story homes, or properties with intricate architectural details. Professionals bring specialized equipment and warranties that cover both materials and workmanship. Compare timelines: DIY projects often span weekends over several weeks, while crews finish in days. Weigh your skill level honestly before committing to a full DIY approach, as improper installation can lead to leaks and void any material warranties.
Real-World Fixer-Upper Examples
Consider a 1950s ranch home where owners replaced damaged wood siding with vinyl panels. The project improved insulation performance and eliminated constant repainting needs, resulting in a fresher appearance that stood out in the neighborhood. Another example involves a Victorian fixer-upper using fiber cement to restore historic details without the upkeep of original materials, preserving charm while adding modern durability. A third case features a mid-century modern bungalow that combined wood composite accents with vinyl on less visible sides to stretch resources further. These cases highlight how targeted updates maximize visual impact and functional benefits when matched to the home's style and location.
Maximizing ROI Through Strategic Choices
Focus on high-visibility areas first, such as the front facade, to create immediate curb appeal gains. Pair new siding with updated trim or shutters for a cohesive look that elevates the entire property. Track before-and-after photos to document improvements for potential buyers or future reference. In 2026, emphasis on energy-efficient underlayments can further boost long-term savings by reducing heating and cooling demands.
Checklist for a Successful Budget Siding Project
- Inspect and repair the substrate thoroughly before any new work begins.
- Measure the exterior twice for accurate material estimates and account for waste.
- Choose weather-resistant underlayment suited to your regional climate.
- Schedule work during mild weather to avoid complications from extreme temperatures.
- Apply sealant around windows, doors, and penetrations for complete protection.
- Inspect finished work for gaps, loose pieces, or improper overlaps.
- Dispose of old materials responsibly according to local regulations.
Common Pitfalls to Avoid
Rushing the prep phase leads to future leaks and structural issues down the road. Skipping proper ventilation behind the siding can trap moisture and promote mold growth inside walls. Overlooking permits in some municipalities risks fines or forced removal of the work. Always verify local codes before starting and consider consulting a professional for the initial inspection if the home has a complex history of renovations. Another frequent mistake is selecting materials solely based on appearance without considering maintenance requirements or compatibility with existing insulation.
FAQ on Weatherproofing Your New Siding
How does siding improve energy efficiency? Proper installation with insulation backing reduces heat transfer through walls, helping maintain consistent indoor temperatures year-round. What maintenance prevents weather damage? Annual inspections and prompt repairs of caulk joints keep water out and extend the life of the siding. Can old siding be covered? Yes, but only if the structure supports the added weight and moisture issues are resolved first to avoid compounding problems. Which material handles heavy rainfall best? Fiber cement excels in wet climates due to its resistance to rot and warping when installed with adequate drainage. How often should sealant be reapplied? Check caulking around openings every spring and fall, refreshing as needed to maintain a tight seal against the elements.
For more on home weatherization, visit energy.gov. Additional guidance on housing standards is available at hud.gov. Homeowners can also explore general renovation resources at epa.gov.
Conclusion
Budget siding renovations empower fixer-upper owners to refresh exteriors effectively in 2026. By assessing conditions, selecting suitable materials, and following structured steps, you can achieve lasting results that enhance both protection and appeal. Focus on quality installation to ensure your investment pays off for years ahead while avoiding common oversights that undermine the project.
No comments yet. Be the first!