 Fixated on Home

Introduction to Budget Fixer-Upper Renovations
Fixer-upper properties present exciting opportunities for homeowners who want to build equity through strategic improvements. However, the choice between tackling renovations yourself or hiring professionals significantly impacts both immediate expenses and long-term outcomes. This comprehensive guide explores the nuances of DIY versus professional budget renovations in 2026, with a focus on material sourcing strategies, realistic time commitments, essential skill evaluations, and often-overlooked risks that can derail even well-planned projects.
Homeowners frequently underestimate the complexity of older homes, where outdated wiring, plumbing, or structural issues can surface unexpectedly. Understanding these elements helps create a renovation plan that maximizes value while protecting against costly setbacks. Whether refreshing a single room or overhauling an entire property, informed decisions lead to better results and fewer regrets.
Core Decision Factors in DIY Versus Professional Work
Material sourcing forms the foundation of any successful budget project. DIY renovators can explore local salvage yards, online marketplaces, and big-box store clearance sections to secure quality supplies at reduced rates. Professionals often benefit from established trade accounts that provide consistent access to durable products and volume discounts. Evaluating both paths requires comparing availability, delivery timelines, and compatibility with existing home features.
Time commitments represent another critical variable. DIY work typically unfolds across multiple weekends or evenings, allowing flexibility but extending overall project duration. Professional crews operate on structured schedules that minimize disruption, though coordination and permitting can still introduce delays. Homeowners must honestly assess their availability and tolerance for ongoing construction mess before committing to either route.
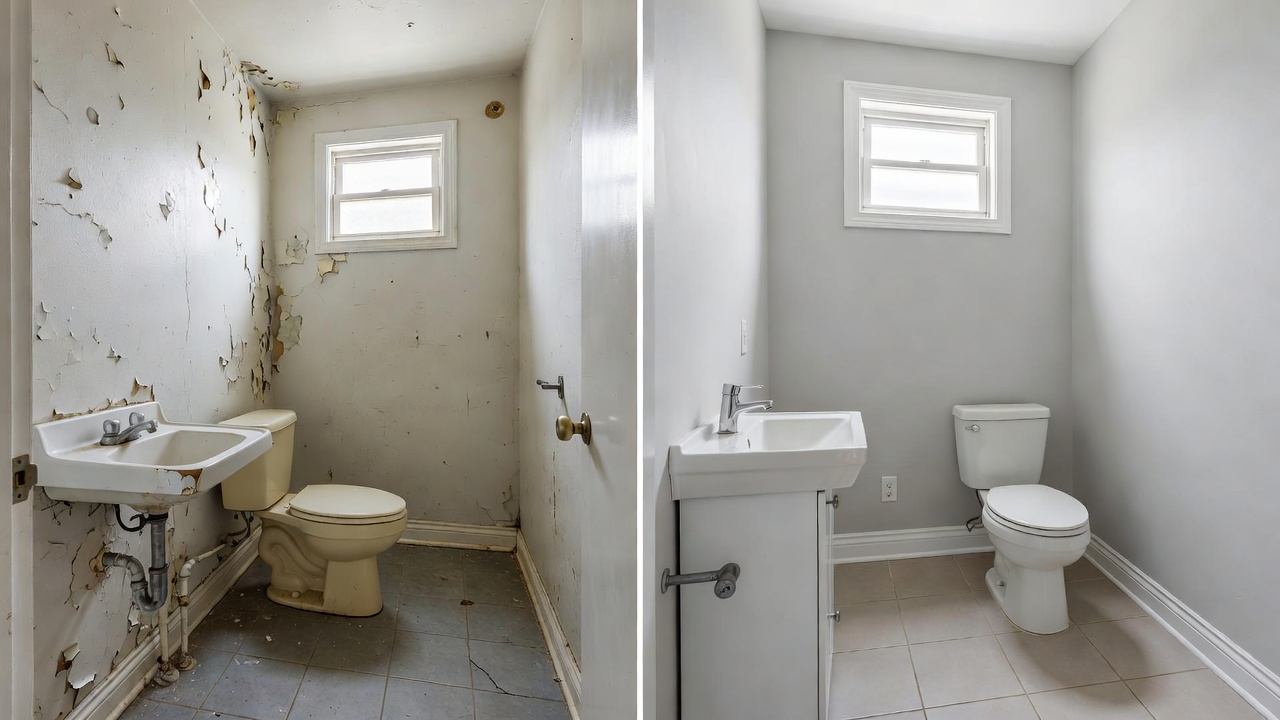
Required skills vary widely by task. Basic carpentry or painting may suit those comfortable with hand tools and online tutorials, while electrical updates or load-bearing modifications demand licensed expertise to satisfy building codes. Hidden risks include disturbing lead-based paint in pre-1978 homes, inadequate ventilation during finishing work, or improper installations that lead to moisture problems down the line. Consulting EPA guidelines on lead-safe renovation provides essential safety protocols for older properties.
Case Study: Basic Carpentry Projects
Installing new baseboards and door casings offers a clear illustration of the DIY versus professional divide. In a DIY scenario, the homeowner measures existing trim, selects affordable pine or MDF boards, and uses a miter saw for angled cuts. Careful sanding, nailing, and caulking follow to achieve seamless joints. Success hinges on steady hands and patience with adjustments, especially in rooms with uneven floors or out-of-square corners.
Professional carpenters bring specialized equipment such as laser levels and pneumatic nailers that produce cleaner results in less time. They also anticipate challenges like matching historical profiles in vintage homes. While the finished appearance often justifies the investment, homeowners should request detailed material specifications to ensure the work aligns with budget goals and aesthetic preferences.
Case Study: Painting Interior Spaces
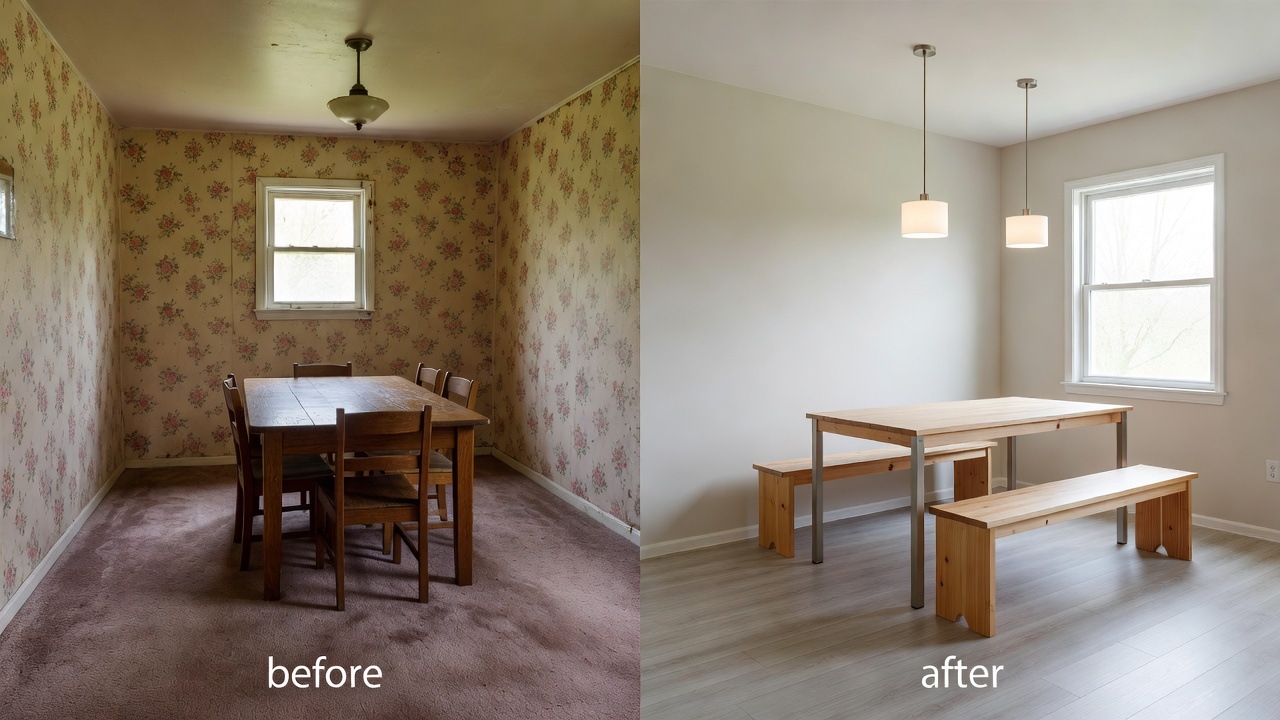
Painting stands out as an approachable entry point for DIY enthusiasts. The process begins with thorough surface preparation: washing walls, filling holes, sanding imperfections, and applying painter’s tape along trim and ceilings. Multiple thin coats of quality latex paint deliver better coverage than a single heavy application. Beginners benefit from practicing on inconspicuous areas first and using angled brushes for crisp lines around windows and doors.
Professional painters excel at achieving uniform finishes on textured surfaces and high ceilings where ladders or scaffolding become necessary. They also manage color transitions and sheen consistency across large spaces efficiently. Potential DIY pitfalls include poor ventilation leading to lingering odors and improper disposal of rags or leftover paint that may violate local regulations. Resources from the Environmental Protection Agency offer guidance on safe handling practices.
Step-by-Step Framework for Choosing DIY or Hiring Help
- Define project scope by creating a detailed list of every task, including prep work, demolition, installation, and cleanup.
- Review local building codes and permit requirements through your city’s planning department to avoid compliance issues.
- Perform a realistic skills self-assessment, perhaps by completing a small test project like painting a closet before committing to larger areas.
- Estimate total time by breaking tasks into phases and factoring in material procurement and drying times between coats.
- Compare sourcing options by visiting suppliers and noting lead times, return policies, and bulk purchase opportunities.
- Evaluate safety needs such as dust containment, protective gear, and ventilation requirements, especially in homes built before 1978.
- Collect multiple professional bids to establish market benchmarks and identify which portions of the work justify outsourcing.
- Decide on a hybrid strategy where you handle demolition and prep while professionals manage technical installations.
Sourcing Materials on a Budget
Effective material sourcing can dramatically influence overall project economics. Start by creating a prioritized shopping list that separates must-have items from optional upgrades. Visit multiple retailers, including warehouse clubs and specialty salvage yards, to identify the best combination of price and quality. Consider reclaimed lumber for non-structural elements or factory seconds for flooring when imperfections will be hidden by furniture. Always verify compatibility with existing systems to prevent future compatibility problems.
Avoiding Common Pitfalls
Many first-time renovators fall into predictable traps. Overestimating personal skill levels often leads to rework that erodes initial savings. Underestimating preparation time results in rushed finishes that show wear quickly. Ignoring ventilation and dust control can create health hazards or damage adjacent rooms. Maintaining a detailed journal of decisions and receipts helps track progress and provides documentation for resale or insurance purposes.
Maximizing Value Without Sacrificing Quality
Prioritize improvements that deliver visible impact and functional benefits. Focus on high-traffic areas first, then move to cosmetic updates. Incorporate energy-efficient choices such as LED lighting or improved insulation where feasible. Document every phase with photographs to support future appraisals. A hybrid approach often yields the strongest return: manage straightforward tasks yourself while engaging specialists for code-sensitive work.
2026 Market Considerations
Current renovation trends emphasize durability, sustainability, and integration with existing home systems. Homeowners who monitor supplier promotions and plan projects around seasonal material availability can optimize timing. Staying informed about evolving code requirements ensures compliance and protects property value over time.
Frequently Asked Questions
How long do typical budget renovations take?
Project duration depends on scope and chosen method. Straightforward painting or trim work may require only a few days for professionals but several weekends when completed by homeowners balancing other responsibilities. Larger carpentry or multi-room updates often extend to several weeks when permits and inspections are required.
What quality concerns should beginners address?
Emphasize thorough surface preparation, accurate measurements, and manufacturer-recommended application techniques. Consider professional assistance for final finishing on highly visible surfaces to maintain overall appearance and longevity.
What remodeling tips help first-time renovators?
Develop a written plan with contingency buffers for both time and materials. Watch instructional content from reputable sources, assemble appropriate safety equipment, and complete one area before beginning the next to maintain momentum and minimize stress.
Conclusion
Choosing between DIY and professional services for fixer-upper renovations demands careful evaluation of skills, available time, material options, and potential risks. By applying the decision framework and practical examples outlined above, homeowners can achieve meaningful savings while delivering durable, high-quality results that enhance both livability and property value in 2026 and beyond.
No comments yet. Be the first!