 Fixated on Home
Introduction to Budget Door Makeovers in 2026
Fixer-upper homes often feature outdated or damaged doors that drag down curb appeal and interior flow. In 2026, homeowners are turning to budget-friendly DIY projects to refresh entry and interior doors without breaking the bank. This guide covers everything from material selection to final hardware touches, keeping total costs under $300 as of 2026-07-22. Whether you're updating a front entry for better first impressions or refreshing bedroom doors, these techniques deliver professional-looking results using basic skills and affordable supplies. Many fixer-uppers from the mid-20th century have standard 32-inch or 36-inch openings, making slab replacements straightforward once measurements are confirmed.
Door upgrades improve energy efficiency by sealing drafts and can increase a home's perceived value through better aesthetics. Beginners should focus on interior projects first to practice techniques before tackling weather-exposed entry doors.
Choosing Materials: Slab Doors vs Pre-Hung Options
Slab doors are solid panels sold without frames, making them ideal for budget renovations. They cost less and suit existing jambs in good condition. Pre-hung doors come assembled with frames, which simplifies installation but adds expense and weight. For fixer-uppers, start with hollow-core slab doors for interiors or solid-core slabs for entries needing sound dampening. Compare finishes like primed MDF for painting or wood veneer for staining. Hollow-core options weigh less and are easier for solo installers, while solid-core provides better durability in high-traffic areas.
When selecting slabs, measure the exact height, width, and thickness of the existing door. Standard residential thickness is 1-3/8 inches for interiors. Consider door swing direction and hinge side to avoid ordering mistakes. Popular retailers stock multiple sizes and styles ready for pickup or delivery.
Essential Tools and Prep Steps for Beginners
Beginners need a circular saw, drill, level, chisel, sandpaper, and painter's tape. Additional helpful items include a stud finder, utility knife, and wood filler for minor repairs. Prep includes measuring the opening twice, removing old hardware, and sanding surfaces smooth. Always check for lead paint in older homes before sanding. Clear the workspace of furniture and protect floors with drop cloths. Label all screws and hinges during removal so reassembly is faster if needed later.
Practice hinge mortising on scrap wood first. This prevents visible errors on the final door. Allow adequate drying time between prep steps if filling holes or applying wood conditioner.
Step-by-Step Installation Instructions
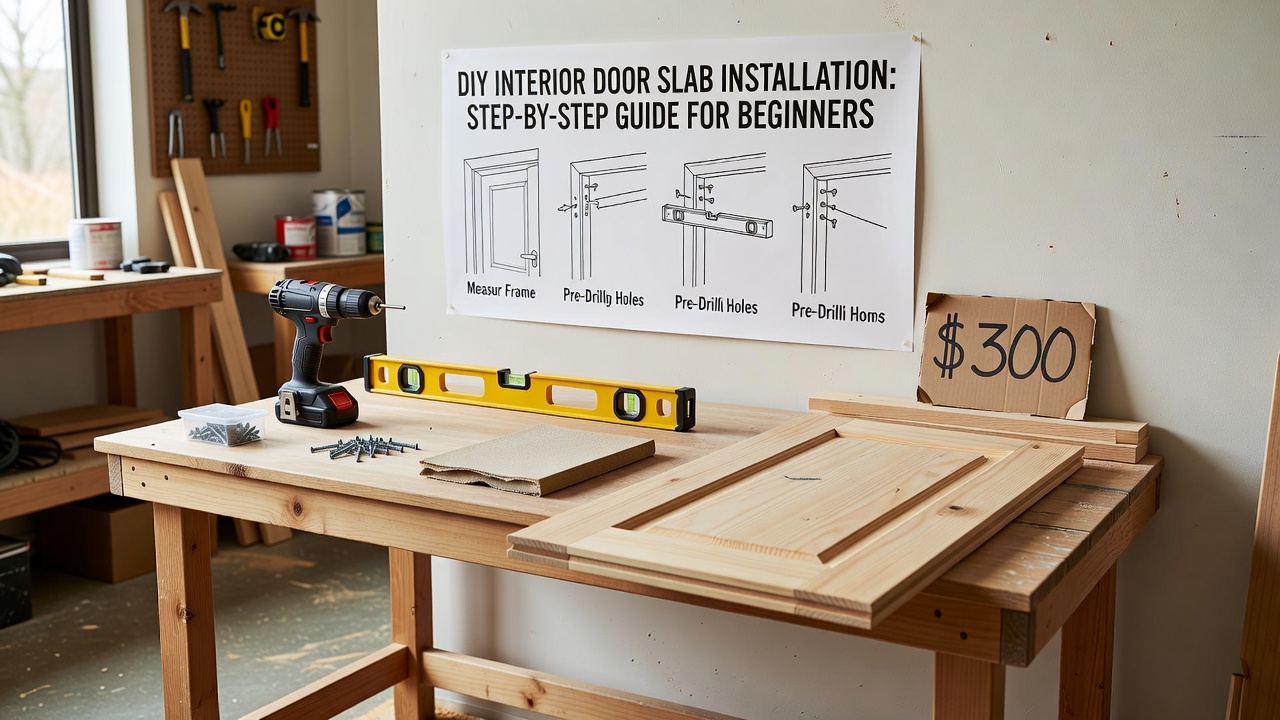
1. Remove the old door and hinges carefully by supporting the door with shims and unscrewing from the bottom up.
2. Test-fit the new slab and mark hinge locations using the old door as a template.
3. Chisel mortises for hinges and install with screws, ensuring they sit flush.
4. Hang the door and check for even gaps around the perimeter, typically 1/8 inch.
5. Adjust as needed with a plane or shims, then secure the strike plate.
Practice on an interior door first to build confidence. If the door binds after hanging, sand high spots gradually rather than removing too much material at once. For pre-drilled hinge locations, use a self-centering bit for precision.
Hardware Upgrades for Instant Impact
Swap outdated knobs and hinges for modern matte black or brushed nickel styles. These small changes boost aesthetics without major expense. Look for passage sets for interior doors and keyed entry sets for fronts. Consider lever handles for easier operation, especially in homes with elderly residents. Match finishes across all doors in a hallway for a cohesive look.
Painting Methods to Enhance Curb Appeal
Use high-quality exterior paint for entry doors and satin interior paint for others. Apply primer first, then two coats with a foam roller for smooth results. Popular finishes include bold navy for contrast or crisp white for timeless appeal. Lightly sand between coats for a factory-smooth surface. Allow full cure time, usually 24-48 hours, before reinstalling hardware.
Cost Breakdowns Under $300
A typical project might include a slab door, primer, paint, hardware, and tools rentals. Shop sales at major retailers for the best value. Always verify current pricing in-store or online. Budget allocation often favors quality paint and hardware over the door itself, as these elements determine longevity and appearance.
Before-and-After Case Studies
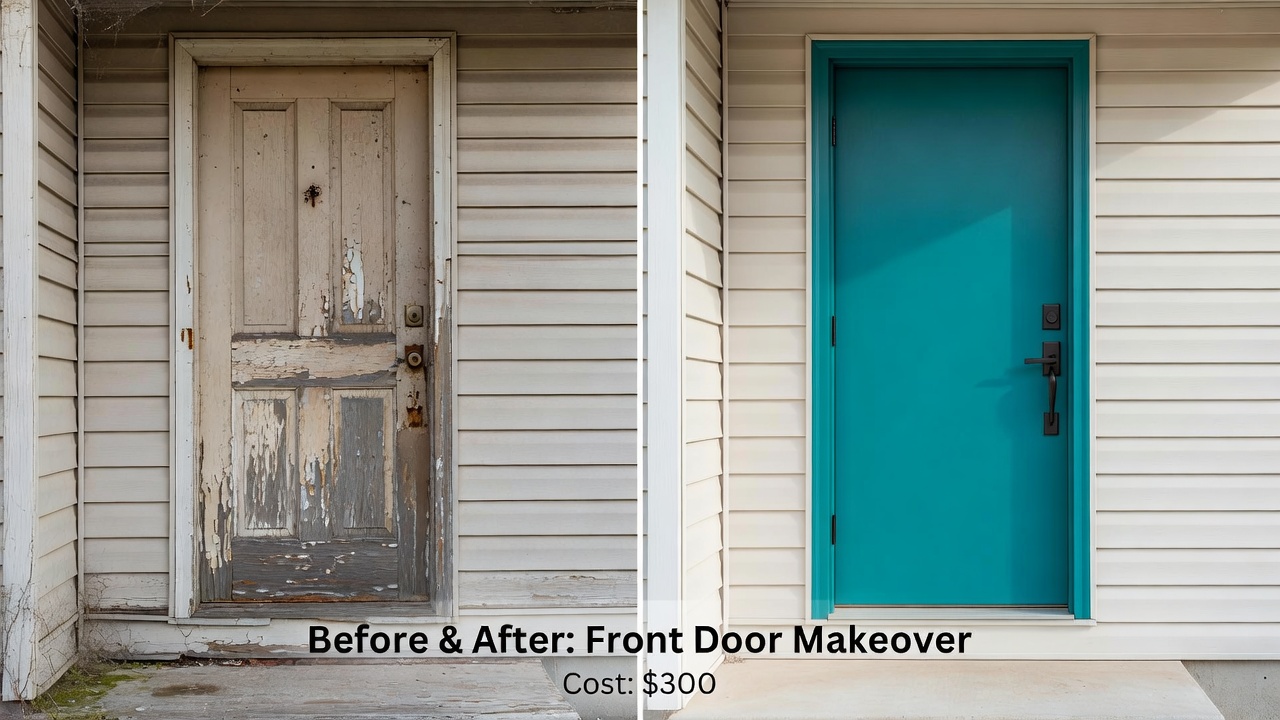
Case 1: A 1950s ranch home's front door went from peeling paint to a vibrant teal finish, increasing perceived home value noticeably. The owner replaced the slab, added weatherstripping, and chose matte black hardware for contrast.
Case 2: Interior hollow-core doors received new paint and modern levers, unifying the home's style on a tight budget. Multiple doors were completed over two weekends using consistent color throughout the main floor.
Comparisons of Popular Finishes
- Matte black hardware: Modern and hides fingerprints well.
- High-gloss paint: Reflects light, easy to clean, but shows imperfections.
- Stained wood: Warm and natural, requires more maintenance.
- Satin finishes: Balance of durability and subtle sheen suitable for most rooms.
Common Mistakes to Avoid
One frequent error is failing to account for door swing clearance when installing new slabs near baseboards or furniture. Always test the full arc before final hinge tightening. Another issue involves skipping primer on raw wood or MDF, leading to uneven paint absorption. Measure hinge setback accurately to prevent doors from rubbing the frame. Finally, rushing the painting process without proper ventilation can cause drips and extended drying times.
FAQ
How do I fix door alignment issues?
Adjust hinges or plane the door edge slightly. Ensure the frame is plumb using a level. Add shims behind hinges if the door sags over time.
What about weatherproofing entry doors?
Add weatherstripping and a door sweep. Check seals annually. For more guidance on energy-efficient home improvements, see energy.gov.
Maintenance tips for painted doors?
Clean with mild soap, touch up chips promptly, and avoid harsh cleaners. Inspect hardware screws every six months and tighten as needed.
Can I paint over existing hardware?
No, always remove hardware before painting to achieve clean lines and prevent paint buildup on moving parts.
How long does a typical DIY door project take?
Most beginners complete an interior door in one afternoon after prep, while entry doors may require a full day including curing time between paint coats.
Conclusion
These 2026 budget DIY door makeovers transform fixer-uppers affordably. Start small, follow the steps, and enjoy refreshed spaces that boost both function and style. For more inspiration, visit Home Depot or Lowe's for supplies and ideas. Additional paint resources are available at Sherwin-Williams.
No comments yet. Be the first!