 Fixated on Home
Introduction to Budget Gutter Installation in 2026
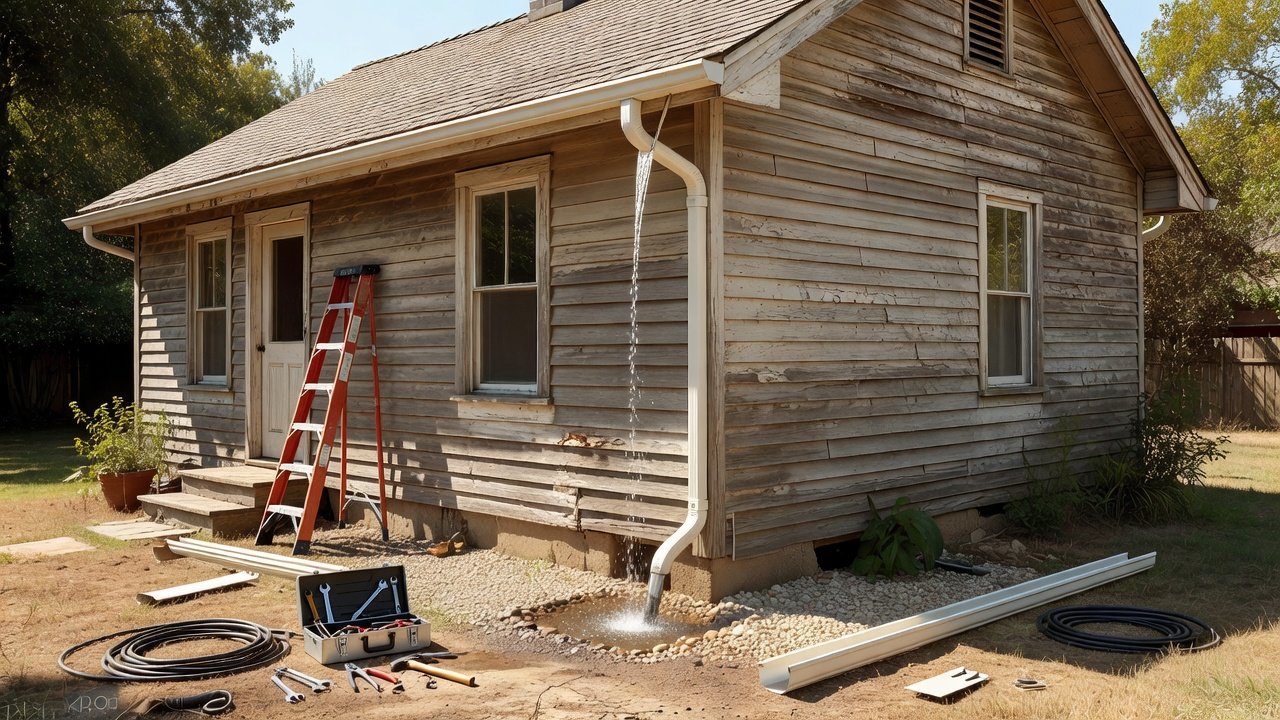
Homeowners tackling fixer-upper properties often face drainage challenges that lead to foundation damage and water intrusion. Installing gutters yourself provides an affordable solution, especially when focusing on budget-friendly options. This guide delivers actionable steps for a successful 2026 project, emphasizing practical materials selection and real-world renovation insights for beginners. Proper gutters direct rainwater away from your home, protecting siding, landscaping, and structural integrity over time. Many fixer-uppers from earlier decades lack adequate drainage systems, making upgrades essential for long-term value. Beginners will find value in the detailed comparisons, checklists, and FAQs included here, which draw from recent home improvement trends emphasizing self-reliance and cost control.
Understanding local climate patterns helps tailor your approach, whether dealing with heavy rains or seasonal freezes. The process rewards careful planning and attention to slope and sealing details that prevent future issues.
Selecting Budget-Friendly Materials
Focus on durable yet inexpensive options available at major home improvement retailers. Vinyl and aluminum stand out for cost-conscious DIYers because they balance performance with ease of handling. Measure your roofline first to estimate needs accurately, noting any unique angles or extensions that might require custom cuts. Consider the overall aesthetic of your fixer-upper to choose finishes that complement existing trim.
Vinyl vs Aluminum Options
Vinyl gutters resist rust and require minimal maintenance but can become brittle in extreme cold. They install quickly with snap-together components that reduce the need for specialized skills. Aluminum sections are more flexible for custom fits and often come pre-finished in various colors to match home exteriors. Consider your local climate when choosing—vinyl suits milder areas with less temperature fluctuation, while aluminum handles swings better without cracking. Both materials support straightforward DIY efforts and integrate well with existing fascia boards on older homes. Real-world examples from recent renovations show vinyl performing reliably in suburban settings, whereas aluminum excels on properties exposed to coastal winds.
Essential Tools for the Job
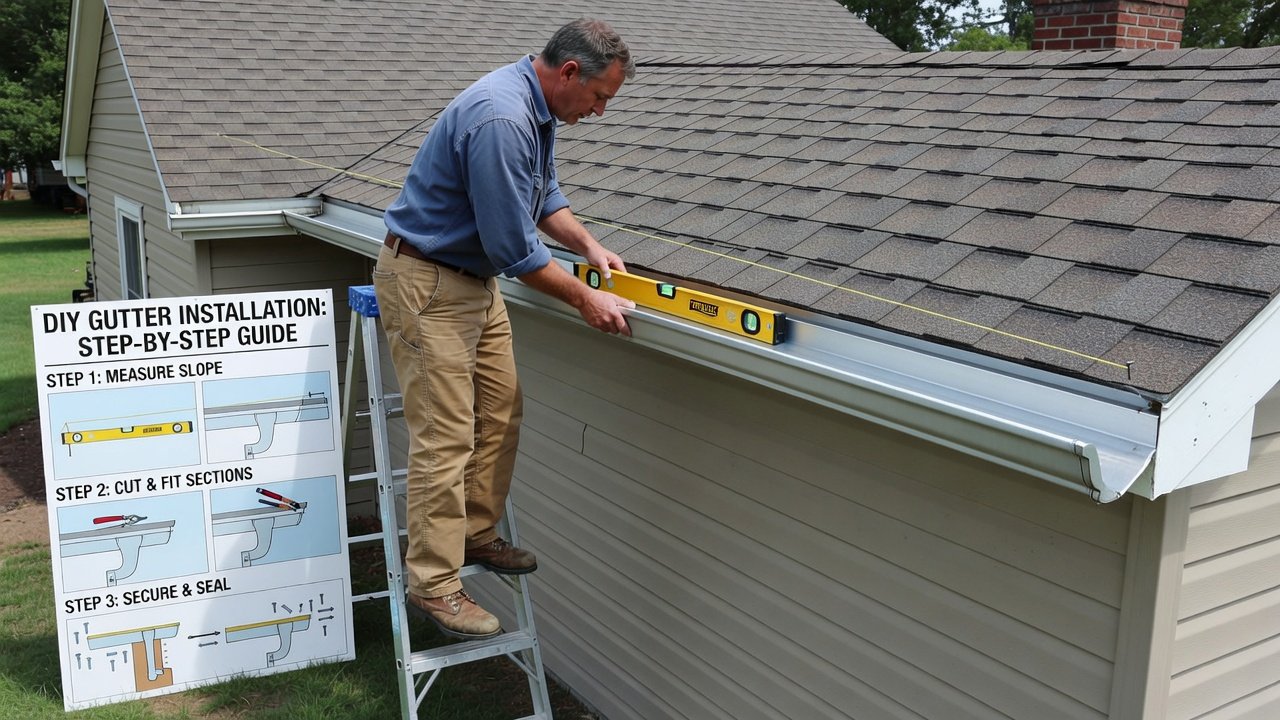
Gather these items before starting to avoid mid-project delays: ladder rated for your weight plus materials, measuring tape, torpedo level or longer spirit level, hacksaw or miter saw with fine-tooth blade, cordless drill with bits, screwdriver set, caulk gun, safety glasses, work gloves, and a chalk line or string for alignment. A gutter crimper proves useful for joining sections neatly. Rent specialized tools like a ladder stabilizer if your roof height exceeds standard reach. Organize everything on a tarp near the work area for efficiency. This preparation step prevents common frustrations and keeps momentum during the full installation day.
8-Step Installation Process
Follow this sequence methodically for reliable results on any fixer-upper. Each step builds on the previous one to ensure structural integrity and proper water flow.
- Assess and clean the roofline thoroughly, removing old gutters if present and inspecting fascia for rot or damage that needs repair first.
- Mark fascia board locations every 2-3 feet for secure hanger placement, accounting for any obstacles like vents or windows.
- Install hangers with proper outward slope of approximately one-quarter inch per ten feet to promote consistent drainage without standing water.
- Cut gutter sections to length using a fine-tooth blade, deburring edges to avoid injury and ensure smooth connections.
- Assemble corners, end caps, and downspout outlets with high-quality sealant applied generously at joints.
- Secure gutters to hangers, checking level and slope frequently with your string line and level tool.
- Attach downspouts and extensions directing water at least five to ten feet away from the foundation to prevent pooling.
- Test the entire system with a garden hose to confirm smooth flow and seal any minor leaks before declaring the project complete.
Safety Tips During Installation
Always use a stable ladder on firm, level ground and wear appropriate personal protective equipment including gloves and eye protection. Avoid working in high winds, rain, or extreme heat that could cause fatigue. Secure tools with lanyards to prevent drops onto surfaces below. For elevated sections, enlist a spotter to assist with positioning long pieces. Review guidelines from OSHA for ladder safety best practices that apply directly to residential projects. Taking these precautions reduces risk significantly during multi-hour efforts.
Common Pitfalls to Avoid
Improper slope causes standing water and overflows—double-check every section with a level before final fastening. Over-tightening screws can crack vinyl sections, leading to replacements later. Ignoring expansion gaps in long runs leads to buckling during temperature changes. Poor sealing at joints invites leaks that undermine the entire system over one or two seasons. Real renovation examples demonstrate that skipping the slope verification test often requires full rework within the first year of heavy weather exposure. Another frequent mistake involves neglecting to clear debris from downspouts before testing, which masks flow problems until after completion.
Cost Breakdown and Real-World Examples
Budget projects prioritize value through careful sourcing of standard components. Materials remain affordable for average homes when purchased in standard lengths from local suppliers. Factor in occasional tool rentals if you lack specific items at home. Recent fixer-upper projects demonstrate substantial savings compared to professional installation when following these steps carefully. One example involved a 1950s bungalow where new gutters resolved chronic basement moisture issues after years of neglect. Another case on a craftsman-style home used aluminum for better wind resistance, resulting in improved curb appeal alongside functional drainage. These outcomes highlight how methodical DIY work delivers professional-grade results without premium labor expenses.
Maintenance and Weatherproofing FAQ
How often should gutters be cleaned?
Inspect and clear debris twice yearly, focusing on spring and autumn when leaves accumulate most heavily. Use a gutter scoop followed by a hose flush for thorough results that maintain optimal flow throughout the year.
What weatherproofing steps are essential?
Apply exterior-grade sealant at all joints during initial assembly and again annually as part of routine checks. Install gutter guards in areas with heavy foliage to reduce clogs from organic matter. Ensure downspout extensions handle heavy rainfall volumes by extending them far enough from the home base.
Can these gutters handle extreme weather?
Both vinyl and aluminum perform well when installed correctly with adequate support spacing. Check local building codes for any additional requirements related to wind or snow loads in your specific region before finalizing the design.
What maintenance extends the lifespan of the system?
Regular inspections after major storms help catch loose hangers or minor separations early. Repainting aluminum sections every few years preserves appearance and adds a protective layer against oxidation.
Conclusion
Completing a DIY gutter installation on a fixer-upper empowers homeowners with practical skills and lasting home protection. Follow the outlined process, prioritize safety, and verify slope meticulously for optimal results. This approach aligns with 2026 trends in affordable home improvement projects that emphasize hands-on solutions and durable outcomes for older properties.

No comments yet. Be the first!