 Fixated on Home
Introduction to Budget Balcony Makeovers in 2026
Fixer-upper properties often come with overlooked outdoor spaces that hold huge potential. A neglected balcony can become a functional retreat with the right DIY approach focused on low-cost materials and practical builds. This guide explores strategies tailored for budget-conscious homeowners, emphasizing durability against weather challenges like wind exposure while maximizing small areas. Homeowners searching for ways to enhance their properties without major investments will find actionable advice here, covering everything from initial planning to long-term care.
Whether dealing with concrete slabs or basic railings, these ideas prioritize easy assembly using common tools. Homeowners can achieve professional-looking results without hiring contractors by sourcing from local suppliers and repurposing items. The focus remains on creating inviting spaces that add value and enjoyment to daily life in urban or suburban settings.
Assessing Your Balcony Before Starting
Begin with a thorough evaluation of your space. Measure dimensions, note sun exposure, and identify issues such as loose railings or poor drainage. Wind is a common challenge in urban or elevated settings, so prioritize stable designs that resist gusts. Small-space optimization involves vertical elements to free up floor area and create multi-functional zones. Consider factors like building codes in your area and any restrictions from homeowners associations that might affect modifications.
Create a simple checklist: inspect for structural integrity, measure twice for custom pieces, and plan for weather-resistant finishes. This preparation prevents costly mistakes later and ensures the projects align with your specific balcony conditions, whether it faces prevailing winds or receives intense afternoon sun.
Material Sourcing on a Budget
Focus on affordable, readily available supplies like pressure-treated lumber, recycled pallets, and basic hardware. Visit home improvement stores for sales or check community reuse centers. Opt for treated woods or composites that withstand moisture without frequent replacements. Repurposing old furniture or crates can further reduce expenses while adding unique character to the space.
Compare low-cost options like pine against more durable cedar. The former works for temporary setups, while the latter lasts longer in variable climates. Always seal surfaces for added protection. Explore local salvage yards for unique finds that can be adapted into rail planters or seating frames, promoting sustainability alongside affordability.
Project 1: Building Rail Planters
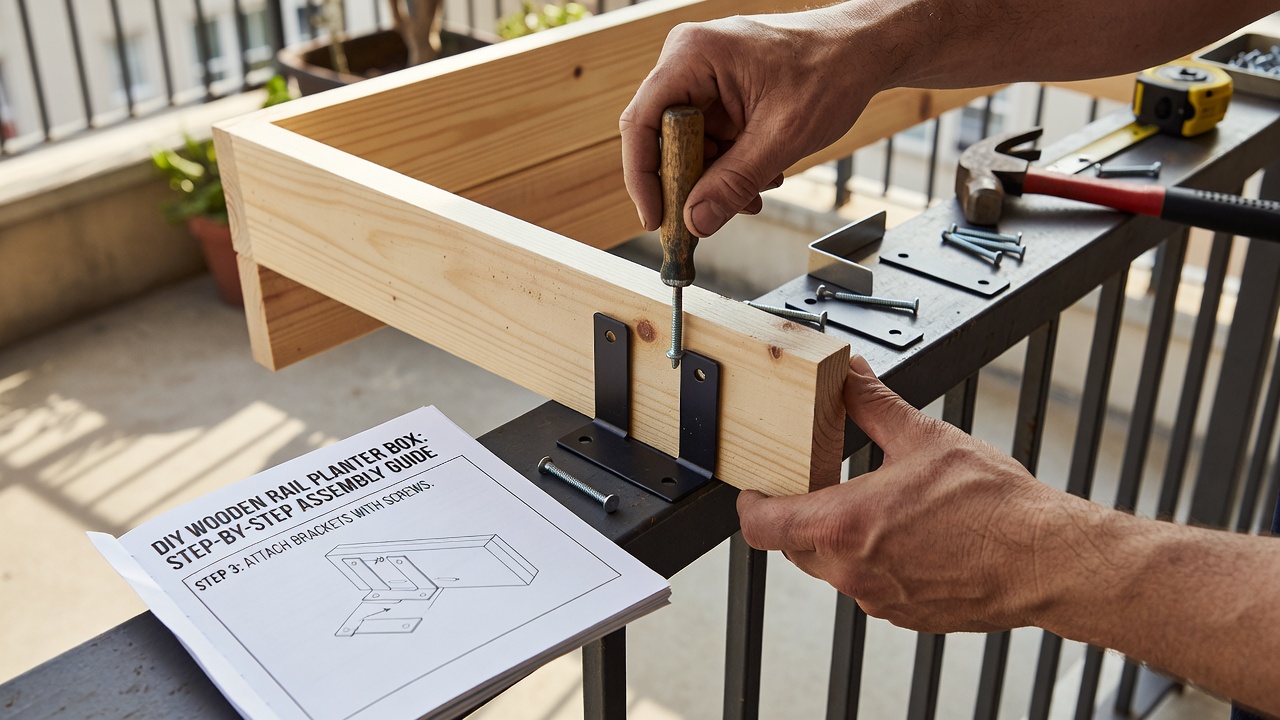
Rail planters add greenery without consuming floor space. Start by cutting wood to fit your railing width. Assemble boxes with screws, line with landscape fabric, and attach securely using brackets rated for outdoor use. This project suits beginners and can be completed in a few hours with basic power tools.
Step-by-step: 1. Measure railing precisely. 2. Cut base and sides from suitable lumber. 3. Drill drainage holes to prevent water buildup. 4. Mount and fill with soil and plants suited to your climate. These planters improve air quality and create visual interest year-round while helping to soften harsh architectural lines.
Project 2: Fold-Down Tables for Versatile Use
A fold-down table maximizes flexibility in tight quarters. Use hinges on a wall-mounted board supported by foldable brackets. Choose marine-grade plywood for moisture resistance and finish with exterior paint or stain. This setup serves as a workspace or dining surface that tucks away when not needed, making it ideal for compact balconies used for multiple purposes throughout the day.
Test stability before regular use, especially in windy conditions. Add a small lip around the edge to keep items from sliding off during breezes. Customize the size based on your available wall space and consider adding hooks underneath for hanging lightweight tools or decor.
Project 3: Weather-Resistant Seating Solutions
Simple benches or modular cushions from foam and outdoor fabric provide comfort. Build frames from 2x4 lumber and add slats for airflow. Waterproof covers extend lifespan significantly and protect against UV damage. Incorporate storage compartments beneath seats to keep cushions dry during unexpected weather changes.
Compare options: basic cushions cost less upfront but require more upkeep, while built-in benches offer permanence. Layer multiple cushions for added comfort and choose neutral colors that blend with surrounding architecture. These seating areas encourage relaxation and can double as extra surface space when needed.
Optimizing for Small Spaces and Wind Exposure
Vertical gardening and wall-mounted storage help maximize every inch. Use lattice panels as windbreaks that also support climbing plants. Position heavier items like planters low to the ground for stability during gusts. Experiment with folding or stackable furniture to adapt the space for entertaining or quiet reading sessions.
Before-and-After Case Studies
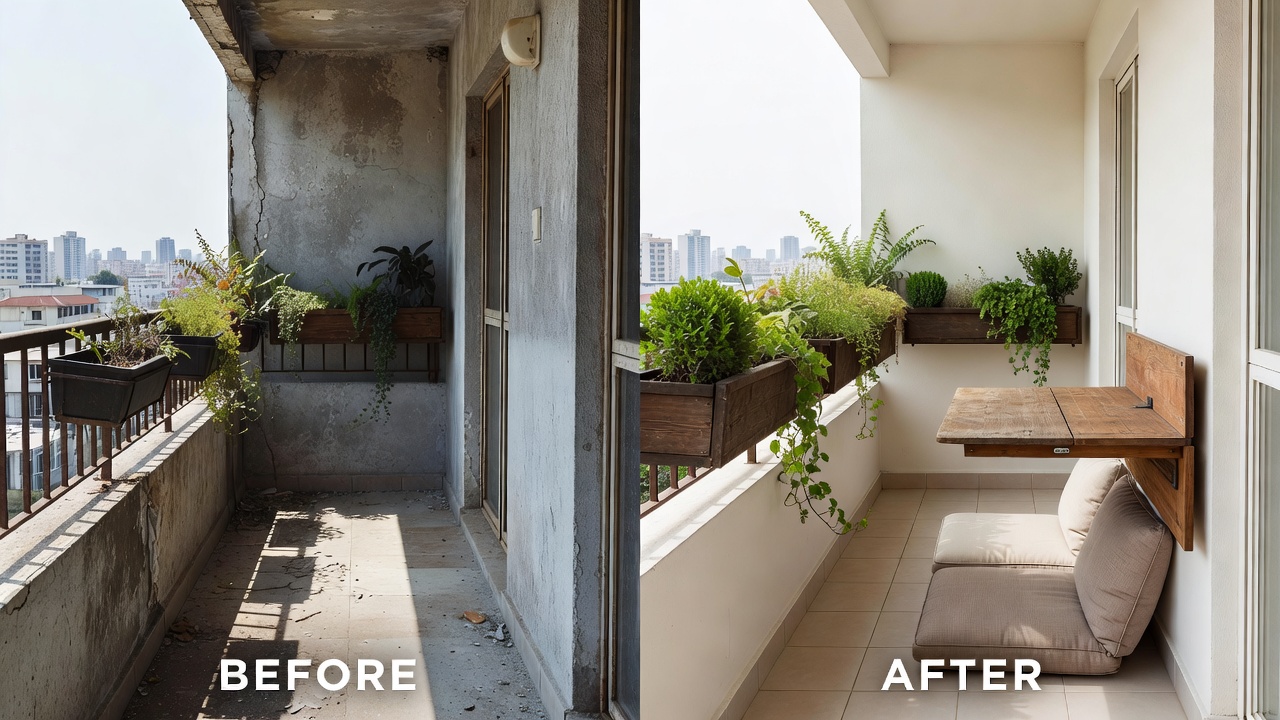
One homeowner converted a bare 4x6 foot balcony into a lush lounge using rail planters and a fold-down table. The transformation took one weekend and improved daily usability dramatically by adding seating and greenery. Another case involved adding windbreaks with lattice panels, turning an exposed area into a cozy nook suitable for morning coffee even on breezy days. A third example featured modular seating with hidden storage, allowing the owner to host small gatherings comfortably.
These examples highlight how targeted builds address specific pain points like limited seating or harsh elements, demonstrating real-world applications that inspire similar efforts.
Common Challenges and Solutions
- Wind exposure: Secure all items with heavy bases or ties; choose low-profile designs and avoid tall unstable structures.
- Small-space optimization: Leverage vertical walls and railings for storage and decor while keeping pathways clear.
- Maintenance: Select UV-resistant materials and inspect seasonally for wear, tightening hardware as needed.
- Drainage issues: Incorporate slopes or channels in flooring projects to direct water away from living areas.
Beginner Checklist and Practical Tools
Checklist items include safety goggles, measuring tape, drill, level, and weatherproof sealant. Break projects into phases: planning, sourcing, building, and finishing. Gather a core set of tools such as a cordless drill, handsaw, and sandpaper for smooth results. Always work on stable surfaces and wear appropriate protection during cutting or drilling.
Maintenance Tips and FAQ
How often should I reseal wood? Apply sealant annually before harsh seasons to maintain protection against moisture and sun.
Can these projects handle heavy rain? Yes, with proper drainage and elevated bases that allow water to flow freely.
What plants work best in rail planters? Drought-tolerant varieties like succulents and herbs thrive in exposed spots with limited soil depth.
How do I clean weather-resistant cushions? Spot clean with mild soap and allow to air dry completely before storage.
Are there safety considerations for elevated balconies? Always verify load-bearing capacity and avoid overloading railings with heavy attachments.
For more inspiration on outdoor DIY techniques, explore This Old House, Family Handyman, and Bob Vila. These resources offer reliable guidance for similar home upgrades.
Conclusion
With thoughtful planning, any fixer-upper balcony can evolve into a welcoming extension of your home. These 2026 DIY ideas emphasize accessibility, resilience, and creativity to deliver lasting value through practical, achievable projects.
No comments yet. Be the first!