 Fixated on Home
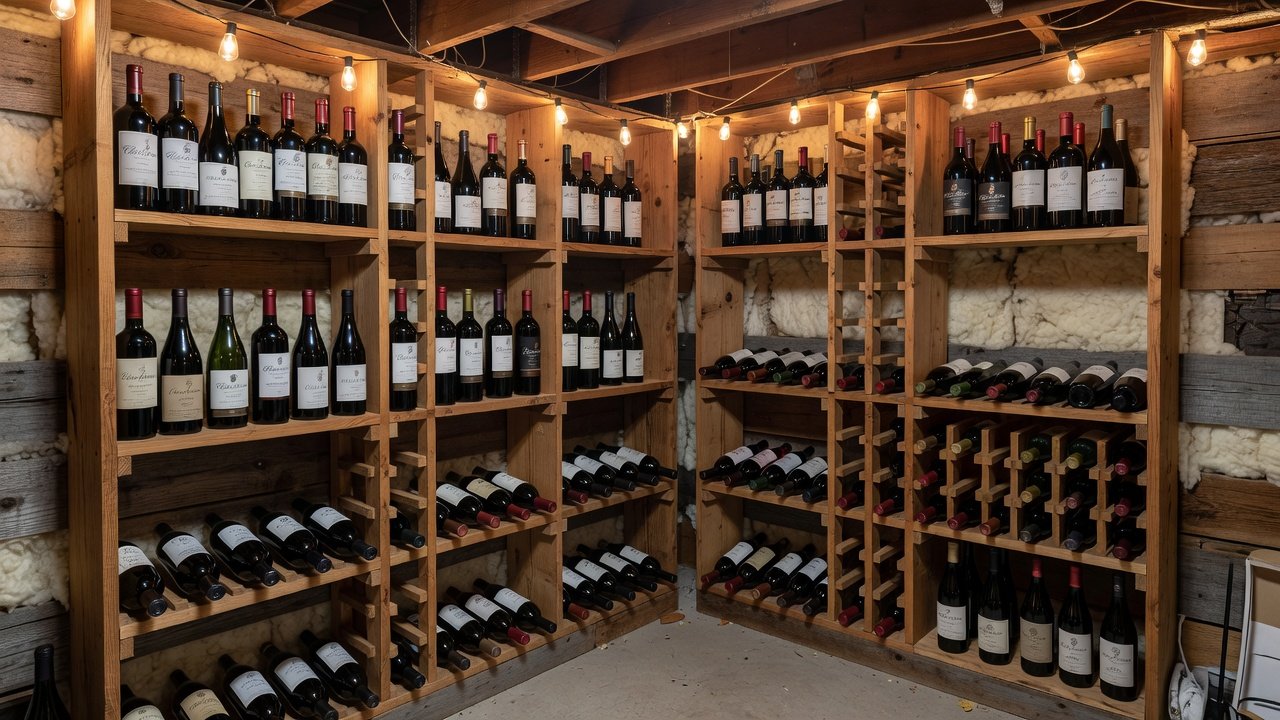
Introduction to Budget DIY Basement Wine Cellars
Homeowners tackling fixer-upper properties often seek practical ways to maximize underutilized basement space. A DIY wine cellar offers an elegant storage solution that preserves wine quality while adding value to the home. This guide explores budget-friendly strategies for 2026 builds, focusing on racking systems, insulation techniques, and humidity management that suit small or irregular basement layouts. With thoughtful planning, even novice renovators can achieve professional-grade results without hiring contractors. The key lies in understanding how basements naturally maintain cooler temperatures and adapting simple home improvement methods to create stable environments for wine preservation.
Successful projects start with careful planning to address common challenges like moisture and temperature fluctuations. By sourcing affordable materials and following structured assembly steps, enthusiasts can create functional cellars without professional installation. This approach aligns perfectly with fixer-upper lifestyles where every dollar and square foot counts toward long-term home enjoyment and potential resale value.
Selecting the Ideal Basement Location
Basements provide natural cooling advantages, but not every corner works equally well. Choose an interior wall away from exterior doors or windows to minimize temperature swings. Assess the space for existing utilities and ensure adequate headroom for racks. Measure the area precisely to determine bottle capacity needs, whether for 50 bottles or several hundred. Consider factors such as proximity to electrical outlets for monitoring devices and ease of access for regular use. Avoid areas near water heaters or furnaces that could introduce unwanted heat or vibrations.
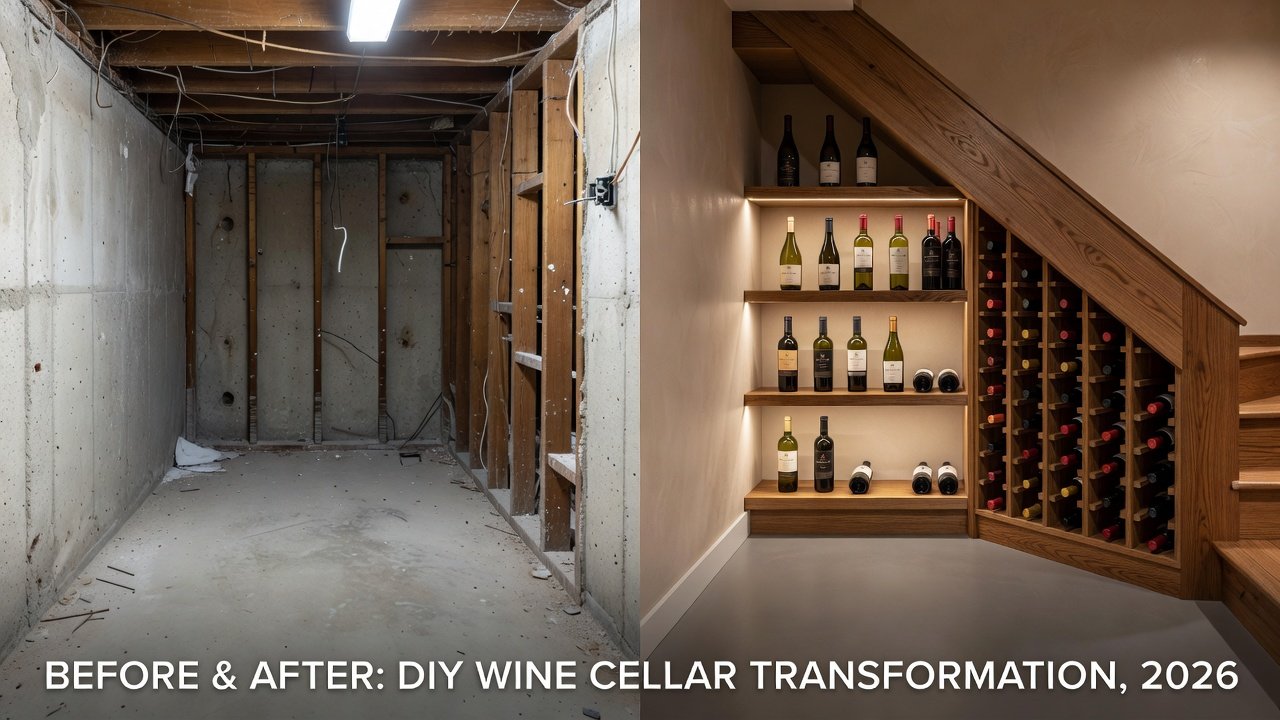
Real-world examples from small-space conversions show that corner alcoves or under-stair areas convert efficiently into wine storage zones when properly prepared. One common mistake is overlooking airflow patterns, which can lead to uneven cooling. Walk through the basement at different times of day to observe natural light and temperature variations before committing to a spot.
Assessing Space and Initial Planning
Begin by sketching a simple floor plan that includes rack dimensions, walking paths, and any necessary ventilation gaps. Account for door swing if adding an enclosure and verify that the floor can support the weight of filled racks. Test the area for existing dampness using basic moisture meters available at hardware stores. This preliminary work prevents costly rework later and ensures the final cellar fits seamlessly into the existing basement layout.
Material Sourcing for Cost-Effective Builds
Focus on readily available lumber, plywood, and basic hardware from local suppliers. Pine or cedar works well for racks due to natural resistance to warping. For insulation, rigid foam boards or fiberglass batts provide effective barriers. Source humidity control devices like small dehumidifiers or passive silica packs designed for enclosed spaces. Look for reclaimed or discounted materials at salvage yards to further reduce expenses while maintaining quality. Always inspect wood for straightness and dryness to avoid future structural issues.
Compare rack styles such as diamond bin configurations versus traditional shelving. Diamond bins maximize space for larger collections, while horizontal shelving allows easier label viewing for smaller setups under 100 bottles. Modular options offer flexibility if your collection grows over time.
Step-by-Step Assembly Instructions
- Prepare the space by cleaning walls and floors, then apply a moisture barrier if needed. Seal any visible cracks with appropriate caulk.
- Install insulation along walls and ceiling using vapor-retardant methods to maintain stable conditions. Overlap seams and tape edges for a continuous barrier.
- Construct the frame with 2x4 lumber cut to measured dimensions, securing with screws for durability. Double-check levelness at every stage.
- Build individual racks by notching shelves to cradle bottles securely, spacing rows according to bottle size. Sand all edges to prevent splinters.
- Assemble and anchor the unit to the wall for safety, then add finishing touches like staining for aesthetics. Allow adequate drying time before loading bottles.

Insulation, Humidity, and Temperature Monitoring
Proper insulation prevents condensation and keeps temperatures consistent between 50-60 degrees Fahrenheit. Pair this with humidity levels around 50-70% using affordable hygrometers for ongoing monitoring. Digital sensors connected to simple apps offer alerts for deviations, helping maintain ideal storage conditions long-term. In regions with seasonal extremes, consider adding a small exhaust fan controlled by a thermostat to assist natural basement cooling.
Links to authoritative guidance on indoor environmental control can be found at EPA resources and energy efficiency tips. Additional safety information is available through OSHA guidelines.
Comparisons of Rack Styles and Bottle Capacities
- Traditional shelving: Best for 24-72 bottles; easy access and visibility; requires more wall space.
- Bin-style racks: Ideal for 100+ bottles; compact footprint in tight spaces; good for bulk storage.
- Modular stackable units: Flexible for growing collections; budget-friendly expansion; can be reconfigured as needed.
- Custom angled designs: Allow sediment settling in older wines; suited for enthusiasts with varied vintages.
Evaluate based on your collection size and available floor space to avoid overcrowding. Test-fit a few bottles during construction to confirm spacing works for standard and larger formats.
Real Examples from Small-Space Conversions
One homeowner transformed a 6x8-foot basement nook into a 150-bottle cellar using reclaimed wood and basic foam insulation. Another project in a damp foundation area incorporated raised flooring and passive ventilation for success. A third example involved converting an old coal room with added dehumidification, resulting in stable conditions year-round. These cases highlight adapting to unique fixer-upper constraints like uneven floors or low ceilings while staying within modest material budgets.
Maintenance Routines and Safety Tips
Regular inspections for mold or leaks ensure longevity. Clean racks seasonally and recalibrate monitors. Always secure heavy units to studs and avoid overloading shelves. For moisture challenges, address any foundation issues before finalizing the build. Keep a simple log of temperature and humidity readings to spot trends early. Safety considerations include proper ventilation to prevent musty air buildup and using non-toxic finishes on all wood surfaces.
Common Mistakes to Avoid
Many first-time builders skip the moisture barrier, leading to warped racks within months. Others underestimate the importance of consistent monitoring, resulting in spoiled bottles. Overbuilding without measuring twice often causes fit issues in irregular basement spaces. Planning for future expansion from the start saves time and effort.
Frequently Asked Questions
How do I handle high basement moisture?
Use vapor barriers and dehumidifiers rated for enclosed areas to stabilize humidity without excessive energy use. Combine with regular checks for foundation seepage.
What if space is very limited?
Vertical rack designs and corner placements maximize capacity in compact fixer-upper basements. Consider wall-mounted options where floor area is scarce.
Are there alternatives to full insulation?
Targeted wall treatments combined with monitoring often suffice for moderate climates. Focus efforts on the most exposed surfaces first.
How often should racks be cleaned?
Seasonal dusting and inspection help maintain appearance and prevent dust accumulation that could affect bottle labels or airflow.
Conclusion
Creating a DIY basement wine cellar transforms unused space into a personalized asset. With thoughtful material choices, precise assembly, and consistent maintenance, budget-conscious homeowners achieve professional results. Apply these techniques to your next renovation for satisfying, long-lasting wine storage that enhances both your home and your enjoyment of fine wines.
No comments yet. Be the first!