 Fixated on Home
Introduction to Budget-Friendly Pantry Builds
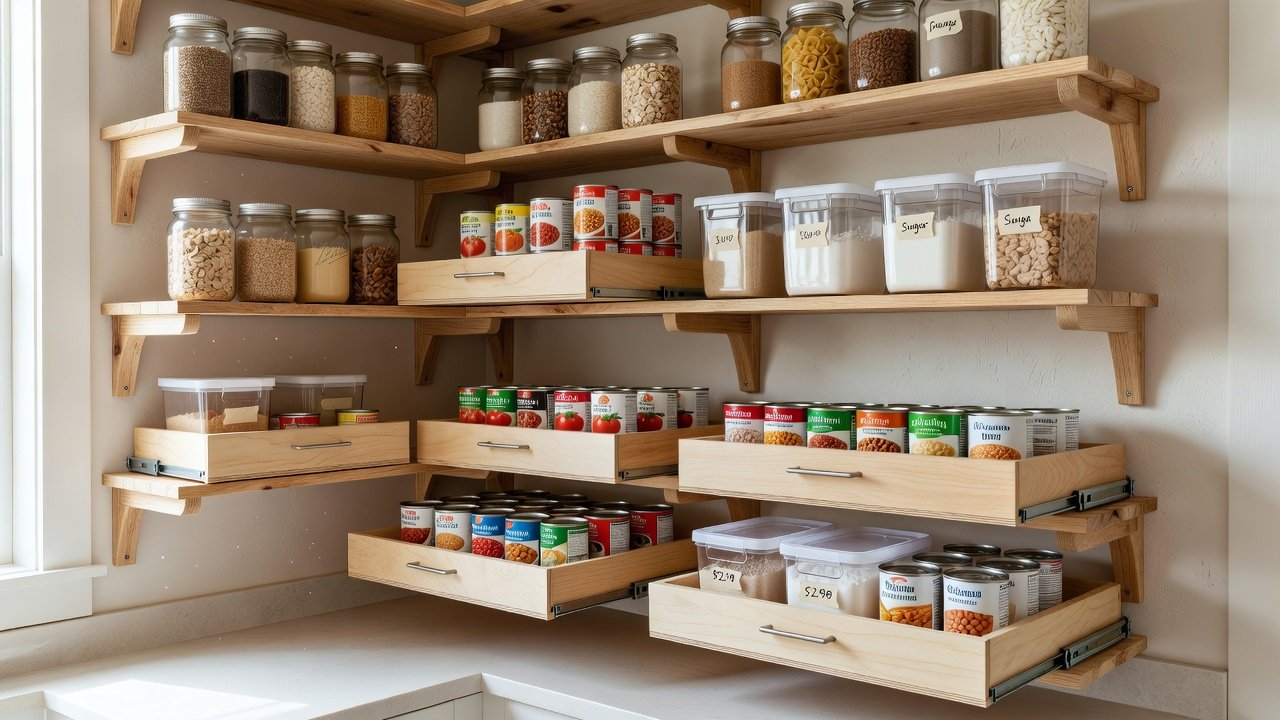
Fixer-uppers frequently suffer from disorganized storage spaces that waste valuable square footage and frustrate daily routines. A well-planned DIY pantry renovation transforms these overlooked areas into efficient, accessible hubs for food and kitchen essentials. This comprehensive 2026 guide delivers beginner-friendly how-to advice tailored specifically for homeowners working within strict budgets. Readers will learn proven strategies for planning layouts that suit irregular spaces, sourcing durable materials without overspending, and completing step-by-step builds such as sturdy shelving and smooth-operating pull-out organizers. Additional coverage includes space optimization techniques, side-by-side material comparisons, and inspiring real-home case studies that demonstrate dramatic before-and-after transformations. Practical elements throughout feature numbered installation instructions, troubleshooting tips, and an expanded FAQ addressing frequent challenges like moisture control and long-term maintenance. By focusing on practical, repeatable methods, this resource helps create pantries that improve kitchen workflow while adding lasting value to older properties.
Planning Your Pantry Layout
Effective pantry design begins with accurate measurements of the available footprint, including height, width, and depth. Sketch multiple layout options on paper or with free digital tools to visualize traffic patterns and reachability. U-shaped configurations work well in deeper closets, while straight-wall or L-shaped arrangements suit narrow alcoves common in fixer-uppers. Factor in door swing direction, electrical outlet locations for lighting or small appliances, and natural ventilation paths. Prioritize zones for different item categories such as dry goods, canned foods, and small appliances. Leave at least 12 inches of clearance above the floor for easy cleaning and consider future needs like additional family members or bulk purchasing habits. Beginners benefit from starting with modular components that can be reconfigured later without major demolition.
Sourcing Affordable Materials
Selecting cost-effective yet reliable materials forms the foundation of any successful budget project. Pine boards and plywood sheets deliver solid performance at accessible prices, while wire shelving systems provide excellent visibility and airflow. Compare options carefully: solid lumber withstands heavier loads over time compared to pressed particleboard, and powder-coated metal brackets resist rust better in humid environments. Visit local salvage yards, reuse centers, and clearance aisles at major retailers to find straight, high-quality pieces. Sand all surfaces thoroughly before assembly to prevent splinters and ensure finishes adhere properly. Always verify that chosen materials meet basic safety standards for food storage areas.
Essential Tools and Preparation
Before beginning construction, gather a core set of tools including a cordless drill, circular saw or hand saw, level, measuring tape, stud finder, sandpaper assortment, and safety glasses. A laser level speeds up accurate marking on uneven walls typical of older homes. Prepare the workspace by clearing the area, protecting floors with drop cloths, and ensuring good lighting. Double-check that all fasteners and hardware are rated for the expected weight loads of pantry contents. Having everything organized beforehand reduces mid-project trips to the store and keeps momentum high.
Step-by-Step Shelving Installation
Follow these detailed steps for reliable, adjustable shelving that maximizes vertical space:
- Locate wall studs using a reliable stud finder and mark their positions clearly.
- Measure and mark horizontal lines at desired shelf heights with a laser level for precision.
- Secure mounting brackets or wooden cleats directly into studs using appropriate length screws.
- Cut shelf boards to exact lengths, sand all edges smooth, and apply a protective sealant if desired.
- Position shelves on the supports, test stability by applying gradual pressure, and adjust as needed.
- Repeat for additional tiers while maintaining at least 12 inches between levels for easy access to large items.
This methodical approach produces professional-grade results even for first-time builders.
Building Pull-Out Organizers
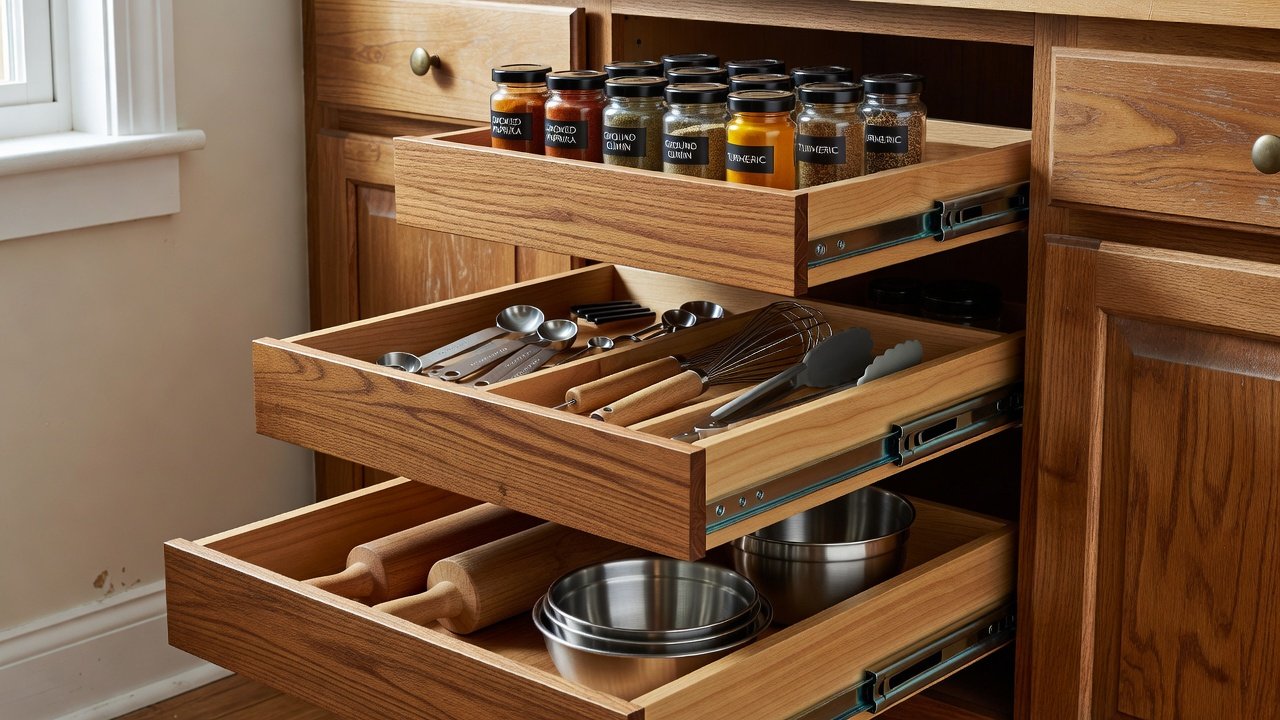
Pull-out organizers convert deep or awkward pantry sections into highly usable storage. Construct simple drawer boxes from plywood using basic butt joints reinforced with wood glue and screws. Attach heavy-duty drawer slides rated for kitchen use to both the box sides and the cabinet interior. Test the sliding motion multiple times before final installation and add stops to prevent over-extension. Incorporate dividers inside the drawers for separating spices, baking supplies, or small gadgets. Line the bottoms with easy-to-clean shelf paper to contain spills and simplify maintenance.
Space Optimization Hacks
- Mount narrow racks on the inside of the pantry door to store lightweight items such as seasoning packets, measuring cups, and reusable bags without consuming shelf space.
- Employ clear stackable bins with labels to group similar products together, making inventory checks quick and reducing duplicate purchases.
- Install under-shelf baskets that hang from existing shelves to create an extra layer of storage for smaller packages.
- Add adhesive hooks or hanging rods along side walls for brooms, aprons, or reusable shopping totes.
- Use turntables or lazy Susans in corner areas to bring items from the back into easy reach without rearranging everything.
Implementing several of these low-effort hacks can dramatically increase usable capacity in compact fixer-upper pantries.
Material Comparisons for Durability
Choosing between wood, wire, and laminate requires understanding how each performs in real-world conditions. Solid wood provides attractive aesthetics and superior strength for heavy canned goods but needs periodic sealing to resist moisture. Wire systems excel at ventilation and allow quick visual inventory but may allow smaller items to fall through gaps. Laminate-coated boards offer moisture resistance and easy cleaning, making them suitable for homes in humid climates. Evaluate your specific environment, expected load weights, and aesthetic preferences before committing to one material throughout the project.
Real-Home Case Studies
In one city row house renovation, a cramped under-stair alcove measuring just three feet wide was converted into a functional pantry using basic pine shelving and door-mounted racks. The transformation allowed the homeowners to relocate overflow items from kitchen counters, improving meal preparation efficiency. Another suburban fixer-upper project focused on retrofitting an existing pantry with custom pull-out drawers built from leftover plywood. This change particularly benefited residents with limited mobility by eliminating the need to reach deep into shelves. A third example involved a historic home where vertical space was maximized with ceiling-height adjustable units, resulting in organized storage that preserved original architectural details while meeting modern needs. Each case highlights how thoughtful planning and simple builds deliver noticeable improvements in daily living.
Moisture Control and Maintenance
Older homes often face humidity challenges that can damage stored food and cabinetry. Install vents or small exhaust fans if the space lacks natural airflow. EPA guidance on moisture management emphasizes regular inspections and prompt repairs of any leaks. Apply mold-resistant primer and paint to all wooden surfaces during construction. Place moisture-absorbing packets on lower shelves and check them seasonally. CDC recommendations for preventing mold suggest keeping indoor humidity below 50 percent when possible. Routine cleaning with mild soap and thorough drying prevents buildup that leads to odors or structural issues over time.
Common Mistakes to Avoid
Many first-time builders overlook stud locations, resulting in wobbly shelves that fail under load. Another frequent error is underestimating clearance needs between shelves, which makes retrieving large items difficult. Skipping surface preparation such as sanding leads to rough finishes that snag packaging. Always plan for future expansion rather than building rigid systems that cannot adapt. Finally, neglecting to test slide mechanisms thoroughly before stocking organizers can cause frustrating jams later.
FAQ
How do I handle uneven walls in old homes? Use shims behind cleats or brackets to create level mounting surfaces before attaching shelves.
What if my budget is extremely limited? Begin with freestanding shelving units that require no wall modifications and upgrade to built-ins later.
Can these projects be completed in a weekend? Yes, most basic shelving and organizer builds finish within two days when materials are pre-cut and tools are ready.
How should I address potential pest issues? Seal all gaps around baseboards and use airtight containers for open food packages.
Is lighting necessary in a small pantry? Battery-powered LED strips or motion-sensor lights improve visibility without requiring electrical work.
Conclusion
These 2026 DIY pantry build ideas provide fixer-upper owners with actionable, budget-conscious methods to create organized, durable storage solutions. Through careful planning, quality material choices, and methodical execution, homeowners achieve professional outcomes that enhance daily kitchen functionality and support long-term property value. Applying the techniques and lessons shared here empowers anyone to tackle pantry renovations with confidence and lasting success.
No comments yet. Be the first!