 Fixated on Home
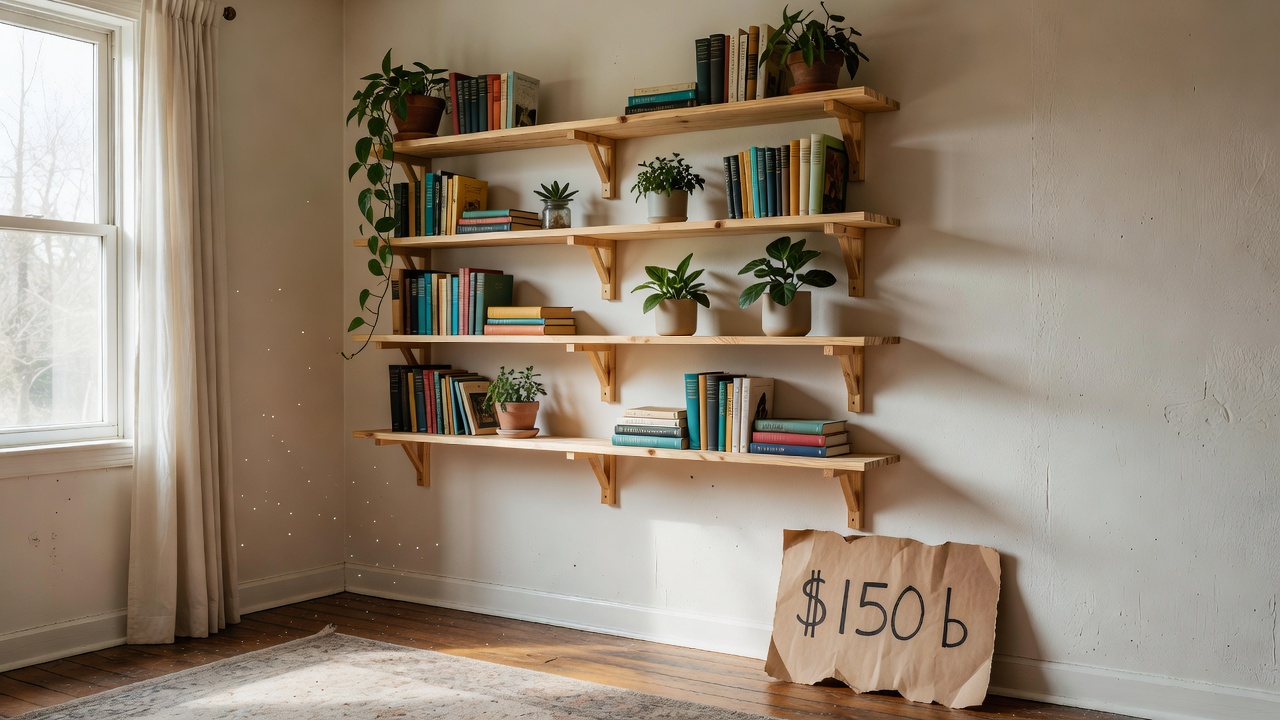
Introduction to 2026 Budget Built-In Shelving
Fixer-uppers in 2026 continue to attract homeowners seeking personalized spaces without high costs. Custom built-in shelving offers a practical way to add storage while enhancing room aesthetics. This approach aligns perfectly with budget reno trends, allowing you to transform underutilized walls and corners into functional features that feel custom and intentional. Whether you are updating a living room, bedroom, or even a hallway, these projects emphasize affordability and simplicity using basic home improvement techniques.
Modern fixer upper ideas often revolve around maximizing every square foot. Built-in shelving achieves this by turning blank walls into organized display areas or hidden storage zones. With careful planning, even complete beginners can achieve professional-looking results that blend seamlessly with existing architecture.
Why Built-In Shelving Suits Modern Fixer-Uppers
Built-ins provide seamless integration compared to freestanding furniture. They maximize vertical space in smaller homes common among budget renovations. In 2026, trends favor minimalist designs with natural wood tones, modular elements that adapt to evolving layouts, and sustainable material choices that reduce waste. These solutions address common pain points like cluttered rooms and limited storage by building directly into walls, creating a polished look that increases perceived home value over time.
Unlike store-bought bookcases that can feel temporary, custom units become permanent upgrades. They also allow for creative adaptations such as incorporating lighting or adjusting depths to fit awkward alcoves found in older properties.
2026-Specific Design Trends for Budget Projects
This year emphasizes mixed materials like wood paired with metal accents and neutral color palettes that make small spaces feel larger. Homeowners are incorporating floating elements and asymmetrical arrangements to add visual interest without extra expense. Sustainable sourcing and multi-functional designs that double as room dividers are gaining popularity in fixer upper communities.
Material Sourcing Under $150
Start at local hardware stores or online marketplaces for lumber, brackets, and finishes. Pine boards, plywood sheets, and basic brackets often keep totals low. As of 2026-07-17, many DIYers source everything needed for under $150 by choosing reclaimed wood or sales items. Visit Home Depot for reliable options on dimensional lumber and brackets that suit most wall-mounted builds. Consider these options: standard 1x10 pine boards for shelves, 2x4 framing lumber, and metal L-brackets. Always measure twice before buying to avoid waste and check for straight, knot-free pieces.
Essential Tool List
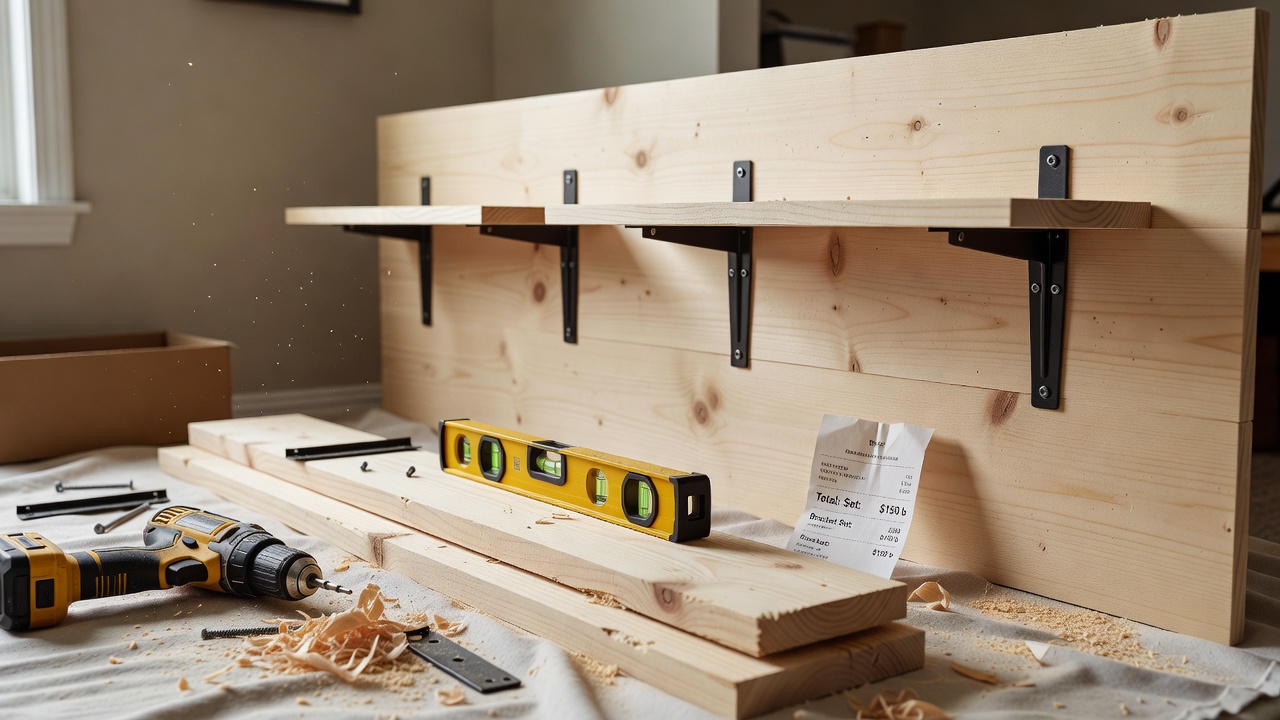
These tools cover both wall-mounted and freestanding builds. Beginners can borrow or rent specialty items to control expenses. A reliable list includes a circular saw or handsaw for cutting, a drill with various bits for pilot holes and driving screws, a four-foot level and measuring tape for accuracy, a screwdriver set, orbital sander, wood glue, stud finder, and safety glasses. Optional but helpful additions are a speed square for angled cuts and clamps to hold pieces steady during assembly.
Planning and Measuring Your Space
Before any cutting begins, sketch your layout on paper and note stud locations. Account for electrical outlets, baseboards, and ceiling height. Allow at least 12 inches of clearance above and below each shelf for practical use. Double-check all measurements against the actual wall to prevent costly mistakes later in the process.
Step-by-Step Assembly: Wall-Mounted Unit
Locate studs using a stud finder and mark their positions clearly with painter's tape. Mark shelf positions at desired heights after confirming level lines across the wall. Cut boards to length using your saw and sand all edges smooth to prevent splinters. Secure brackets into studs with long construction screws rated for the expected load. Attach shelves to brackets using shorter screws and apply your chosen finish such as stain or paint for protection and style. Always check level at each stage to prevent sagging over time. For added strength, consider adding a backer board between shelves and the wall.
Freestanding Unit Construction
Build a simple box frame with 2x4s for the base and sides. Add vertical supports spaced no more than 24 inches apart and horizontal shelves resting on cleats or brackets. Reinforce all corners with additional brackets and wood glue. This design moves easily if layouts change later and works well in open-concept spaces where permanent wall mounting is not desired.
Design Comparisons
Wall-mounted options save floor space but require solid walls with accessible studs. Freestanding units offer flexibility yet occupy more room and may need anchoring for safety. Compare both against your room's traffic patterns and weight requirements before choosing. Wall-mounted units often look more built-in, while freestanding can be relocated during future renovations.
Before-and-After Examples
A narrow hallway transforms from wasted space into a library nook with floating shelves holding books and decorative items. An empty corner in the living room becomes a media center after adding a custom unit with integrated lighting and cable management. In one bedroom project, a long wall received staggered shelving that doubled display space while hiding seasonal clothing bins below.
Integration Tips with Existing Layouts
Match shelf depth to nearby furniture for visual harmony. Use the same paint color as walls for a built-in appearance that recedes into the architecture. Add baskets or bins for hidden storage that maintains clean lines. Consider how the new shelving interacts with windows, doors, and existing art to avoid visual clutter.
Cost Breakdowns
Expect primary expenses in lumber and hardware. Finishes and accessories add smaller amounts. Track every purchase to stay within budget during the project. Many successful budget reno projects keep material costs minimal by repurposing offcuts and shopping end-of-season clearances.
Common Pitfalls to Avoid
- Skipping stud location, leading to weak installations that fail under load
- Overloading shelves without proper support spacing or thicker materials
- Ignoring moisture levels in wood before assembly, which can cause warping
- Choosing mismatched finishes that clash with room decor and reduce cohesion
- Failing to account for baseboard height, resulting in uneven gaps at the floor
Maintenance and Safety Considerations
After installation, periodically check brackets for tightness. Dust shelves regularly and avoid placing heavy items on upper levels. Follow basic safety guidelines from sources like Lowe's when working with power tools. Wear protective gear and work in well-ventilated areas when applying finishes.
FAQ
Can beginners complete these projects?
Yes, with basic tools and patience. Start with a simple wall-mounted design before advancing to more complex freestanding builds.
How long does assembly take?
Most units finish in one weekend, including drying time for finishes and any painting steps.
What if walls are uneven?
Use shims behind brackets to create level surfaces and ensure stable mounting.
Are permits required for built-in shelving?
Usually not for non-structural additions, but check local codes if modifying load-bearing walls.
How do I choose the right wood type?
Pine works well for painted projects, while oak or maple suits stained finishes for durability.
Conclusion
These 2026 DIY built-in shelving ideas empower budget-conscious homeowners to upgrade fixer-uppers effectively. With careful planning and the right materials, you achieve custom storage that elevates any space while staying aligned with current fixer upper ideas and budget reno practices.
No comments yet. Be the first!