 Fixated on Home
Introduction to Budget-Friendly Craft Rooms in Fixer-Uppers
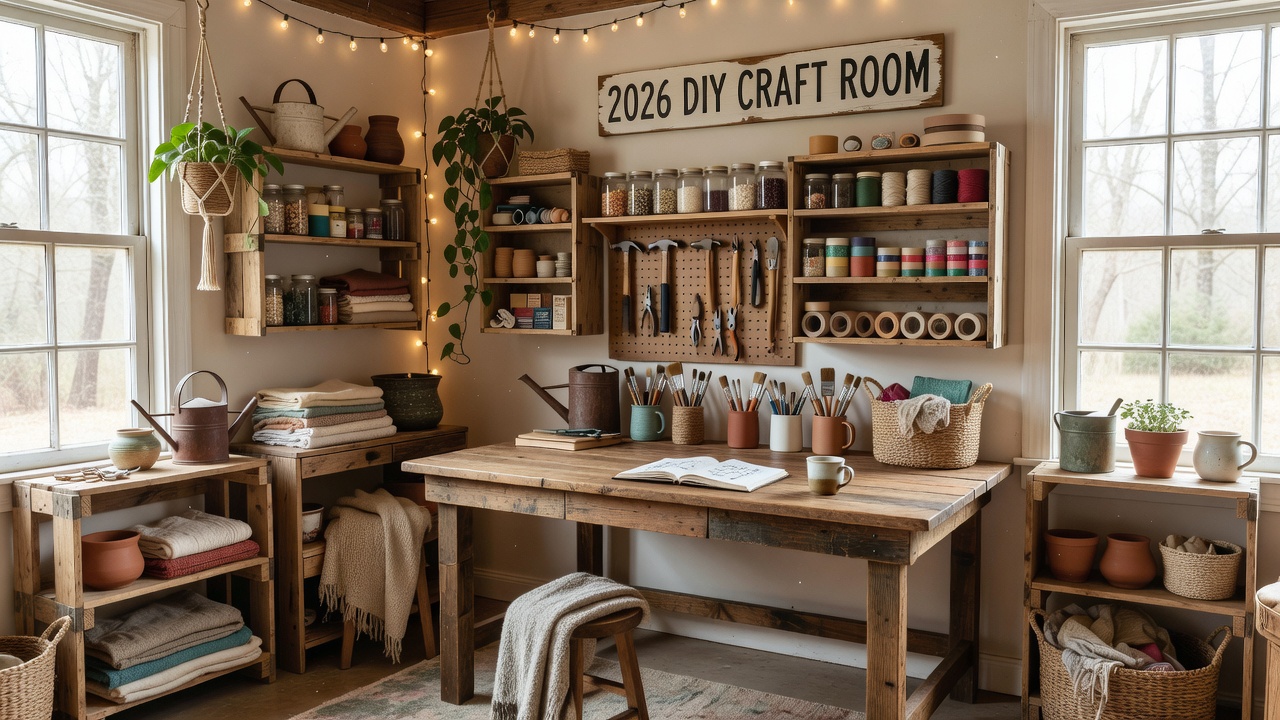
Creating a dedicated craft room in a fixer-upper home does not require a large renovation budget. In 2026, trends emphasize upcycled decor and sustainable DIY hacks that transform underused spaces into functional creative areas. This guide covers space planning, material sourcing, and step-by-step projects to help beginners achieve professional results while keeping costs low. Fixer-uppers often present challenges like uneven floors and limited outlets, yet these can be addressed with creative, low-cost solutions. Focus on modular systems that adapt as your needs evolve, allowing your craft space to grow alongside your skills and projects.
Many homeowners in older properties struggle with awkward layouts or damaged walls, but these elements can become design opportunities. By prioritizing functionality and eco-conscious choices, you can build a room that supports everything from sewing and painting to scrapbooking and woodworking. The emphasis on sustainability in 2026 means sourcing materials locally and repurposing what you already have, reducing environmental impact while adding unique character to your space.
Space Planning on a Tight Budget
Start by measuring your available area and sketching a simple floor plan. Prioritize zones for work surfaces, storage, and lighting. Use painter's tape on the floor to visualize layouts before committing. In fixer-uppers, account for existing architectural features like exposed beams that can double as hanging points for tools or lighting fixtures. Consider traffic flow so you can move freely between stations without tripping over supplies.
Consider multi-use functionality by designing foldable elements that convert the space for other household needs. Sustainable practices, such as reusing existing furniture, align with 2026 eco-trends highlighted by the EPA. Compare open-concept layouts versus divided zones: open plans encourage collaboration if you craft with family, while divided areas help contain messes like paint splatters or fabric scraps. Mistakes to avoid include overcrowding the room early on—leave at least 30 percent of floor space clear for movement and future expansions.
Sourcing Reclaimed Materials
Reclaimed wood from local salvage yards or deconstructed pallets offers character without high expense. Inspect for structural integrity and sand surfaces smooth. Metal brackets from hardware stores complement these pieces for sturdy shelving. Always wear protective gear when handling older materials to avoid dust and splinters. Seek out barn wood, old doors, or even discarded furniture frames that can be disassembled and reinvented.
Partner with community groups or online marketplaces for free or low-cost finds. This approach reduces waste and supports circular economy principles promoted by environmental authorities. Compare new versus reclaimed: reclaimed options often carry natural patina that enhances visual interest, though they may require extra preparation time. Practical tip: create a checklist for material quality—check for rot, nails, and stability before transport. Another example is sourcing vintage crates from flea markets to serve as both storage and decorative accents.
Building Custom Tables
A custom work table forms the heart of any craft room. Use two sawhorses as legs and a reclaimed door or plywood top for the surface. Secure with screws and add casters for mobility. Beginners can complete this in a weekend, with time estimates around 4-6 hours including finishing. For added functionality, incorporate built-in cable management using PVC pipes routed underneath. This setup supports various crafts from sewing to painting.
Compare different table heights: a 36-inch surface suits standing work like cutting fabric, while 30 inches works better for seated tasks such as drawing. Step-by-step instructions include leveling the top with shims if your floor is uneven, a common fixer-upper issue. One real project example involved a couple who built two modular tables that could be pushed together for large projects or separated for individual use, completing the build over a long weekend with basic tools.
Wall Storage Systems and Modular Organizers
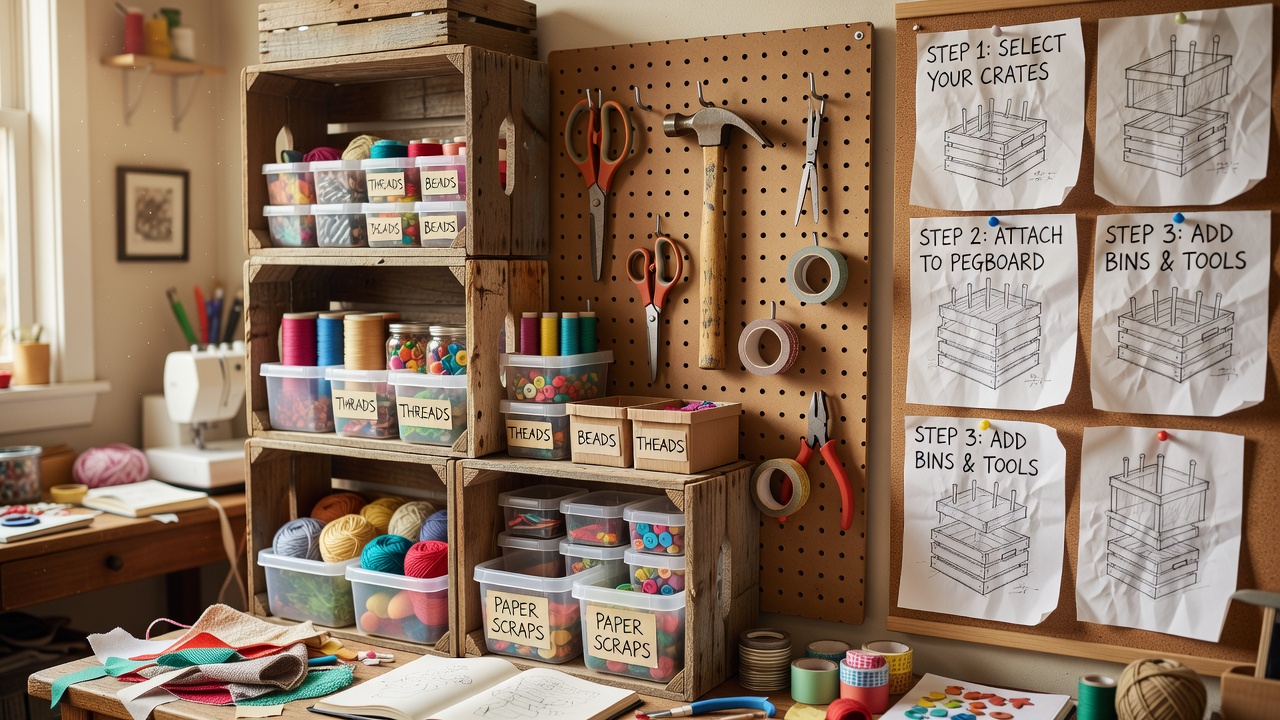
Wall-mounted pegboards provide flexible storage for tools and supplies. Cut reclaimed wood into strips and attach French cleats for easy repositioning. Step-by-step: measure and mark stud locations, pre-drill holes, then install with appropriate anchors. This project takes 3-5 hours for a standard 4x8 foot section. Modular organizers made from repurposed crates or bins stack efficiently. Label each with chalkboard paint for quick identification. These systems maximize vertical space in small fixer-upper rooms.
Expand your system over time by adding hooks, baskets, and magnetic strips for small items. A scannable list of common supplies to organize includes: paintbrushes sorted by size, scissors in dedicated holders, thread spools on dowels, and paper stacks in vertical files. Mistakes to avoid here include overloading walls without proper anchoring, which can lead to sagging or falls. Another practical example is a crafter who turned an entire wall into a rotating display using inexpensive tension rods and clips, allowing seasonal decor swaps without permanent changes.
Lighting Upgrades and Flooring Refreshes
Upgrade lighting with affordable LED strips or clamp-on work lamps positioned to reduce shadows. Natural light from windows can be enhanced by reflective surfaces like mirrors on adjacent walls. Aim for layered lighting: overhead for general use and task lamps for detail work. In 2026, many DIYers incorporate smart bulbs that adjust color temperature for different crafts, such as warm tones for relaxing knitting sessions.
For flooring, apply peel-and-stick vinyl tiles over existing subfloors after thorough cleaning. This refresh protects against spills common in craft projects and adds visual appeal. Focus on durable, easy-clean options that withstand heavy use. Compare options like rubber mats for standing comfort versus hard surfaces for easy rolling of chairs. Before-and-after photos from similar projects show how simple lighting tweaks dramatically improve visibility and mood in previously dim corners.
Real Project Examples and Time Estimates
One successful example involved converting a spare bedroom corner using only salvaged lumber and basic hardware. The result featured a 6-foot table, overhead shelving, and rolling storage carts completed in under 20 hours across three days. Another project used upcycled shipping pallets for a vertical garden wall that doubled as decor, finished in a single afternoon. A third case study highlighted a family who refreshed an attic space with insulation upgrades disguised as stylish fabric panels, taking two weekends total.
Before-and-after transformations often show how minor tweaks like paint and organization turn cluttered spaces into inspiring studios. Track progress with photos to document your own journey and share on community forums for inspiration. Time estimates for beginners should always include buffer time for learning curves and unexpected issues like stubborn old paint layers.
FAQ: Common Challenges in DIY Craft Rooms
- How do I control dust in a shared home? Use a shop vac with HEPA filter and designate a dedicated zone with plastic sheeting barriers. Regular cleaning routines prevent buildup that affects air quality.
- What if the room needs to serve multiple purposes? Incorporate fold-down tables and wheeled furniture for quick reconfiguration. Test layouts during planning to ensure smooth transitions between uses.
- Are sustainable hacks reliable long-term? Yes, when properly sealed and maintained, upcycled materials perform comparably to new ones. Seal wood surfaces to protect against moisture common in older homes.
- Where can beginners find step-by-step guidance? Resources from established home improvement sites like This Old House offer detailed tutorials. Join local workshops for hands-on practice.
Addressing these issues early ensures your craft room remains practical and enjoyable for years. Additional tips include budgeting time for maintenance and choosing versatile tools that serve multiple crafts.
Conclusion
With thoughtful planning and reclaimed materials, any fixer-upper can host a vibrant craft room in 2026. Embrace sustainable DIY approaches to create a personalized space that sparks creativity without breaking the bank. Start small, iterate often, and enjoy the process of building something truly your own. Explore further resources from HGTV for ongoing inspiration as trends evolve.
No comments yet. Be the first!