 Fixated on Home
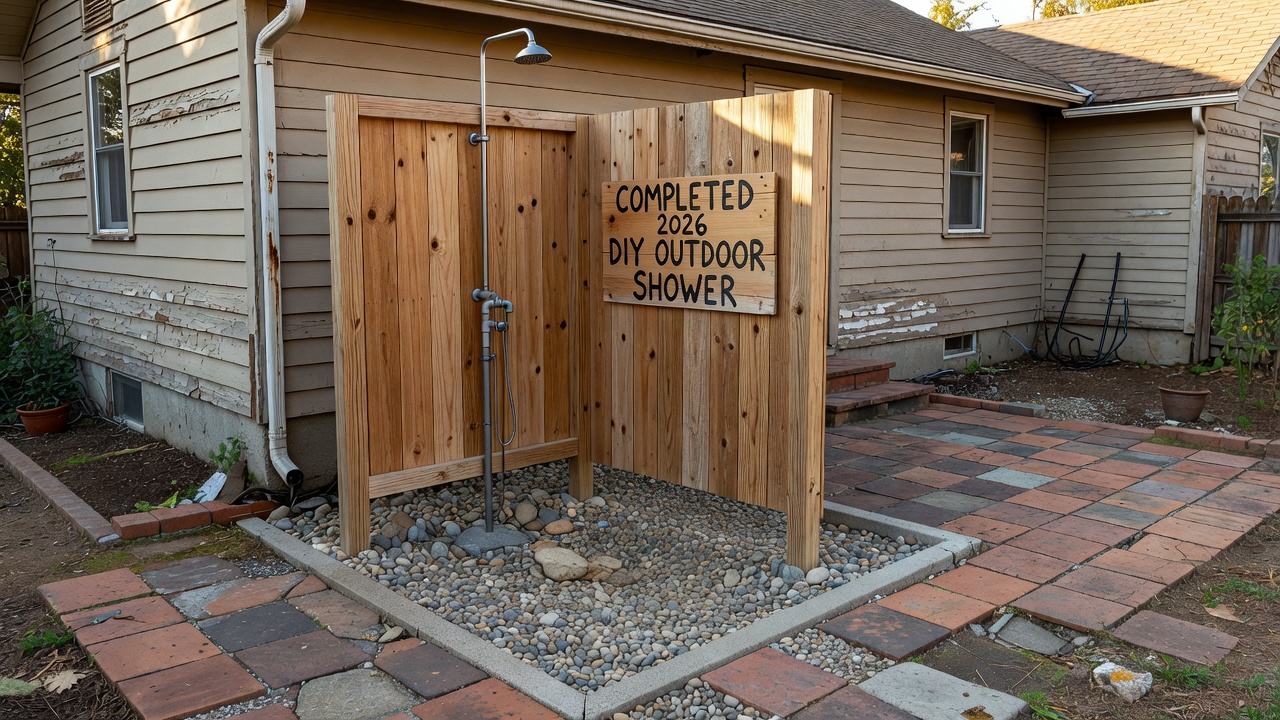
Introduction to Budget-Friendly Outdoor Showers
Homeowners tackling fixer-upper properties often seek simple upgrades that boost curb appeal and functionality without breaking the bank. A DIY outdoor shower fits perfectly into this vision, offering a refreshing way to rinse off after yard work or enjoy the outdoors. This comprehensive guide walks through every stage of building one in 2026, focusing on low-cost approaches that integrate seamlessly with existing patios or decks while emphasizing durability and ease of maintenance.
Proper site planning prevents common issues like poor drainage or privacy concerns. Begin by evaluating your yard's layout, sun exposure, and proximity to water sources. Choose a spot near an exterior hose bib to minimize plumbing runs and reduce overall project complexity. Many homeowners discover that thoughtful placement transforms underutilized spaces into functional outdoor amenities that increase property enjoyment year-round.
Site Planning and Preparation
Measure the area carefully to ensure the shower fits without obstructing walkways or creating tripping hazards. Account for natural slope to direct water away from the house foundation and toward appropriate drainage points. Mark utilities before any digging occurs to avoid damaging underground lines. Consider sun patterns throughout the day so users can enjoy comfortable temperatures, and evaluate wind exposure that might affect privacy screens or water spray. Sketch a simple layout on paper first, noting distances from the house and any existing structures like fences or decks. This preparation phase saves time and money during actual construction.
Material Selection for Durability on a Budget
Focus on weather-resistant options such as cedar or pressure-treated lumber for frames, marine-grade plywood for bases, and galvanized hardware. These choices withstand seasonal changes while keeping expenses manageable. Select fixtures rated for outdoor use to ensure longevity and reduce replacement frequency. Compare options like composite decking versus natural wood for the floor area, weighing factors such as rot resistance and ease of cleaning. Always prioritize materials that resist mold and UV degradation for long-term performance in outdoor environments.
Plumbing Basics Without Major Renovations
Connect to an existing outdoor spigot using flexible hoses and quick-connect fittings for straightforward installation. Install a simple mixing valve for temperature control and add shutoff valves near the source. For cold climates, incorporate drain lines and insulation to prevent freezing damage during winter months. Route lines along existing structures when possible to avoid trenching. Test the system thoroughly before finalizing connections to catch leaks early. Consult local guidelines from the EPA on water efficiency during installation to promote sustainable practices.
Building Privacy Screens
Construct simple screens using lattice panels or vertical slats attached to 4x4 posts set in concrete footings. Add climbing plants such as ivy or jasmine for natural coverage that improves over time. This step enhances usability while maintaining an open, inviting feel. Explore variations like roll-up bamboo shades for adjustable privacy or solid panels with cutouts for ventilation. Ensure screens are tall enough to provide coverage from neighboring views yet allow airflow to keep the space comfortable.
Drainage Solutions
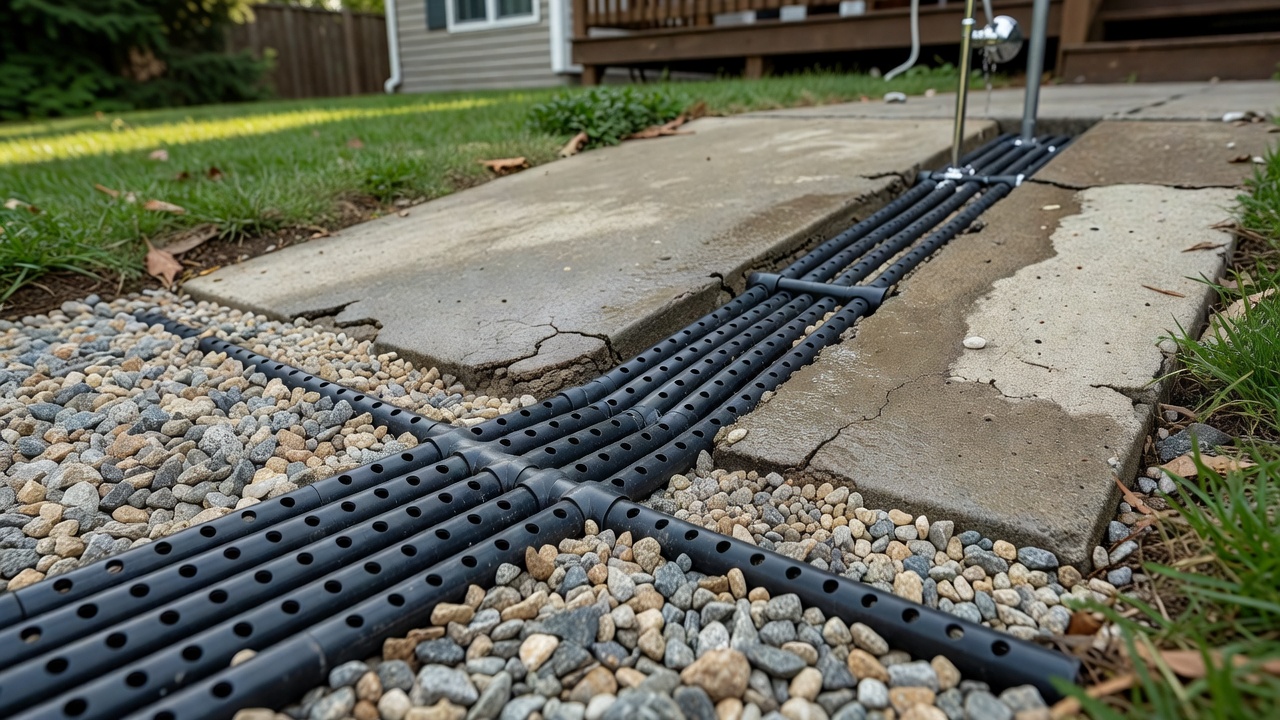
Effective drainage starts with a gravel bed and perforated pipe leading to a dry well or existing storm system. Slope the surface slightly and use a grated floor to keep the area clean and prevent standing water. This prevents pooling and erosion around the shower base while protecting nearby landscaping. In areas with heavy clay soil, consider adding a French drain extension for better performance. Regular inspection of the drainage path keeps the system functioning optimally throughout the seasons.
Weatherproofing Techniques
Apply exterior-grade sealants to all wood surfaces and use stainless steel fasteners to avoid rust. Cover exposed plumbing with insulated sleeves and protective covers. These measures protect against UV rays, rain, and temperature swings for years of reliable service. Reapply finishes annually and check for cracks in seals after extreme weather events. Proper weatherproofing extends the life of the entire installation significantly.
Beginner-Friendly Tools Checklist
- Drill and bits for assembling frames
- Level and measuring tape for accurate placement
- Saw for cutting lumber to size
- Wrench set for plumbing connections
- Shovel for drainage work and post holes
- Caulk gun and sealant for weatherproofing
- Hammer and nails or screws for basic assembly
- Utility knife for cutting hoses and insulation
Real-World Project Examples
Example 1: A suburban fixer-upper added a corner shower beside the deck using repurposed fencing for privacy. Before the build the space was bare concrete; after, it featured a tiled base and hose connection that blended with the existing decking. The project took two weekends and improved daily routines for the family.
Example 2: An urban backyard project integrated the shower with an existing patio by routing water through a buried line. The result included a bamboo screen and pebble drainage area that complemented modern landscaping while solving a previous mud problem near the back door.
Example 3: A rural property created a freestanding unit with a solar shower bag option. Before photos showed an unused side yard; after included a wooden platform and native plant border that attracted birds and created a relaxing retreat.
Example 4: A coastal home built a compact model near the garden shed, emphasizing quick drainage to handle heavy rains. The transformation turned a muddy patch into a functional outdoor feature with reinforced posts to withstand occasional strong winds.
Integration with Patios or Decks
Anchor posts into existing decking or use surface mounts to avoid structural changes. Match materials to blend with surrounding surfaces for a cohesive look. This approach allows the shower to feel like a natural extension rather than an afterthought. Consider adding matching lighting or storage hooks for towels to enhance convenience and overall design harmony.
Mistakes to Avoid
One common error is neglecting proper slope for drainage, which leads to water accumulation and potential foundation issues. Another is using indoor-rated fixtures that fail quickly outdoors. Skipping the utility marking step can result in costly repairs if lines are hit. Always plan for future maintenance access and avoid overcomplicating the plumbing design on a first project.
FAQ
What building codes apply to outdoor showers?
Most areas require proper drainage and backflow prevention. Check with your local permitting office before starting to ensure compliance with plumbing and zoning rules. Additional considerations may include height restrictions for privacy structures.
How do I maintain the shower over time?
Inspect seals annually, clear debris from drains, and reapply protective finishes every two seasons. Winterize by draining lines in colder regions to prevent burst pipes. Regular cleaning of the floor grate keeps water flowing freely.
Can I add hot water without complex work?
Yes, by extending from an indoor line with insulated piping or using a tankless unit designed for outdoor conditions, always following safety standards from the OSHA for any electrical components.
Are there alternatives if trenching is not feasible?
Surface-mounted hose systems with protective covers offer a viable option. Elevated platforms can also hide lines while improving drainage flow. Explore these simpler routes for quick implementation on tight budgets.
Conclusion
Building a DIY outdoor shower represents an achievable upgrade for any budget-conscious homeowner. By following these detailed steps for planning, materials, plumbing, and protection, you create a lasting feature that enhances your property. Start small, prioritize safety and compliance, and enjoy the results for seasons to come.
No comments yet. Be the first!