 Fixated on Home
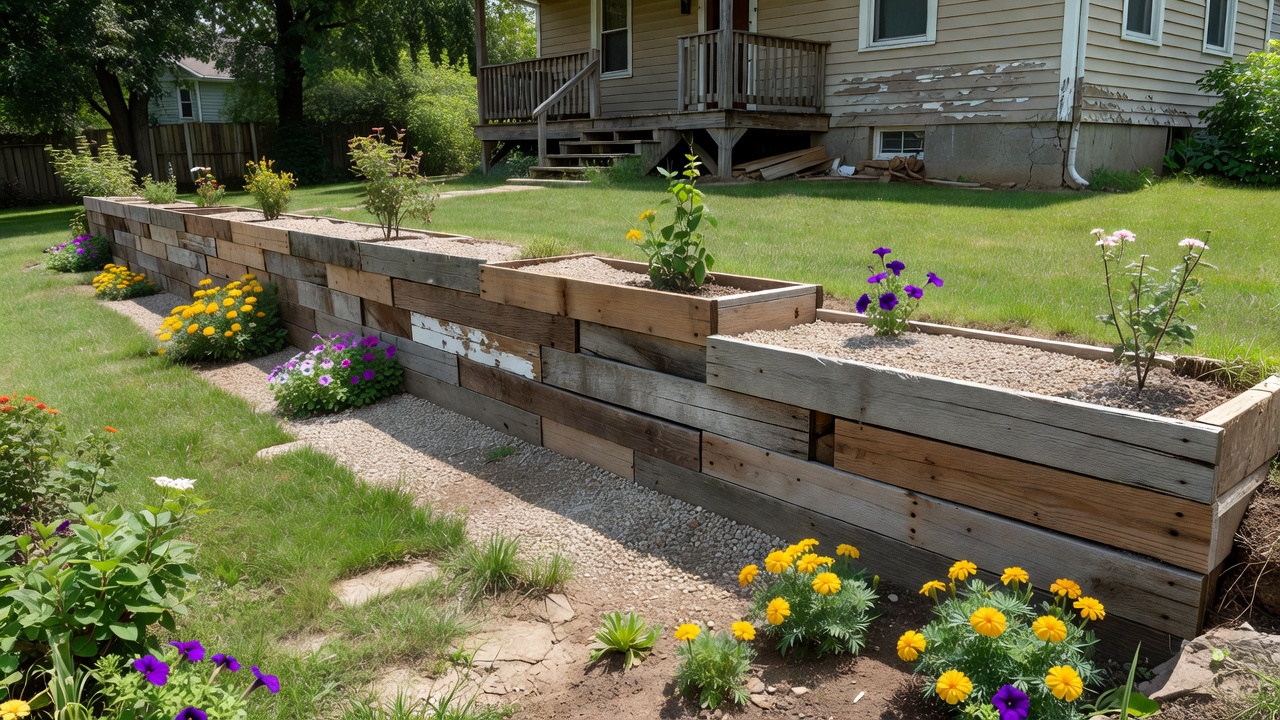
Introduction to Budget DIY Retaining Walls
Fixer-upper properties frequently feature uneven or sloped yards that require practical, affordable solutions for erosion control and creating usable outdoor space. Constructing a retaining wall on a tight budget allows homeowners to convert challenging landscapes into functional areas without the expense of professional contractors. This comprehensive guide emphasizes low-cost approaches that rely on recycled materials, everyday hand tools, and time-tested home improvement practices ideal for 2026 DIY projects. Readers searching for fixer-upper ideas will find actionable strategies that stay under typical household renovation limits while delivering lasting results.
Every successful retaining wall begins with careful evaluation of the site conditions and water management needs. By mastering basic assembly techniques for both wood and concrete block systems, beginners can produce stable, attractive structures that enhance property value and usability. The following sections break down each phase in detail, complete with real-world examples and decision-making frameworks.
Site Assessment and Planning
Thorough site assessment forms the foundation of any reliable retaining wall. Start by measuring the slope height, length, and angle using a simple level and measuring tape. Observe the yard during and after rainfall to map natural water flow patterns and identify potential pooling areas. Check local regulations early, as some municipalities require permits even for low walls. Mark the intended wall location with stakes and string, allowing for a slight backward tilt known as batter to improve stability against soil pressure.
Soil composition plays a critical role in long-term performance. Clay soils retain moisture and exert greater pressure, necessitating additional drainage layers and possibly geotextile fabric. Sandy or loamy soils drain faster but may require extra compaction at the base. Create a basic sketch noting wall dimensions, backfill depth, and any nearby utilities or trees. This planning step helps avoid surprises during construction and ensures the project aligns with the overall fixer-upper landscape vision.
Integrating Proper Drainage
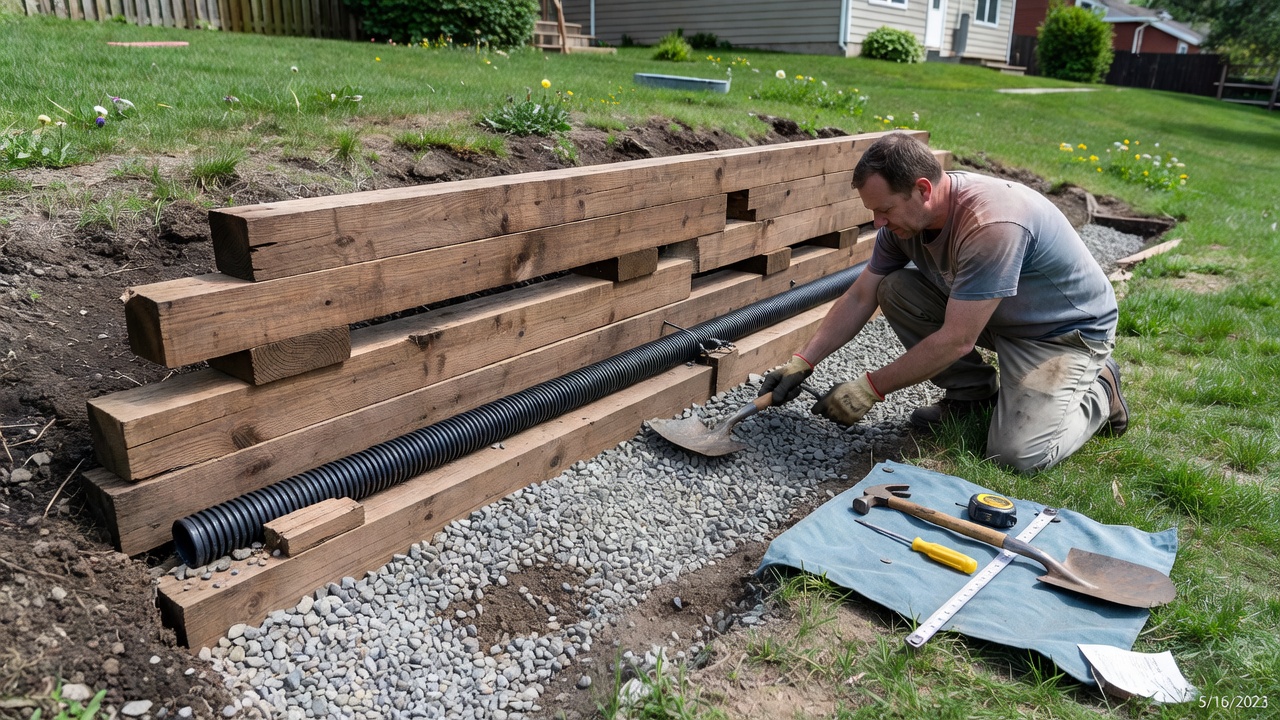
Effective drainage prevents the most common cause of retaining wall failure: water buildup behind the structure. Install a perforated drain pipe along the base, embedded in a bed of clean gravel at least six inches deep. Slope the pipe gradually toward an outlet that directs water away from the house foundation. Cover the gravel with landscape fabric to block soil particles from entering and clogging the system. Weep holes spaced every two to three feet allow trapped moisture to escape through the face of the wall.
Best practices from environmental authorities recommend integrating these features from the start rather than retrofitting later. Learn more about stormwater management principles at epa.gov. In practice, homeowners who skip drainage often face bulging or collapsing walls within a few seasons, turning a budget project into a costly repair.
Essential Tools and Materials
Successful builds rely on a modest toolkit that most DIYers already own or can borrow. Gather a shovel, tamper, level, rubber mallet, circular saw or handsaw, drill with bits, measuring tape, and wheelbarrow. Safety gear includes gloves, eye protection, and sturdy boots. For materials, prioritize pressure-treated lumber or reclaimed timbers for wood walls and interlocking concrete blocks for modular designs. Source gravel, landscape fabric, and perforated pipe from local suppliers or reuse clean fill from other yard projects. Recycled options such as salvaged railway ties or construction-site pallets keep costs down while supporting sustainable practices.
Step-by-Step Wood Retaining Wall Assembly
Wood retaining walls work well for heights under four feet and integrate naturally into garden settings. Begin by excavating a level trench for the base course. Lay the first row of timbers, driving rebar through drilled holes to anchor them into the ground. Stack subsequent courses with staggered joints, fastening each level securely to the one below using galvanized spikes or screws. Backfill progressively with alternating layers of gravel and soil, compacting each layer thoroughly with a tamper. Finish with a cap timber for a clean edge and improved appearance.
A practical example involves a 12-foot-long wall on a gentle slope: one homeowner completed the project over two weekends, spending the first day on excavation and base preparation and the second on stacking and backfilling. Regular checks with a level throughout assembly prevent cumulative errors that could compromise stability.
Concrete Block Retaining Wall Construction
Interlocking concrete blocks provide a straightforward option for straight or curved walls up to four feet tall without mortar. Prepare a compacted gravel foundation at least six inches deep and perfectly level. Set the first course of blocks, verifying alignment in multiple directions. As each additional course is added, backfill immediately with gravel to maintain drainage. Secure cap blocks with construction adhesive for a finished top surface. This modular system allows incremental progress and easy adjustments during building.
Choosing Between Wood and Block Options
Selecting the right material depends on site conditions, desired aesthetics, and maintenance tolerance. Wood offers a natural look and lower initial material demands but requires periodic sealing to resist rot. Concrete blocks deliver superior durability and minimal upkeep yet may appear more formal. Compare the two by evaluating local climate, available labor, and long-term landscape goals. Many fixer-upper projects combine both, using wood for shorter decorative sections and blocks for higher structural needs.
Common Mistakes to Avoid
Even experienced DIYers encounter pitfalls. Skipping proper base compaction leads to settling and leaning. Ignoring drainage creates hydrostatic pressure that pushes walls forward. Using untreated wood in moist soil accelerates decay. Overbuilding height without reinforcement or engineering input risks collapse. Always double-check levels at every stage and consult soil reports if the slope exceeds typical residential heights.
Safety Checklists for DIY Builders
Adhere to these safety protocols throughout the project to protect yourself and others:
- Wear appropriate personal protective equipment including gloves, goggles, and closed-toe shoes.
- Mark and avoid underground utilities before any digging begins.
- Use proper lifting form or mechanical aids for heavy components.
- Keep the work area clear of debris and maintain stable footing.
- Never work alone on larger structures; enlist a helper for lifting and positioning.
Resources from occupational safety experts provide additional guidance on construction site best practices. Visit osha.gov for comprehensive safety standards.
Real-World Example Project Timeline
Consider a typical weekend project for a 10-foot wall in a suburban fixer-upper yard. Day one focuses on site clearing, excavation, and base preparation. Day two covers material delivery, stacking, drainage installation, and backfilling. Follow-up tasks over the next week include final grading and planting. This phased approach minimizes disruption while allowing time for adjustments based on weather or material availability.
Maintenance FAQs
How frequently should walls be inspected? Conduct seasonal visual checks, especially after heavy rains or freeze-thaw cycles. What signs indicate problems? Look for cracks, leaning, or water seepage and address drainage issues promptly. Can vegetation be incorporated? Yes, choose shallow-rooted plants that stabilize soil without compromising the structure. How long can these walls last? With consistent maintenance and quality drainage, expect 10–20 years of reliable service. What if the wall exceeds four feet? Consult local building codes or a professional engineer for taller installations.
Additional soil health insights are available from agricultural authorities. Explore usda.gov for soil assessment resources.
Conclusion
Budget-conscious DIY retaining walls offer a powerful way to revitalize fixer-upper yards through thoughtful planning, proper drainage, and methodical construction. Whether choosing wood or concrete blocks, homeowners who follow these detailed steps achieve stable, attractive results that improve both functionality and curb appeal. Apply the assessment, assembly, and maintenance principles outlined here to create lasting landscape improvements that align with your renovation goals.

No comments yet. Be the first!