 Fixated on Home
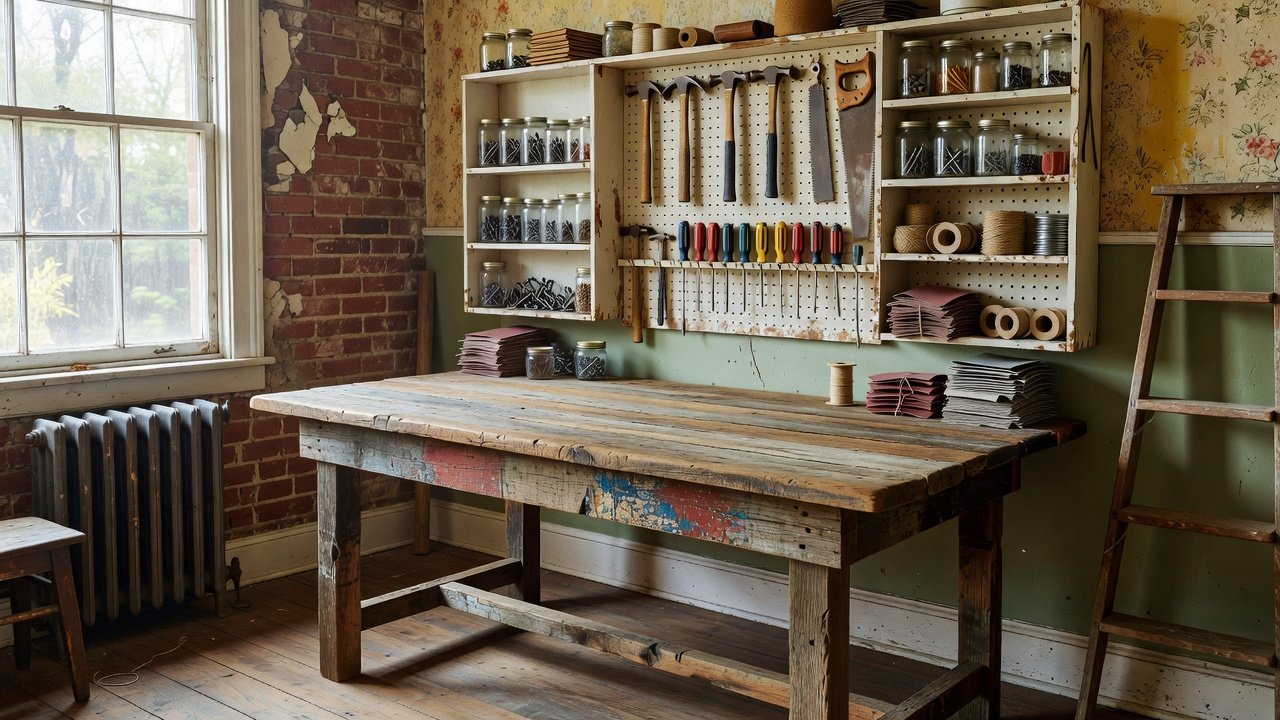
Introduction to DIY Craft Tables in Fixer Upper Homes
Creating a dedicated hobby space in a fixer upper home often starts with a functional craft table. These DIY projects combine budget reno strategies with practical home improvement techniques to transform underused areas into inspiring workspaces. Using reclaimed materials keeps costs low while adding character that matches the vintage charm of older homes. Homeowners tackling renovations frequently discover that a custom-built table not only fits irregular room dimensions but also incorporates personal touches unavailable in mass-produced furniture. This approach aligns perfectly with the fixer upper ethos of resourceful upgrades that enhance both daily living and property value over time.
Whether you're a beginner or experienced maker, building your own table allows customization for specific needs like sewing, painting, or woodworking. This guide covers everything from sourcing supplies to final assembly, ensuring your project supports long-term use in a renovated space. Throughout the process, focus remains on accessible techniques that minimize waste and maximize durability in homes with older flooring or walls.
Sourcing Affordable Materials for Budget Reno Projects
Reclaimed wood from old pallets, barn doors, or construction scraps forms the backbone of these builds. Visit local salvage yards or check online marketplaces for free or low-cost options. Pair these with basic hardware like screws, brackets, and sandpaper available at major retailers. Success in budget reno often hinges on patience during sourcing, as quality reclaimed lumber can vary in condition and requires inspection for rot, nails, or warping before purchase. Consider visiting multiple locations or coordinating with demolition crews for fresh materials that haven't been exposed to weather.
For a complete list of essentials, focus on durable, sustainable choices that withstand daily crafting. Always measure twice before cutting to avoid waste during your home improvement efforts.
- Reclaimed lumber planks for the tabletop
- 2x4 or 2x6 studs for legs and supports
- Wood glue and clamps for strong joints
- Sandpaper in multiple grits for finishing
- Optional casters for mobility in small rooms
- Primer and paint or stain for protection and aesthetics
- Leveling shims for uneven fixer upper floors
Home Depot offers a wide selection of basic tools and hardware to complement reclaimed finds, making it easy to gather everything in one trip.
Essential Tools for Successful Assembly
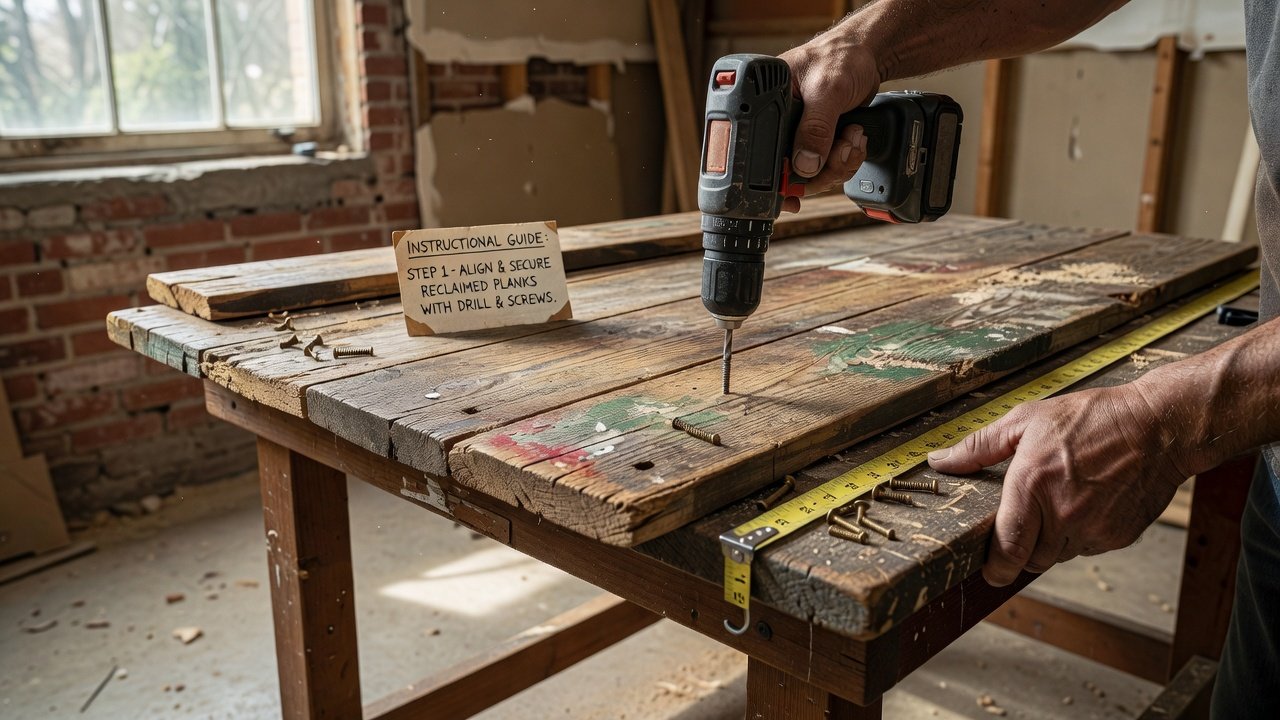
Before starting construction, gather a reliable set of tools that support precise work. A circular saw or handsaw handles cuts, while a cordless drill speeds up fastening. A tape measure, speed square, and carpenter's level ensure accuracy, especially important when adapting to older homes with settling floors. Sanding requires an orbital sander or manual blocks, and safety gear like gloves and goggles protects during the process. These items represent standard home improvement investments that pay dividends across multiple DIY projects.
Step-by-Step Assembly with Precise Measurements
Begin by cutting your tabletop to 48 inches by 30 inches for a standard hobby surface. Attach 2x4 legs at each corner using pocket hole screws for stability. Add cross braces midway down the legs to prevent wobbling on uneven fixer upper floors. Secure the tabletop with additional brackets underneath for extra rigidity. Sand all surfaces smooth before applying a protective sealant. This process typically takes a weekend and requires only a circular saw, drill, and level. For added height adjustment, attach leg levelers at the base to accommodate slight floor variations common in renovated properties.
Build Variations for Different Skill Levels
Beginners can start with a simple sawhorse base topped by a single plank. Intermediate builders might incorporate drawers using basic box construction. Advanced makers can add fold-down extensions or integrated lighting. Each variation builds on the core frame, allowing incremental complexity as confidence grows. For example, adding a lower shelf between the legs creates immediate storage without advanced joinery.
Integrating Smart Storage Solutions
Maximize space by adding under-table shelves or pegboards on the sides. These features keep supplies organized and turn your table into a complete workstation. In budget reno contexts, repurpose old drawers or crates for zero-cost storage upgrades. Consider installing a hanging rod along one side for rolls of paper or fabric, or mount small bins on the legs using simple hooks. Such additions prove especially useful in compact hobby areas where every inch counts toward efficient workflow.
Customization Ideas for Various Hobbies
Tailor the table height to your primary activity—lower for detailed seated work like jewelry making or higher for standing tasks such as pottery. Incorporate built-in power strips along the back edge to power tools safely. For artists, add a tempered glass overlay on part of the surface for easy cleanup. Woodworkers might route grooves for clamps or add a vise mount. These custom elements transform a basic build into a personalized hub that supports creative flow during extended sessions.
Real Fixer Upper Transformation Examples
One homeowner converted a neglected basement corner into a vibrant art studio using a reclaimed oak table. Another added casters to a compact build for easy movement between kitchen and living areas during phased renovations. A third example involved integrating the table into an attic space with sloped ceilings by shortening one leg set slightly, demonstrating how DIY projects adapt to unique architectural challenges. These stories illustrate the versatility of home improvement through thoughtful material reuse.
Cost Comparisons to Store-Bought Options
DIY builds using reclaimed materials deliver significant savings compared to retail tables. Focus on quality craftsmanship to achieve professional results that rival expensive purchases. Many store-bought alternatives lack the character and exact sizing needed for irregular fixer upper rooms, making the hands-on route more satisfying long term.
Lowes provides pricing references for similar ready-made furniture to help gauge your savings potential.
Common Mistakes to Avoid During Construction
Rushing measurements often leads to uneven legs or unstable frames. Always double-check cuts against your plans. Skipping proper sanding can result in rough surfaces that damage projects or clothing. Overlooking floor leveling leaves the table rocking during use. Finally, neglecting sealant application shortens the lifespan of reclaimed wood exposed to moisture or craft chemicals. Taking time on each step ensures a reliable finished piece.
FAQ: Addressing Common Challenges
How do I level a table on uneven floors?
Use adjustable feet or shims under the legs. Check with a spirit level at multiple points during assembly and make incremental adjustments.
What if I lack advanced tools?
Many builds succeed with hand tools alone. Borrow or rent specialized equipment for one-time cuts, or visit community workshops for access.
Can these tables support heavy equipment?
Reinforce with additional bracing and choose thick reclaimed wood for load-bearing surfaces. Test stability before placing heavy items like sewing machines.
How do I protect the surface from stains and scratches?
Apply multiple coats of polyurethane or use a removable cutting mat on top. Regular maintenance with gentle cleaners preserves the finish.
Is it possible to disassemble for moving?
Yes, use screws instead of permanent glue in key joints so the table can be broken down and reassembled in a new location.
Conclusion
These 2026 DIY craft table builds empower homeowners to create personalized hobby spaces through thoughtful budget reno and home improvement. By focusing on reclaimed materials and adaptable designs, your project will enhance both functionality and home value for years to come. Start planning your build today to enjoy a dedicated creative area tailored exactly to your needs.
No comments yet. Be the first!