 Fixated on Home
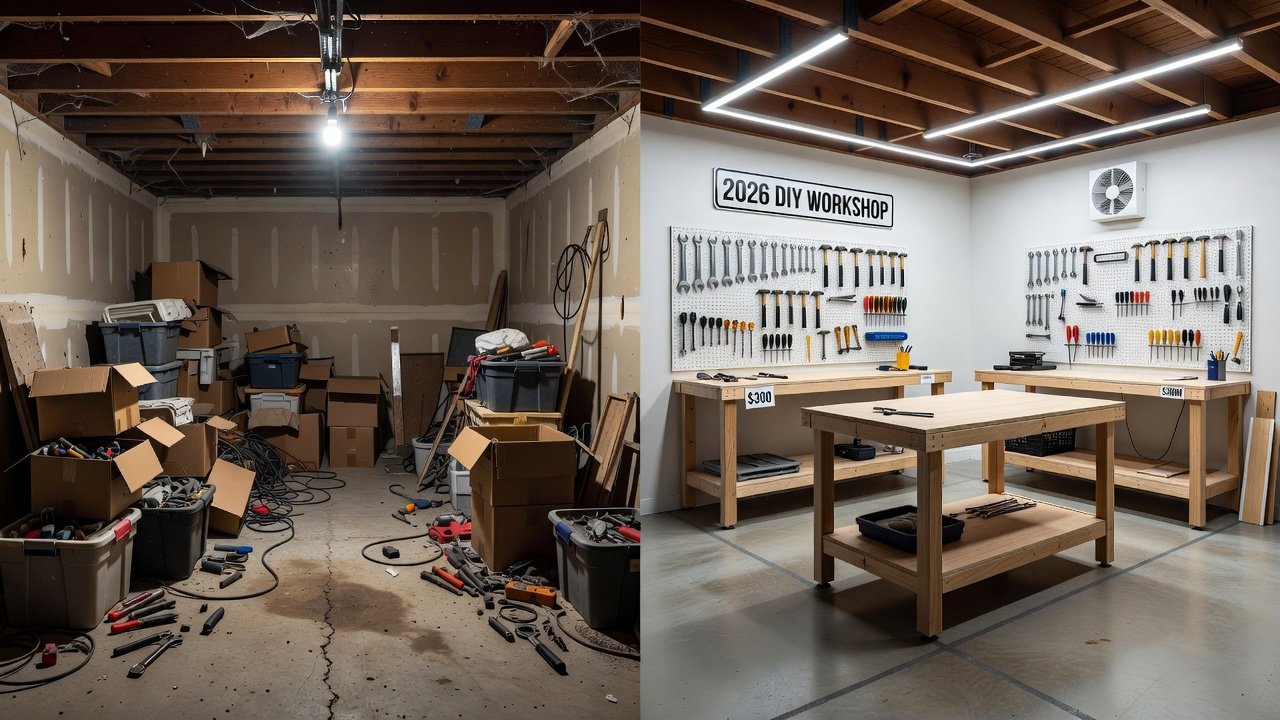
Introduction: Turning Limited Space into a Functional Workshop
Many homeowners with fixer-upper properties face the challenge of creating a dedicated workspace without breaking the bank. In 2026, practical DIY workshop setups focus on repurposing garages and basements efficiently. This guide walks through beginner-friendly steps for space-saving layouts, essential tool organization, affordable sourcing, and more while keeping total costs under $300 as of 2026-09-16. Whether you are tackling home repairs, woodworking, or general maintenance, a well-planned workshop enhances productivity and reduces frustration from disorganized tools.
Fixer-upper homes often come with underutilized areas like garages filled with clutter or damp basements. By applying modular designs and smart hacks, you can create a versatile area that adapts to seasonal projects. The emphasis remains on low-cost materials sourced locally and reusable components that grow with your skills.
Assessing Your Space and Planning the Layout
Start by measuring your available area. For small garages or basements, prioritize vertical storage and foldable elements to maximize floor space. Sketch a simple floor plan that includes zones for work, storage, and safety clearance. Consider traffic flow so you can move large items without obstruction. Measure ceiling height for overhead racks and note existing electrical outlets and windows for natural light and ventilation planning.
Walk through the space multiple times at different times of day to observe lighting patterns and temperature fluctuations. This assessment prevents costly mistakes later. Create zones such as a primary workbench area, tool wall, and material staging spot. Leave at least three feet of clearance around the main work surface for safe movement.
Building a Modular Workbench on a Budget
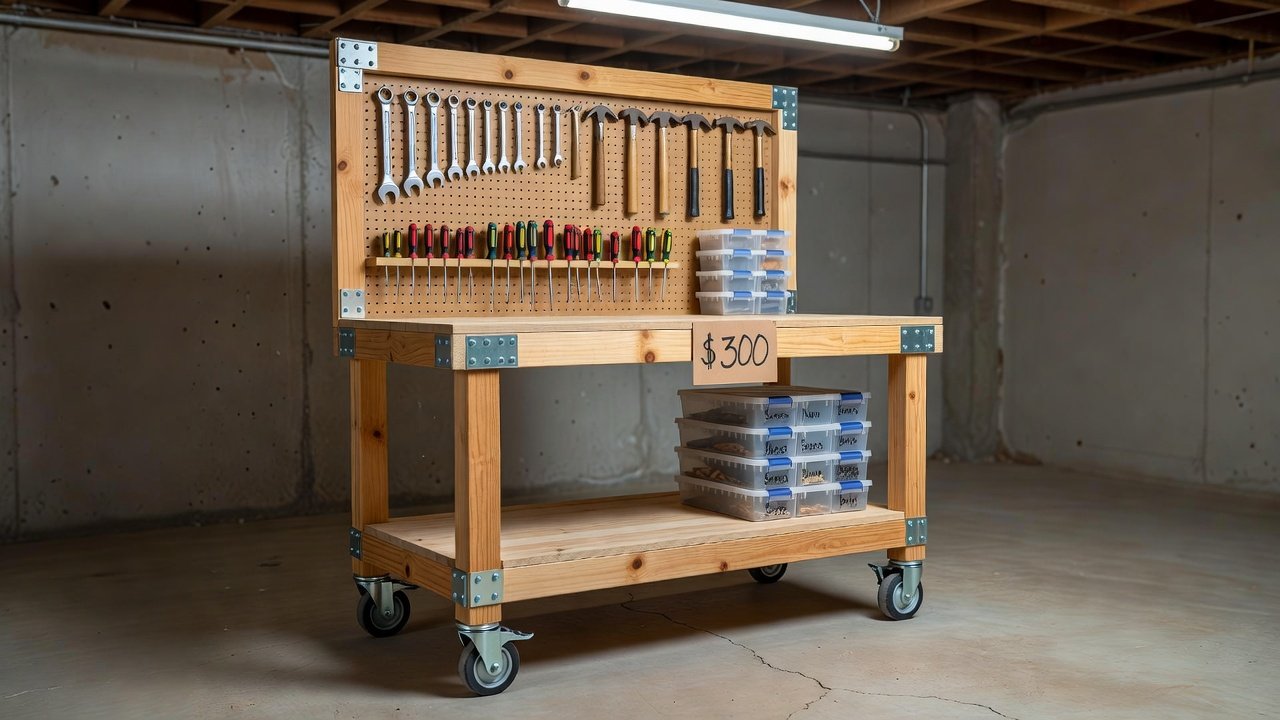
A modular workbench forms the core of any workshop. Use affordable lumber and brackets for a customizable design that can expand later. Assemble sawhorses with plywood tops for a sturdy surface. Add casters for mobility and pegboards for hanging tools. This DIY option saves significantly compared to pre-made units while allowing personalization for your fixer-upper needs.
Begin construction by cutting legs to uniform height and securing cross braces for stability. Attach a thick plywood top with screws and reinforce corners with metal brackets. Install locking casters on each leg so the bench can be repositioned easily. Mount a pegboard panel on the back for immediate tool access. The modular nature lets you add extensions or shelves as projects evolve.
Tool Organization and Storage Solutions
Effective organization keeps tools accessible and prevents loss. Install wall-mounted racks and magnetic strips for frequently used items. Compare DIY solutions like repurposed crates versus store-bought cabinets: DIY versions often cost half as much and fit irregular spaces better. Label bins clearly and group items by project type for quick retrieval. Consider shadow boards where tool outlines are drawn on pegboard so missing items are instantly noticed.
Additional ideas include overhead pulley systems for seasonal equipment and rolling carts that tuck under the workbench. These methods reduce floor clutter and protect tools from moisture common in basements. Rotate inventory seasonally to keep only active tools within arm's reach.
Lighting and Ventilation Hacks
Proper lighting improves safety and precision. Combine overhead LED fixtures with task lamps on adjustable arms. For ventilation, use portable exhaust fans and window kits to manage dust and fumes. These hacks draw from established guidelines at EPA resources on indoor air quality and help maintain a healthy environment during extended work sessions. Position lights to eliminate shadows over the workbench and add motion-sensor strips along walkways for convenience.
Improve airflow by placing intake fans near windows and exhaust units directed outside. Simple box fans with furnace filters create low-cost air scrubbers that capture fine particles. Test ventilation before starting dusty projects to ensure comfort and compliance with basic health standards.
Safety Protocols Every Beginner Should Follow
Safety is non-negotiable. Wear protective gear including goggles and gloves. Ensure proper grounding for all electrical tools. Follow protocols outlined by OSHA workplace safety standards adapted for home use. Keep a well-stocked first-aid kit nearby and establish clear pathways to exits. Additional steps include fire extinguisher placement near flammable materials and regular inspection of extension cords for wear.
- Always unplug tools before changing blades or bits.
- Store chemicals in locked cabinets away from heat sources.
- Post emergency contact numbers on the wall.
- Conduct monthly checks of smoke detectors in the workspace.
Real-World Cost Breakdowns Under $300
Material sourcing from local hardware stores or online marketplaces keeps expenses low. A typical breakdown includes lumber for the bench, pegboard and brackets, lighting kits, ventilation fan, and organization accessories, totaling under $300 as of 2026-09-16. Shop sales and reuse existing items where possible to stay within budget. Track receipts and compare prices across two or three suppliers to maximize value without compromising quality.
Before-and-After Examples
One homeowner converted a cluttered 200-square-foot garage into a clean workspace featuring a fold-down workbench and labeled storage walls. The transformation allowed efficient project flow and reduced setup time by half. Another basement example added modular shelving that doubled storage capacity without permanent alterations. A third case involved converting a narrow side garage bay into a multi-purpose station with rolling tool chests that nest together when not in use, freeing central floor area for vehicle maintenance.
DIY Versus Store-Bought Storage Comparison
DIY storage using basic lumber and hooks offers customization and lower upfront costs. Store-bought options provide quick installation but often lack flexibility for unique spaces. For fixer-uppers, DIY wins on adaptability and long-term savings, though store-bought may suit those short on time. Consider hybrid approaches where you build the main structure yourself and purchase only specialized organizers for small parts.
Common Mistakes to Avoid
Many beginners overlook moisture control in basements, leading to rust on tools. Always elevate storage off concrete floors. Another frequent error is insufficient lighting, which causes eye strain and inaccurate cuts. Plan electrical needs early to avoid extension cord overloads. Finally, skipping safety gear for quick tasks often results in preventable injuries.
FAQ: Addressing Common Challenges
How do I control dust in a small workshop?
Use a shop vacuum with HEPA filter and seal gaps around doors. Regular sweeping and a dedicated dust-collection station minimize buildup. Consider a simple downdraft table made from pegboard and a box fan for sanding operations.
What about power management?
Install additional outlets with surge protection and use extension cords rated for workshop loads. Avoid overloading circuits by planning tool usage schedules. Label circuits clearly on the breaker panel to prevent accidental shutdowns during critical work.
Can I expand the setup later?
Yes, modular designs allow easy additions like extra shelving or tool stations as your budget and needs grow. Start with a core workbench and add wall systems incrementally.
How should I handle seasonal temperature swings?
Insulate walls where possible and use portable heaters or fans. Store temperature-sensitive materials in sealed containers to prevent warping or degradation.
Conclusion
With thoughtful planning and budget-conscious choices, any fixer-upper can gain a productive workshop space. These 2026 ideas emphasize practicality, safety, and creativity to support ongoing home improvement projects. Begin with a clear assessment, build modular pieces, and maintain strong safety habits to enjoy years of efficient DIY work.

No comments yet. Be the first!