 Fixated on Home
Why Pocket Doors Are Ideal for Budget Fixer-Uppers
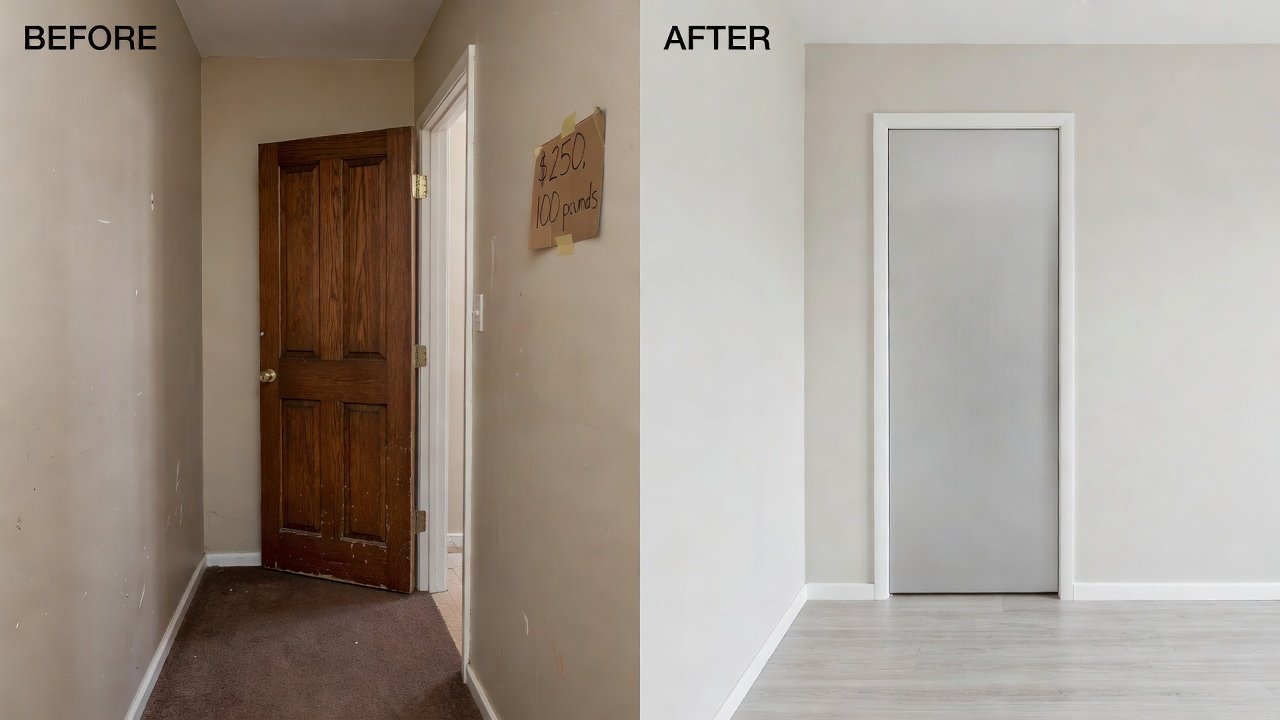
Pocket doors save valuable floor space in older homes where every square foot counts. They slide into the wall instead of swinging open, making them perfect for tight hallways, bathrooms, or small bedrooms common in fixer-uppers. This 2026 guide walks beginners through an affordable installation using materials under $250 as of 2026-09-20. Homeowners renovating historic properties often discover that pocket doors preserve the original character while modernizing functionality.
Beyond space savings, these doors improve accessibility for mobility-limited residents and reduce the risk of collisions in narrow corridors. In multi-unit buildings, they can also enhance privacy without consuming shared areas. Compared to traditional hinged doors, pocket doors reduce clutter and can improve traffic flow. Homeowners often report better accessibility in renovated spaces after switching.
Material Selection on a Tight Budget
Choose a pre-hung pocket door kit designed for standard 2x4 walls. Look for kits with a steel frame, rollers rated for at least 100 pounds, and a solid-core door slab for durability. Add basic trim, drywall patches, and screws. Total material costs stay under $250 as of 2026-09-20 when shopping sales at major home centers. Avoid cheap hollow-core options that warp over time. Consider upgrading to a soft-close mechanism for quieter operation in living areas.
When selecting materials, prioritize fire-rated components if the door separates living spaces from utility rooms. Measure your existing door opening twice to ensure compatibility. Local salvage yards sometimes offer reclaimed door slabs at reduced prices, but inspect them carefully for warping or damage before purchase.
Essential Tools Needed
- Circular saw and reciprocating saw for precise cuts through studs and drywall
- Level, tape measure, and stud finder to maintain plumb alignment throughout the project
- Drill with bits and screwdriver attachments for securing the frame and hardware
- Drywall saw and utility knife for clean removal of wall sections
- Hammer and pry bar to dismantle old framing without excessive damage
- Safety gear including goggles, dust mask, and gloves to protect against debris
- Stud finder with wire detection to avoid electrical hazards in older walls
Many of these tools are already in a typical DIY toolkit, keeping extra purchases minimal. Renting specialized items like a laser level can improve accuracy on larger projects.
Common Pitfalls in Older Homes
Older homes often have plaster walls, uneven framing, or hidden wiring that complicates installation. Always scan for electrical lines before cutting. Plaster can crumble easily, so reinforce edges with mesh tape. U.S. Department of Housing and Urban Development resources highlight lead paint risks in pre-1978 homes—test surfaces first. Another frequent issue is insufficient wall depth; measure twice to ensure the pocket fits without protruding.
Knob-and-tube wiring from the early 1900s requires professional evaluation before any framing changes. Uneven floors may cause the door to bind, so shim the track carefully. In homes with balloon framing, additional bracing prevents ceiling sagging after stud removal. Environmental Protection Agency guidelines recommend wet sanding plaster to minimize dust exposure.
Detailed 8-Step Installation Process
Follow these steps carefully for a professional result. Diagrams help visualize framing changes and prevent costly errors.
Step 1: Plan and Measure
Mark the exact location. Ensure clearance on both sides of the wall and verify the door will clear adjacent fixtures. Create a detailed sketch noting stud locations and outlet positions.
Step 2: Remove Existing Door and Trim
Take down the old door and casing. Patch any large holes later. Work slowly to salvage trim pieces that can be reused for a seamless finish.
Step 3: Cut the Wall Opening
Use a reciprocating saw to remove drywall and studs where the pocket will sit. Support the ceiling temporarily if needed. Double-check for hidden pipes or cables with a borescope camera if available.
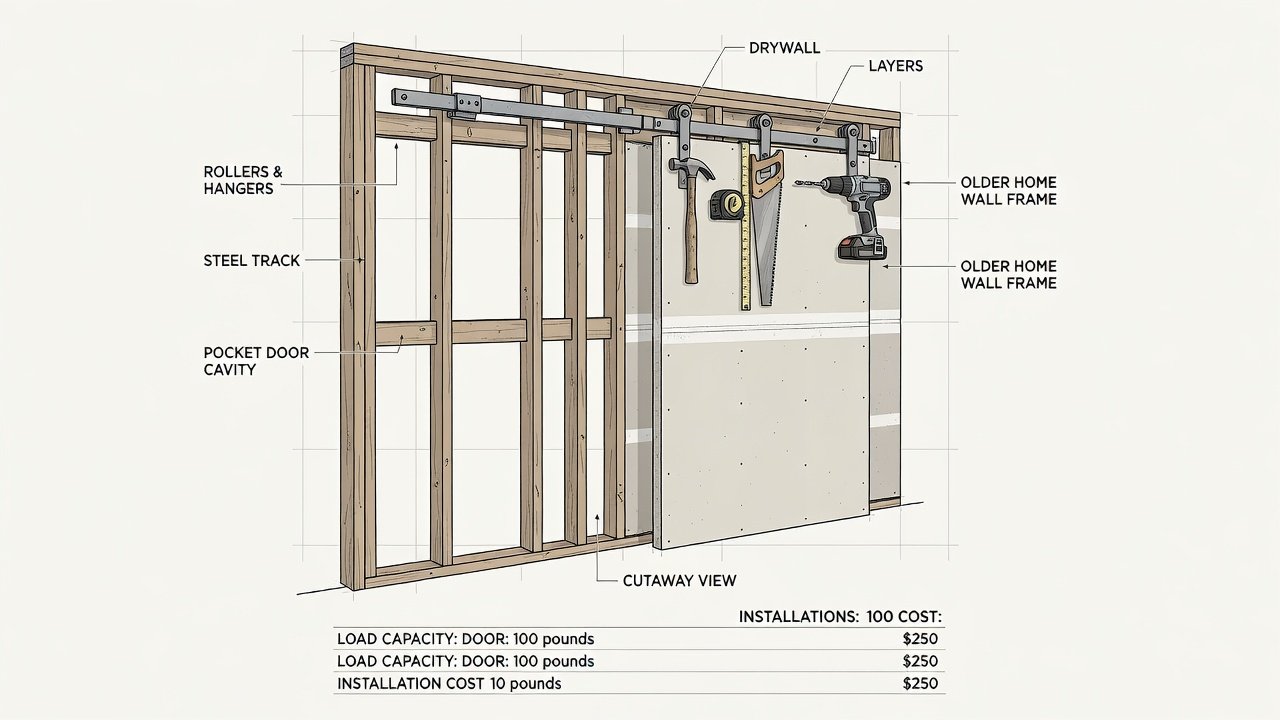
Step 4: Build the Pocket Frame
Assemble the steel pocket frame according to kit instructions. Secure it plumb and level between studs. Add horizontal bracing every 16 inches for extra rigidity in load-bearing situations.
Step 5: Install the Door Track and Rollers
Mount the track at the top of the frame. Attach rollers to the door slab and hang it in place. Test the glide path multiple times before finalizing adjustments.
Step 6: Add Drywall and Finish
Cover the frame with new drywall. Tape, mud, and sand for a seamless look. Apply multiple thin coats of joint compound to avoid visible seams after painting.
Step 7: Install Hardware and Trim
Attach the door pull, bumper, and any edge trim. Adjust for smooth operation. Install a floor guide to prevent the door from swinging out of alignment.
Step 8: Paint and Final Touches
Prime and paint to match your room. Test the door multiple times. Add weatherstripping along the edges for improved sound isolation and energy efficiency.
Cost Comparison Versus Traditional Doors
A basic hinged door install often runs higher when factoring in swing space needs and extra hardware. Pocket doors offer long-term value by freeing up room layout options without major structural changes. Over time, the space gained can increase usable square footage in small homes, potentially affecting resale appeal.
Before-and-After Examples from Real Budget Renos
One couple transformed a cramped 1950s bungalow bathroom by adding a pocket door, gaining usable floor area for a vanity upgrade. Another project in a 1920s craftsman used the technique between living and dining areas, creating an open feel on a limited budget. A third example involved converting a closet into a small office nook where the pocket door allowed furniture placement that a swinging door would have blocked.
Mistakes to Avoid During Installation
Skipping the level check at every stage leads to binding doors. Over-tightening screws can warp the frame. Neglecting to reinforce the header above the opening risks structural weakness. Always work with a helper when lifting the door slab into place to prevent injury or damage.
FAQ
Do I need a permit for pocket door installation?
Check local codes. Minor interior changes usually do not require permits, but consult your building department if structural walls are involved.
How can I improve soundproofing?
Use solid-core doors and add acoustic sealant around the frame. Dense insulation inside the pocket helps reduce noise transfer. Consider adding a second layer of drywall on the pocket side for extra mass.
What maintenance is required?
Lubricate rollers annually and check track alignment. Wipe tracks clean to prevent debris buildup. With proper care, installations last decades. Inspect the door edges yearly for swelling in humid climates.
Can I install a pocket door in a load-bearing wall?
Yes, but install a proper header and consult a structural engineer if unsure. Temporary supports during framing are essential for safety.
Are there alternatives if the wall depth is insufficient?
Consider a barn-door style overlay or a telescoping door system that requires less pocket space while still saving floor area.
Conclusion
This approach delivers a functional, space-saving upgrade without breaking the bank. Start with careful planning and safety checks for the best outcome in your fixer-upper project. OSHA safety guidelines provide additional tool-handling tips to keep your project accident-free. With patience and attention to detail, the finished pocket door will serve your home for many years.

No comments yet. Be the first!