 Fixated on Home
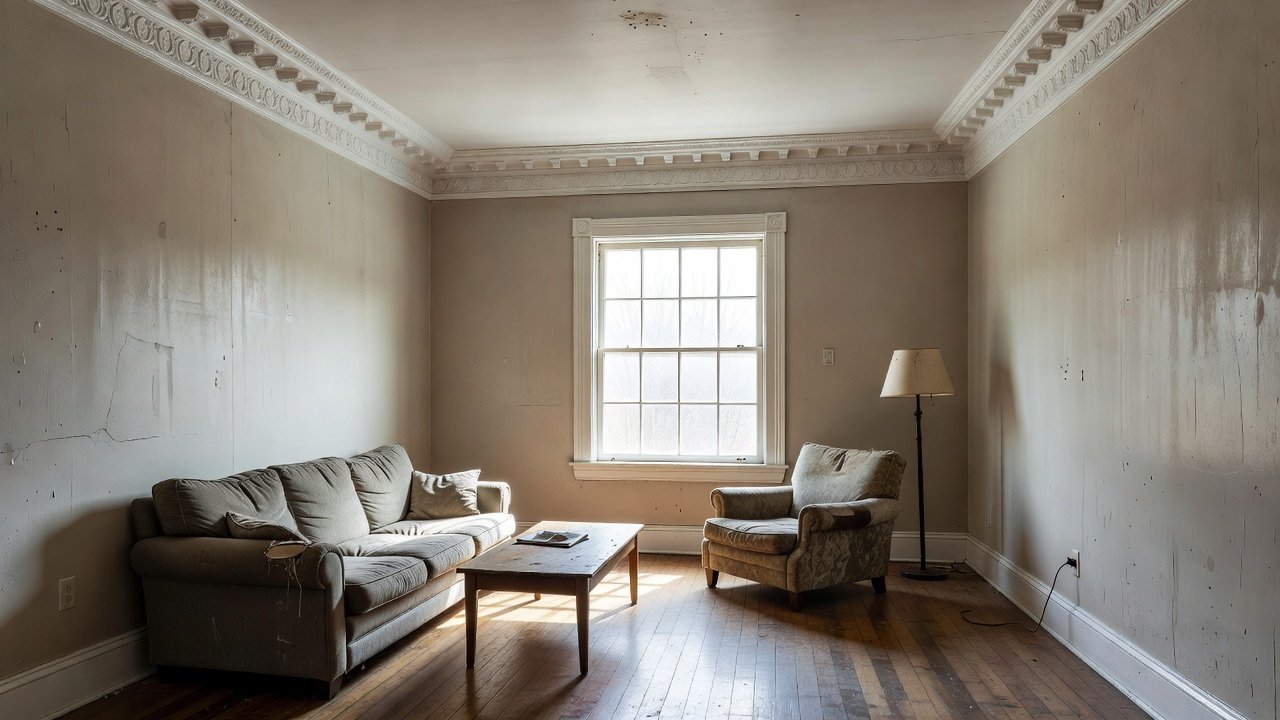
Introduction: Elevating Fixer-Uppers with Crown Molding in 2026
Fixer-upper homes often lack the architectural charm that makes spaces feel polished and valuable. Crown molding is one of the most effective upgrades to introduce elegance without major structural changes. In 2026, DIY trends emphasize accessible, high-impact projects that homeowners can complete on tight budgets while achieving professional-looking results. This guide covers everything from selecting suitable materials to mastering coping techniques for imperfect walls, ensuring your project delivers lasting visual appeal. Many homeowners in older properties discover that adding this detail transforms plain rooms into inviting areas that feel custom-built. The process builds confidence for future renovations and adds subtle sophistication that buyers notice during showings.
Why Crown Molding Remains a Top 2026 DIY Trend
Architectural details like crown molding enhance perceived home value and create seamless transitions between walls and ceilings. For budget-conscious renovators, it offers a quick transformation that complements various interior styles, from traditional to modern farmhouse. The focus this year is on lightweight, easy-to-install options that minimize waste and tools required. Trends show increased interest in sustainable materials and techniques that work well with existing plaster or drywall imperfections common in homes built before 1980. Homeowners report higher satisfaction when the molding integrates smoothly with baseboards and window casings already present.
Choosing Affordable Materials
Beginner projects succeed when materials are forgiving and lightweight. Popular choices include MDF, polyurethane, and primed pine, each offering different benefits for uneven surfaces common in older homes. MDF provides a smooth paint-ready surface ideal for formal living areas, while polyurethane resists moisture in kitchens and bathrooms. Primed pine offers a classic wood grain look for those preferring natural finishes. Consider the room's humidity levels and your comfort with cutting tools when deciding. Always measure twice and account for waste when purchasing. Comparing profiles helps match existing trim styles without clashing at transitions.
Essential Tools for Precise Installation
Successful results depend on the right equipment. A miter saw, coping saw, caulk gun, and level are foundational. For uneven walls, a laser level helps identify high and low spots. Sandpaper, wood filler, and a nail gun complete the kit. Renting specialized tools for a single weekend can keep expenses low. Additional helpful items include a stud finder to locate secure nailing points and a contour gauge for replicating wall irregularities. Many successful projects also use a simple block plane to fine-tune edges after initial cuts.
Step-by-Step Measuring and Coping Techniques
Accurate measuring starts at the longest wall and works around the room clockwise. Mark corners clearly and note any deviations greater than a quarter inch. For coping, cut the first piece square, then use a coping saw to follow the profile of the molding on the second piece. This method accommodates gaps in older construction better than simple miter cuts. Practice on scrap pieces first to understand how the blade follows curves. In rooms with multiple angles, such as bay windows, create templates from cardboard to test fits before committing to final cuts. Uneven walls in 1950s fixer-uppers often require extra filler at joints, so plan extra time for adjustments.
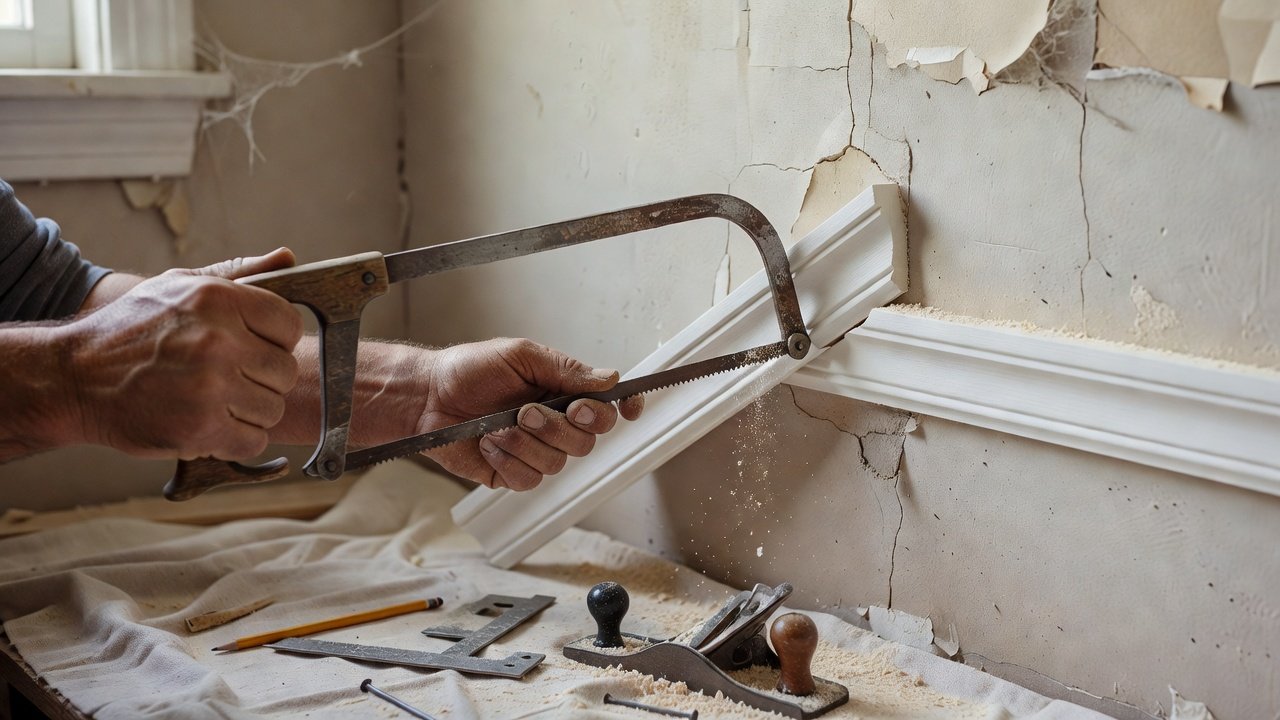
Installation Process for Beginners
- Prep walls by cleaning and marking guidelines with a chalk line for straight reference.
- Cut and dry-fit all pieces before nailing to catch any alignment issues early.
- Secure molding with finishing nails every 12 inches into studs where possible.
- Fill nail holes and seams with caulk or filler, smoothing immediately for invisible repairs.
- Check each section for level after installation and adjust before moving to the next wall.
Working in pairs speeds the process, with one person holding pieces while the other nails. Start in less visible corners to build skill before tackling prominent areas like the main living space.
Painting and Finishing for Seamless Results
Prime all surfaces before painting to ensure adhesion and hide any manufacturing marks. Use semi-gloss paint for easy cleaning and a crisp look that highlights the molding profile. Apply two coats, sanding lightly between them with 220-grit paper. Before-and-after photos highlight how fresh paint unifies the molding with existing trim. Consider painting the ceiling the same color as the molding for a taller visual effect in smaller rooms. Allow full drying time between steps to avoid smudges that require touch-ups later.
Before and After Considerations
Documenting the space with photos before starting helps track progress and provides inspiration for future projects. After installation, evaluate how the new detail interacts with lighting throughout the day. Many homeowners add matching chair rails in the same material for a cohesive look throughout the home. This approach works especially well in dining rooms where architectural interest draws attention to the space.
Common Pitfalls to Avoid
- Rushing measurements on out-of-square corners leads to visible gaps that are hard to conceal.
- Skipping the dry-fit step often results in wasted material from incorrect cuts.
- Overlooking expansion gaps in humid areas causes buckling over time.
- Using the wrong adhesive on specific wall surfaces creates weak bonds that fail within months.
- Ignoring safety gear during cutting exposes users to dust and potential injury.
Cost-Saving Tips for Budget Projects
Buy molding in longer lengths to reduce joints and waste. Reuse existing trim where possible and shop remnant sections at local suppliers. Work during off-peak seasons for better material availability. Group purchases with neighbors to qualify for bulk discounts. Repurpose leftover pieces for smaller projects like picture frames or shelving accents. Planning the entire home project in phases spreads effort and allows learning from each room's unique challenges.
Real-World Examples from Homeowners
One family updated a 1960s ranch by installing simple ogee profile molding throughout the main floor, creating a consistent flow from entryway to bedrooms. Another project focused on a single accent wall in the home office, using a bold painted finish to draw attention to built-in bookshelves. These examples demonstrate how the same technique adapts to different budgets and room functions while maintaining a cohesive overall design.
Maintenance and Long-Term Care
Regular dusting with a microfiber cloth prevents buildup that dulls the finish. Touch up paint annually in high-traffic areas to protect against chips. Inspect joints seasonally for any separation caused by seasonal humidity changes and recaulk as needed. Proper care ensures the molding remains a lasting feature rather than a temporary fix.
FAQ: Addressing Gaps, Corners, and Maintenance
How do I handle large gaps? Use flexible caulk or backer rod for fills over a quarter inch, then sand smooth after drying.
What about inside and outside corners? Cope inside corners and miter outside ones for the cleanest joints that follow the molding profile exactly.
How do I maintain crown molding? Dust regularly and touch up paint annually to prevent moisture damage and keep surfaces looking fresh.
Can I install over textured ceilings? Yes, but add a thin backer strip first to create a flat nailing surface for better contact.
What if my walls are very wavy? Scribe the bottom edge of the molding to match the wall contour using a compass for accurate tracing.
Is crown molding suitable for low ceilings? Opt for smaller profiles under four inches to avoid overwhelming the space visually.
Conclusion
Implementing crown molding in 2026 transforms fixer-upper interiors into personalized, high-value spaces. With careful planning and these techniques, even first-time DIYers can achieve impressive outcomes that boost both aesthetics and enjoyment of the home. Resources such as Bob Vila and This Old House offer additional visual guides for reference during tricky steps. Start small in a less visible room to build skills before larger projects.

No comments yet. Be the first!