 Fixated on Home
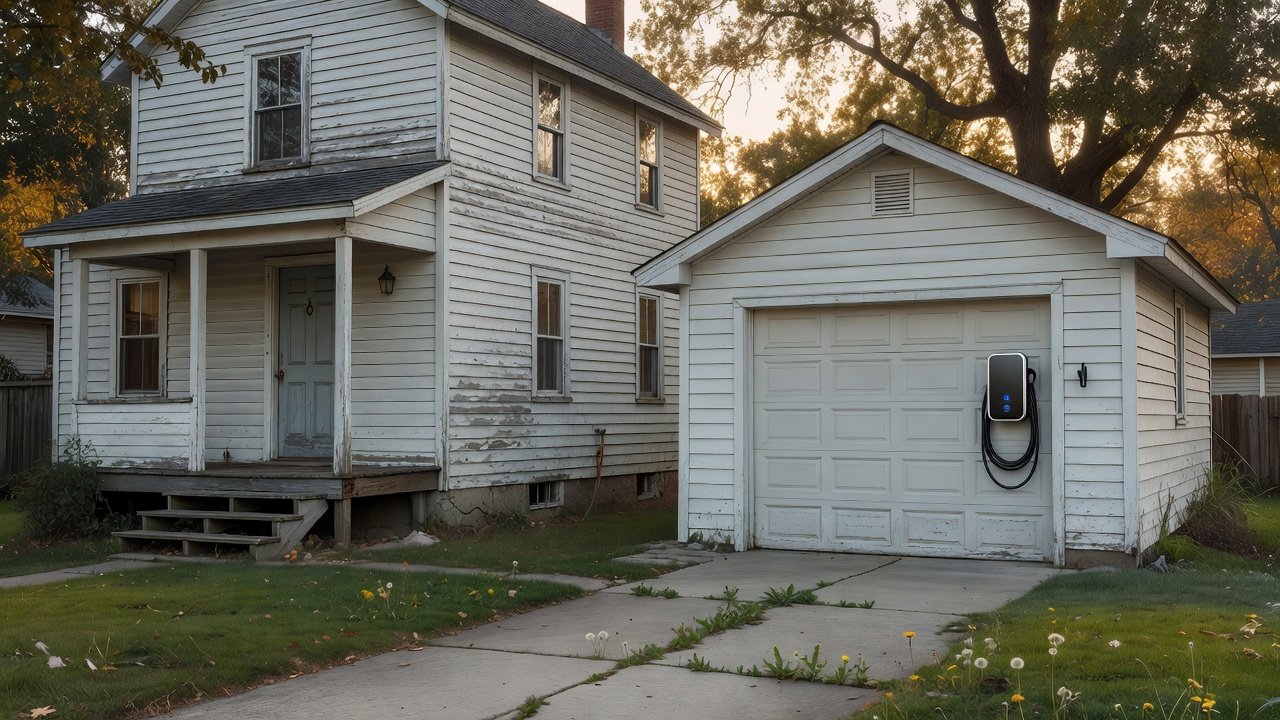
Introduction to Budget DIY EV Charger Projects in 2026
Homeowners tackling fixer uppers often seek cost-effective ways to add modern conveniences like EV charging. This guide focuses on DIY Level 2 charger installs that keep total project costs manageable while qualifying for 2026 energy incentives. Whether updating an older property or completing a budget reno, proper planning ensures safety and efficiency. As electric vehicles become more common, integrating charging infrastructure during renovations adds significant value to your home without requiring a full professional overhaul. DIY projects in this space align perfectly with current trends in sustainable home upgrades, allowing you to control expenses and timelines.
Site Assessment for Your Fixer Upper
Begin by evaluating your electrical panel capacity and garage or driveway location. Check for 240-volt circuit availability and measure distances to avoid long cable runs. Professional assessment tools or a basic multimeter help confirm suitability before purchasing equipment. Walk through your property systematically: inspect the main service panel for available breaker spaces, note any aluminum wiring that may need upgrades, and assess outdoor exposure for weather considerations. Measure the distance from the panel to your preferred charger location, accounting for conduit bends and potential obstacles like walls or landscaping. In older fixer uppers, common issues include outdated fuse boxes or shared circuits that could overload during simultaneous appliance and charger use. Document findings with photos for permit applications and future reference.
Understanding Permit Requirements and Local Codes
Most areas require permits for electrical work involving EV chargers. Contact your local building department early to review 2026 National Electrical Code updates. Documentation of load calculations prevents delays and ensures compliance with insurance standards. Start the process by submitting a simple site plan showing the proposed wiring route and charger specifications. Many municipalities now offer expedited reviews for energy-efficient upgrades. Be prepared to provide load calculations demonstrating that your panel can handle the additional demand without exceeding 80 percent capacity. Failure to obtain permits can void warranties and complicate home sales later. Reach out to neighbors who have completed similar projects for insights into local inspectors' preferences.
Selecting Budget-Friendly Level 2 Charger Kits
Look for UL-listed kits rated 30-40 amps with smart features like app control. Budget-friendly options as of 2026-09-11 include models from reputable brands that integrate easily with existing panels. Compare warranties and weatherproof ratings for outdoor mounting. Prioritize units with adjustable amperage settings to match your panel's capacity and future-proofing capabilities such as Wi-Fi connectivity for monitoring energy usage. Read user reviews focusing on installation ease and long-term reliability rather than just initial cost. Consider compatibility with your vehicle’s charging port and any home energy management systems already in place.
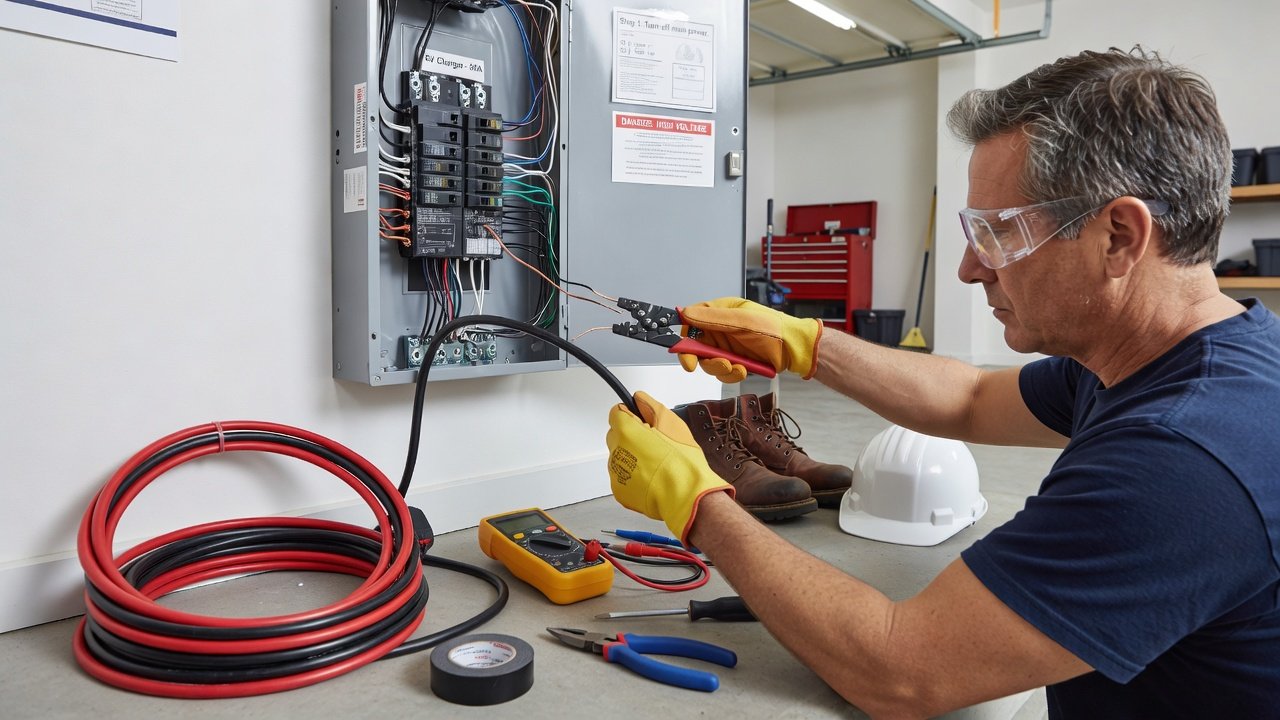
Step-by-Step Wiring and Mounting Instructions
1. Turn off power at the main breaker and verify with a voltage tester.
2. Run appropriate gauge wire from the panel to the mounting location using conduit for protection.
3. Install a dedicated double-pole breaker sized to the charger requirements.
4. Mount the charger unit securely using provided hardware, ensuring it is level and at the recommended height.
5. Connect wiring following manufacturer diagrams, double-check all terminals for tightness, and test for proper grounding before restoring power.
6. Program any smart features and perform a full test charge cycle with your vehicle.
Integration with Existing Electrical Panels
Many fixer uppers have older 100-amp panels. Consider subpanel additions or load management devices to avoid upgrades. Smart chargers with built-in load balancing prevent overloads during peak usage. Calculate your home’s existing load by listing major appliances and their amperage draws, then subtract from total panel capacity. If headroom is limited, install a dynamic load balancer that communicates with the charger to reduce output when other high-draw devices activate. This approach often eliminates the need for expensive panel replacements common in budget renovations.
Cost-Saving Comparisons Versus Professional Installation
DIY approaches can save significant amounts compared to hiring electricians, especially on budget reno projects. Factor in permit fees and tool rentals versus labor rates. Always weigh safety risks before deciding. Track your time investment realistically—many successful DIYers report completing the core electrical work over two to three weekends. Compare total project timelines and the satisfaction of learning new skills against outsourcing. Professional quotes typically bundle materials and labor, while DIY lets you source components individually for potential savings.
Real Fixer Upper Case Studies
Case 1: A 1950s bungalow in the Midwest added a garage-mounted charger using existing circuits after confirming spare capacity with a detailed load study. The homeowners completed the project in two weekends by pre-running conduit during a separate flooring renovation. Case 2: An urban row home retrofit incorporated a weatherproof unit with load balancing to share power between the charger and a new heat pump system, qualifying for local rebates. They documented every step for their HOA approval process. Case 3: A rural property used long conduit runs and a 40-amp kit to support two vehicles on a shared panel by staggering charging times via smart scheduling features. Each case highlights the importance of early assessment and creative problem-solving on older properties.
Safety Checklists for DIY Installs
- Verify all connections are torque-spec compliant using a calibrated torque screwdriver.
- Use GFCI protection where required by local codes and test monthly.
- Inspect for water ingress after weatherproofing with a hose test on the enclosure.
- Test charger functionality with a qualified EV before regular use and monitor for unusual heat.
- Wear appropriate personal protective equipment including insulated gloves during wiring.
- Keep a fire extinguisher rated for electrical fires nearby during the installation process.
Maximizing 2026 Energy Incentives
Federal and state programs offer credits for residential EV infrastructure. Visit energy.gov for current qualification details. Additional resources at epa.gov cover efficiency programs that may apply to your reno. Check irs.gov for updated tax credit forms and eligibility requirements specific to 2026 installations. Many incentives require pre-approval or specific product certifications, so gather documentation early. Some utility companies also provide rebates for smart chargers that support grid integration.
Common Mistakes to Avoid
Skipping load calculations often leads to tripped breakers or panel damage. Using undersized wire creates fire hazards and violates code. Ignoring weatherproofing details results in premature equipment failure in outdoor setups. Always double-check grounding continuity and avoid mixing aluminum and copper conductors without proper connectors.
FAQ: Common Issues Like Load Balancing and Weatherproofing
How do I handle load balancing on older panels?
Use dynamic chargers that monitor total home usage and throttle charging automatically to stay within safe limits.
What weatherproofing is essential for outdoor units?
Choose NEMA 4-rated enclosures and seal all conduit entries with appropriate compounds rated for temperature extremes.
Can I install without upgrading my panel?
Yes, if calculations show spare capacity; otherwise add a subpanel or smart energy management system to optimize existing resources.
What tools are essential beyond basic hand tools?
A circuit tester, conduit bender, torque wrench, and fish tape make the job smoother and safer on most fixer upper electrical systems.
Conclusion
A thoughtful DIY EV charger install enhances any budget fixer upper while aligning with 2026 sustainability goals. Follow codes, prioritize safety, and leverage incentives for the best results. With careful planning and attention to detail, your project can deliver reliable charging for years to come.
No comments yet. Be the first!