 Fixated on Home
Introduction to Budget Home Brewing Stations in Fixer-Uppers
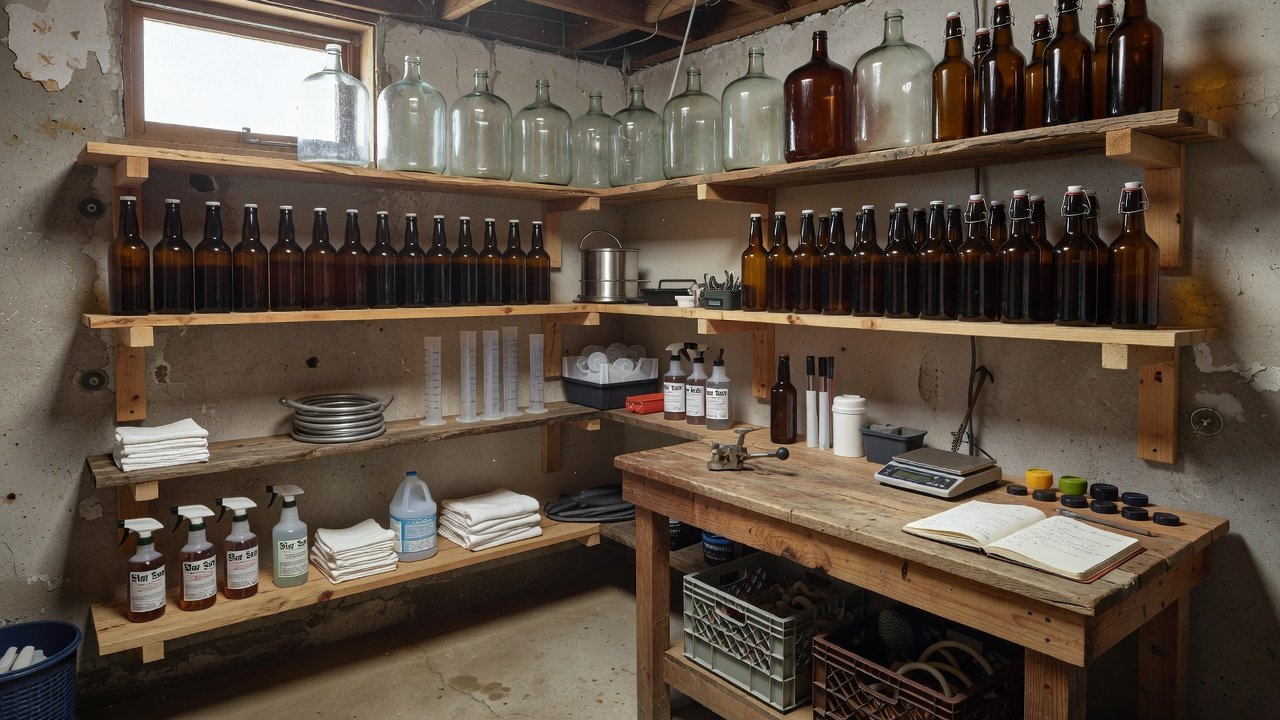
Creating a functional home brewing station in a fixer-upper property combines practical home improvement with the rewarding hobby of craft beer production. In 2026, many homeowners and renters seek space-saving designs that fit tight budgets while maximizing value during renovations. This guide focuses on affordable approaches using simple tools and sustainable materials, emphasizing renter-friendly setups that can be removed without damage. Home brewing has grown in popularity as people look for ways to control ingredients and experiment with flavors in their own spaces. A well-planned station supports fermentation, bottling, and cleaning without requiring a full dedicated room. Fixer-uppers often have underutilized areas such as basements, garages, utility closets, or even kitchen corners that can be transformed with minimal structural changes. The emphasis remains on designs that save floor space while providing easy access to equipment. Beginners benefit from understanding how temperature stability, airflow, and organization contribute to successful batches. This article covers location selection, material choices, assembly steps, safety protocols, customization ideas, real examples, maintenance routines, and answers to frequent questions. By following these practical details, you can build a station that grows with your skills and enhances the overall appeal of your renovation project.
Selecting the Right Location
Assess your fixer-upper for spots with access to water, electricity, and drainage while considering daily workflow. Basements provide natural cooling and darkness ideal for fermentation, but check for moisture issues common in older homes. Garages offer ample room for larger setups yet may need insulation to maintain consistent temperatures. Kitchen nooks provide convenience for frequent use but require careful planning to avoid interfering with cooking areas. Measure the available footprint and height to accommodate shelves, work surfaces, and storage without blocking pathways. Good ventilation prevents buildup of odors or humidity that could affect both brewing results and home comfort. Walk through potential sites at different times of day to note light exposure and traffic patterns. In multi-story fixer-uppers, upper-floor options may work if structural support allows for hanging weight. Avoid locations near furnaces, windows with direct sun, or exterior doors that introduce temperature swings. Consider proximity to a sink for easy cleanup and water access during mashing or sanitizing. Renter-friendly locations favor freestanding units over wall-mounted ones to simplify move-out procedures. Create a simple sketch of each candidate area noting electrical outlets, existing vents, and floor levelness before committing to one spot.
Essential Materials and Tools
Gather affordable materials such as reclaimed wood for shelving, plastic crates for modular storage, and basic fasteners from local suppliers. Focus on sustainable options like recycled lumber or bamboo to align with eco-conscious 2026 renovations. Tools needed include a cordless drill, level, measuring tape, saw, and sandpaper for finishing edges. Additional helpful items are brackets for support, hooks for hanging hoses, and non-slip mats for work surfaces. A materials list might include vertical studs or posts, horizontal boards cut to length, fasteners rated for the expected load, and ventilation components like an inline fan with ducting. Choose food-safe finishes for any surfaces that contact equipment. Examples from real projects show how using secondhand finds from local salvage yards keeps setups practical while reducing waste. Compare options like metal brackets versus wooden supports for durability in humid environments typical of fixer-uppers. Stock up on cleaning supplies and storage bins sized to fit your chosen footprint. Always verify that materials are sturdy enough to hold carboys, kettles, and bottles without sagging over time.
- Reclaimed wood boards for shelves
- Adjustable metal brackets or wooden cleats
- Plastic storage crates or bins
- Small inline exhaust fan and ducting
- Food-grade sealant or finish
- Non-slip shelf liners
- Wall anchors rated for weight
Step-by-Step Assembly Instructions
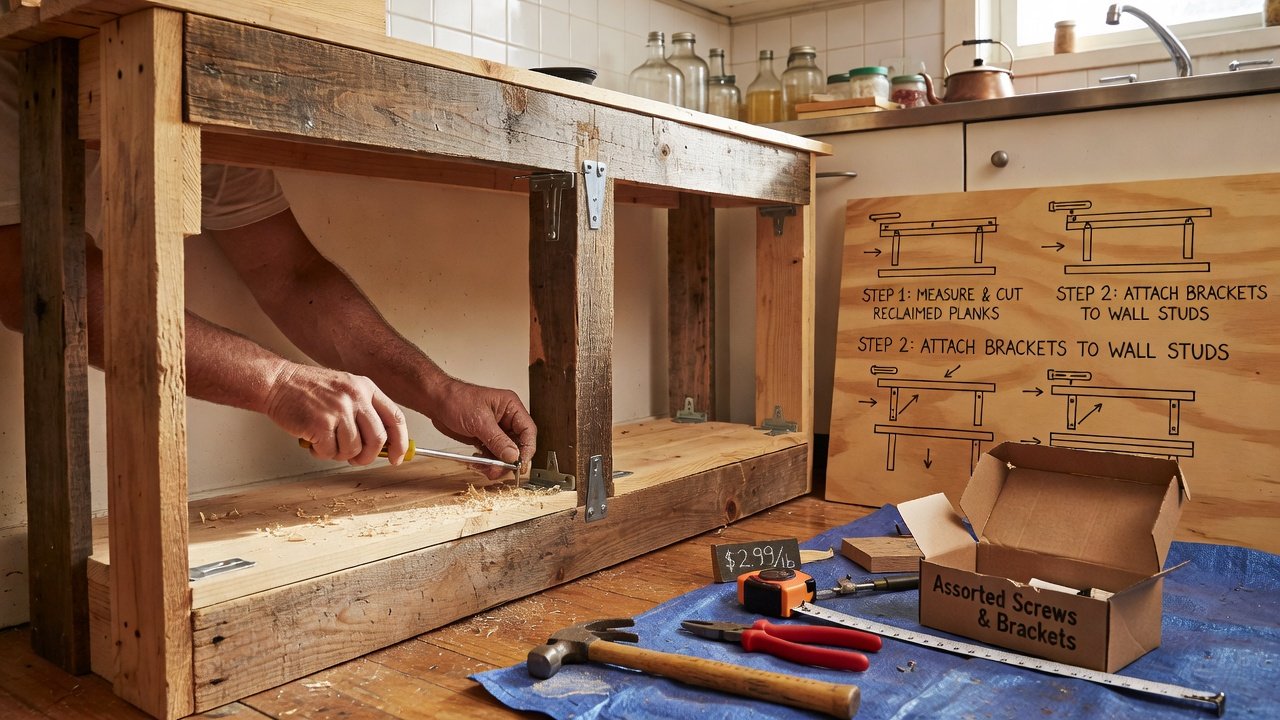
Begin by marking your chosen wall or corner area with a pencil after confirming level floors and walls. Install vertical supports first, ensuring they are plumb using a level at multiple points. Attach horizontal shelves at heights suitable for carboys on lower levels and smaller bottles higher up. Add a lower platform for a sink basin or cleaning station if space allows. Incorporate hooks for hoses and utensils along the sides. Next, integrate ventilation by mounting a small exhaust fan near the ceiling and running ducting to an exterior vent or window. Test stability by placing sample weights on each shelf before loading actual equipment. This process typically takes a weekend for beginners using basic tools, though complex customizations may extend the timeline. Work in stages to allow adhesive or finishes to cure fully between steps. Double-check all connections for tightness after the initial assembly.
Adding Finishing Touches
Sand all wooden surfaces smooth and apply a protective coat if desired. Label sections for different brewing stages to improve organization during use. Install LED strip lighting under shelves for better visibility during evening sessions. Route cords neatly with clips to maintain a tidy appearance.
Safety Considerations
Prioritize ventilation to manage CO2 from fermentation and cleaning chemicals that could accumulate in enclosed spaces. Install smoke detectors nearby and keep fire extinguishers accessible in case of electrical issues. Use food-grade materials to avoid contamination of batches. For electrical components like pumps or fans, ensure proper grounding, especially in older fixer-uppers with outdated wiring. Keep floors dry to prevent slips and store chemicals out of reach of children or pets. Learn more about indoor air quality from the EPA and general safety practices via the CDC. Regular inspections of brackets and fasteners help catch wear before problems arise. Position the station away from high-traffic zones to reduce accident risks during active brewing days.
Customization Options: Shelving and Ventilation
Customize with adjustable shelving for different batch sizes and seasonal equipment needs. Add LED lighting strips for visibility during evening work sessions. For ventilation, combine passive vents with a quiet inline fan controlled by a timer. Renter-friendly versions use tension rods and removable adhesive hooks instead of permanent drilling into walls. In fixer-uppers with limited outlets, incorporate battery-powered or USB-rechargeable lighting options. Wall-mounted units can include fold-down work tables for extra counter space when needed. Corner stations benefit from triangular shelves that maximize awkward angles. Real examples include vertical wall units in urban apartments that fold away when not in use, or basement corner stations in suburban homes with integrated cooling mats for summer months. Explore modular crate systems that stack and unstack easily for flexible storage.
Real-World Examples and Value in 2026 Renovations
Many successful projects start with a simple two-shelf unit that expands over time as brewers refine their process. One example involved converting a garage corner into a complete station using salvaged lumber and basic brackets, resulting in improved organization and easier cleanup. Another project in a basement utilized existing plumbing access for a sink addition, increasing daily usability. These setups add functional value to fixer-uppers by creating dedicated hobby zones that appeal to future buyers interested in craft activities. Sustainable choices like upcycled materials reduce waste and align with current renovation trends focused on environmental responsibility. Track local material availability through community groups to optimize spending while maintaining quality and longevity.
Maintenance and Troubleshooting
Regular cleaning of surfaces and ventilation components keeps the station hygienic and functional. Check shelf alignment monthly and tighten any loose fasteners. Common issues include condensation on bottles, which can be mitigated by improving airflow, or uneven fermentation temperatures addressed with insulation wraps. Rotate stock to use older batches first and inspect seals on carboys periodically. Keeping a simple log of brewing sessions helps identify patterns and refine future setups.
FAQ Section
- How do I handle limited space in small fixer-uppers? Opt for vertical designs with narrow shelves and wall-mounted racks to save floor area while maintaining access.
- What are common beginner mistakes? Overlooking temperature control or poor ventilation leading to off-flavors or mold growth in the space.
- Are these setups suitable for renters? Yes, focus on non-permanent installations using clamps, tension rods, and freestanding units that leave no holes.
- How to maintain sustainability? Choose reclaimed wood, energy-efficient fans, and reusable containers to reduce environmental impact over time.
- What if my home lacks good natural ventilation? Add an inline fan with proper ducting routed to the exterior and monitor humidity levels regularly.
Conclusion
Building a 2026 DIY home brewing station in a budget fixer-upper empowers homeowners with practical skills and a personalized space. By following these steps for location selection, assembly, safety, customization, and ongoing maintenance, beginners can create efficient setups that enhance both brewing enjoyment and property value. Start with core elements, prioritize safety and sustainability, and iterate based on your unique space for rewarding long-term results.
No comments yet. Be the first!