 Fixated on Home
Introduction: Turning Fixer-Uppers into Productive Workspaces
Creating a dedicated home office in a fixer-upper property allows you to maximize underused areas like spare rooms, attics, or basements without major renovations. This guide focuses on budget-friendly DIY approaches that emphasize multi-purpose furniture, smart storage, and efficient lighting to suit small or irregular spaces. By focusing on practical builds and 2026 trends such as sustainable materials and modular designs, you can achieve long-term value while keeping costs low. Homeowners in older properties often face unique hurdles including uneven subfloors, outdated electrical systems, and limited square footage, yet these challenges present opportunities for creative solutions that add both functionality and resale appeal.
Whether you are dealing with uneven floors or limited electrical outlets, these methods prioritize adaptability and functionality. Real-home examples demonstrate how simple projects deliver professional results. The emphasis remains on projects completable with basic tools and materials available at local hardware stores, ensuring accessibility for beginners who may lack advanced carpentry experience.
Assessing Your Space for Maximum Efficiency
Start by evaluating the available area. Measure dimensions, note natural light sources, and identify challenges like sloping ceilings or exposed wiring. In fixer-uppers, prioritize multi-purpose zones that serve as both workspace and storage. Sketch a basic layout to plan furniture placement that avoids blocking pathways. Take time to photograph the space from multiple angles and note any structural features such as load-bearing walls or HVAC vents that could influence placement decisions.
Consider traffic flow and ergonomics. Position the desk near windows for daylight while ensuring easy access to power sources. This initial assessment prevents costly mistakes later. Factor in future needs, such as accommodating additional monitors or expanding storage as your work requirements evolve. Walk through the room at different times of day to observe how shadows and temperature variations affect usability, then adjust your plan accordingly.
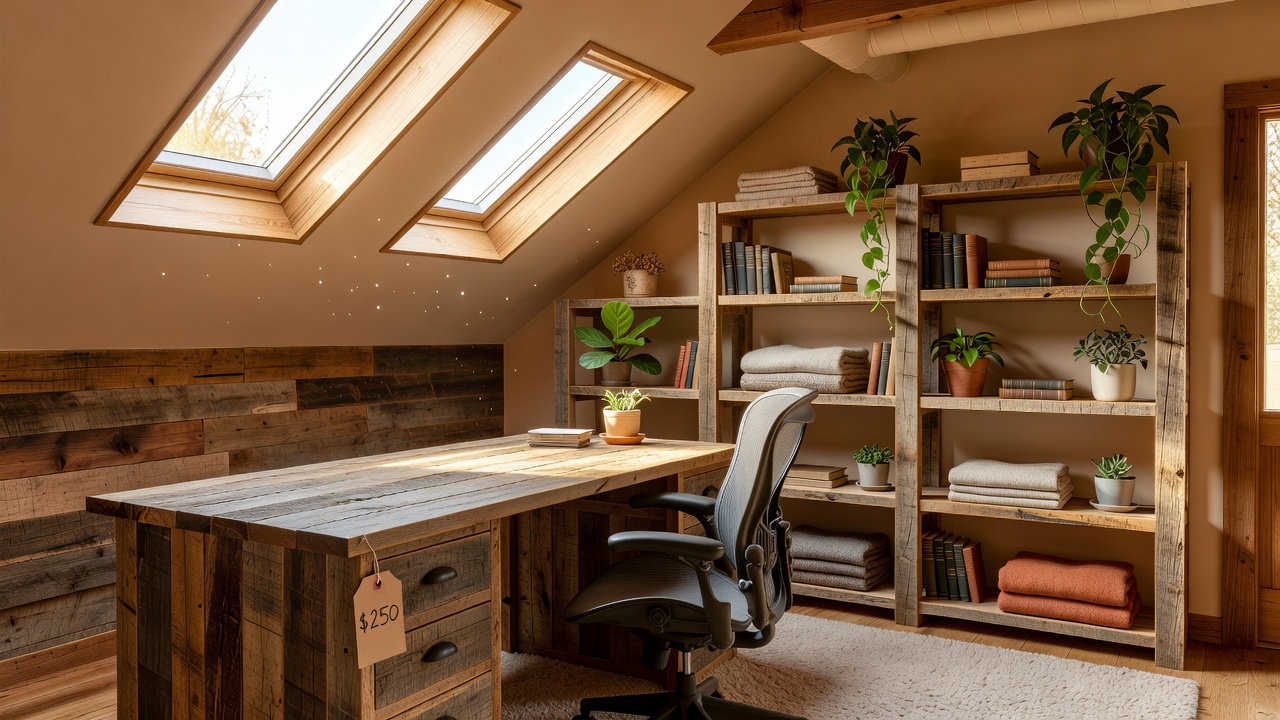
Building a Multi-Purpose Desk: Step-by-Step Plans
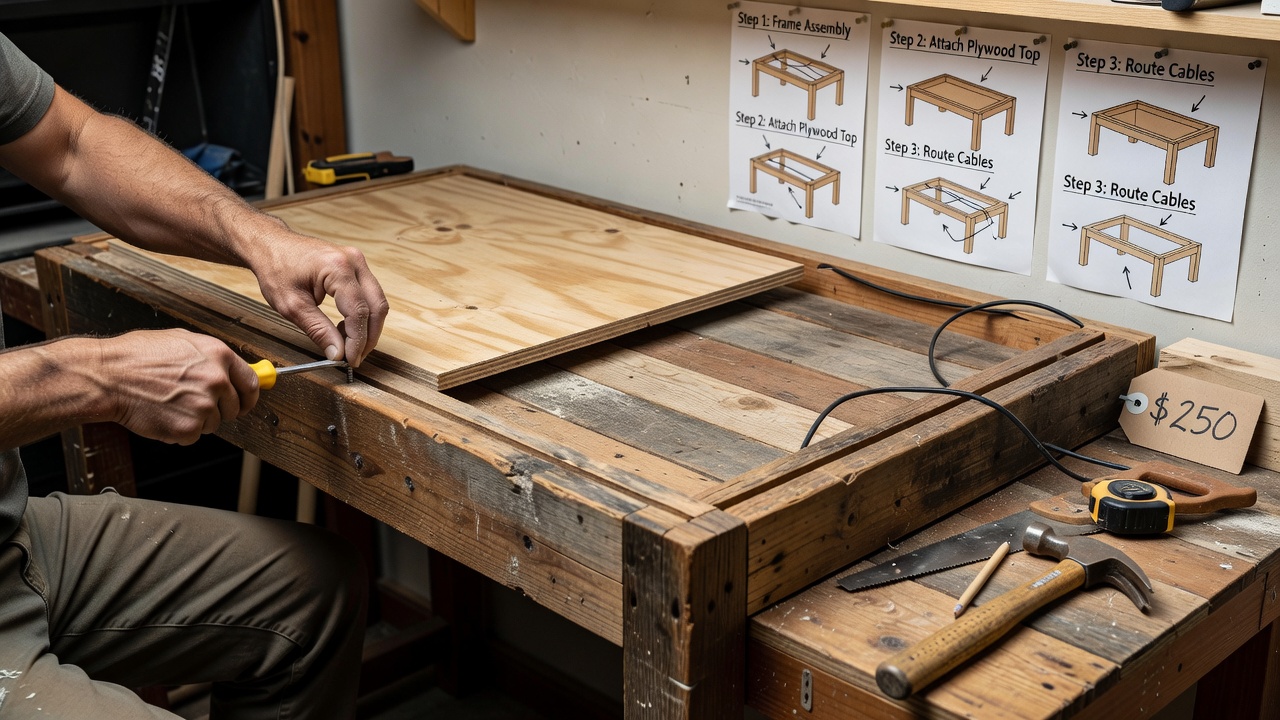
A custom desk built from affordable lumber or reclaimed wood provides the foundation for any setup. Begin with a simple frame using 2x4s for legs and plywood for the top. Sand surfaces thoroughly and apply a protective finish suitable for daily use. Cut all pieces accurately using a circular saw or handsaw, then dry-fit components before final assembly to verify measurements align with your floor irregularities.
Integrate storage by adding shelves underneath or a hutch above. For small spaces, design the desk to fold or extend, allowing it to double as a dining surface when needed. Secure all joints with screws and brackets for stability on uneven floors. Add leveling feet or shims under the legs to compensate for any slope, and reinforce the top with cross-bracing if the surface will support heavy equipment like printers or multiple computers. Finish by routing channels along the back edge for cable passage, creating a clean workspace that hides wiring effectively.
Smart Storage Hacks and Cable Management Systems
Effective storage prevents clutter in compact offices. Use wall-mounted pegboards for tools and supplies, or install floating shelves made from brackets and planks. Repurpose crates or baskets for vertical organization that frees floor space. Label each container clearly and group items by frequency of use so everyday supplies remain within arm's reach while seasonal items stay higher up.
For cables, route them through PVC pipes painted to match walls or use adhesive clips along baseboards. A power strip mounted under the desk keeps connections tidy and accessible. These hacks improve both aesthetics and safety. Extend the system by installing a small surge protector in a concealed drawer and labeling each cord with color-coded tape to simplify troubleshooting when devices are added or replaced.
Lighting Upgrades for Productivity and Ambiance
Layer lighting with task lamps, overhead fixtures, and accent strips. Choose LED options for energy efficiency and longevity. Install dimmable bulbs to adjust brightness throughout the day, reducing eye strain during long work sessions. Position task lighting directly over the desk surface while using softer ambient sources to minimize harsh contrasts that can cause headaches over time.
Incorporate natural light enhancers like mirrors or sheer curtains. For 2026 trends, add smart bulbs controllable via apps for automated schedules that align with work routines. Test different bulb temperatures, opting for cooler daylight tones during focused tasks and warmer hues for evening wind-down periods to support better sleep patterns.
Acoustic Treatments for a Focused Environment
Reduce noise with DIY panels made from fabric-wrapped insulation or old blankets stretched over frames. Hang them on walls behind the desk or on ceilings to absorb sound. This is especially useful in homes with thin walls or nearby traffic. Experiment with placement by temporarily positioning panels and testing audio clarity with a simple voice recording app on your phone.
Combine with rugs and curtains for additional dampening. Test acoustics by recording voice memos before and after installation to measure improvement. For added benefit, consider placing a small bookcase filled with books against one wall, as the irregular surfaces further scatter sound waves effectively.
Real-Home Examples and Cost Breakdowns
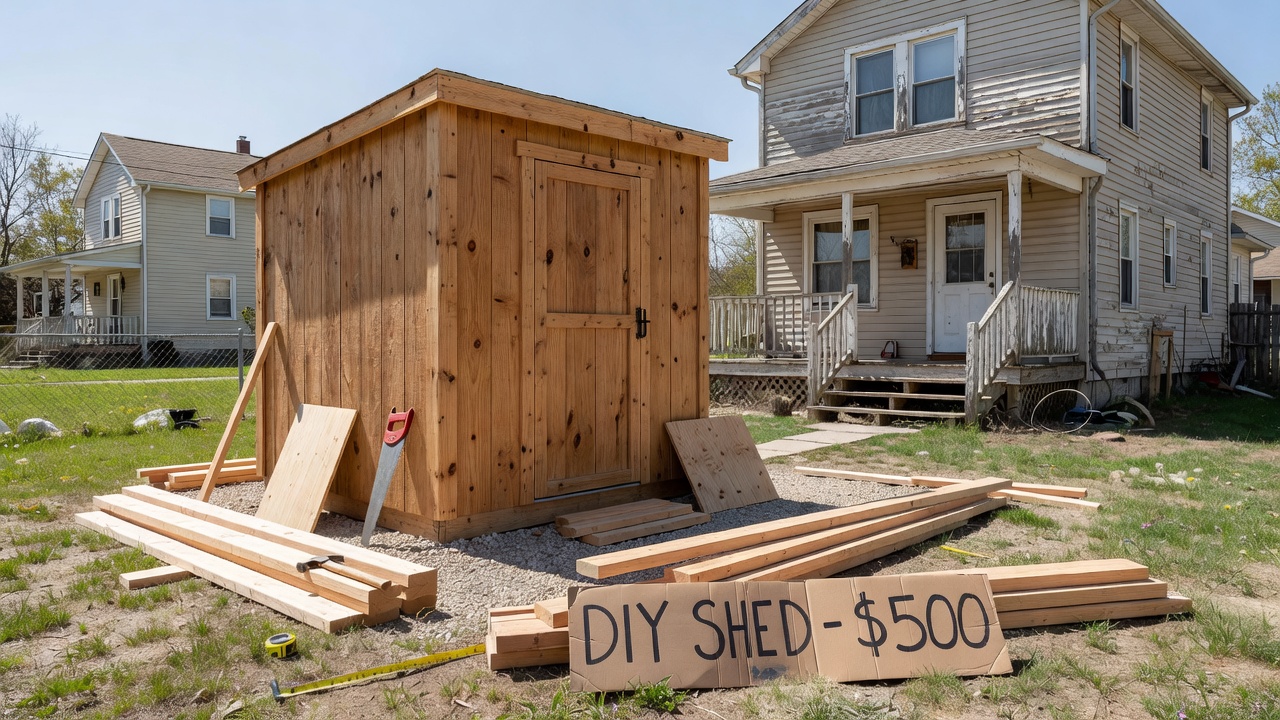
One homeowner converted a basement corner using scrap wood for a desk and secondhand lighting, achieving a complete workspace in under a weekend. Another attic project featured modular shelving that adapted to roof angles, creating ample storage without custom carpentry. A third example involved transforming a narrow hallway nook into a standing desk station with wall-mounted accessories that fold away when not in use.
Qualitative breakdowns show that focusing on reclaimed materials and basic tools keeps projects accessible. Compare these to ready-made furniture, which often requires assembly and offers less customization for irregular spaces. Homeowners report greater satisfaction when they invest time in planning layouts that grow with their needs rather than purchasing fixed-size units that may not fit future configurations.
DIY vs Ready-Made: Key Comparisons
- Customization: DIY allows tailoring to exact measurements and needs.
- Cost: Builds from basic supplies generally cost less than pre-assembled units.
- Durability: Handcrafted pieces can match or exceed mass-produced quality with proper finishing.
- Time: Ready-made options save hours but limit creative control.
- Flexibility: Modular DIY designs adapt more readily to evolving work styles or room changes.
Choose DIY when flexibility matters most in fixer-upper settings. Many ready-made alternatives lack the ability to accommodate sloped floors or awkward corners common in older homes, making custom solutions more practical long term.
Practical Checklists and Material Lists
Desk Build Checklist:
- Gather lumber, screws, sandpaper, and finish.
- Cut pieces to size.
- Assemble frame and attach top.
- Sand and seal surfaces.
- Install storage additions.
- Level the structure and test stability.
- Route cables and add final accessories.
Material List: Plywood sheets, 2x4 studs, brackets, paint or stain, LED strips, cable clips, fabric for panels, leveling feet, and basic hand tools including a drill, level, and measuring tape.
Ergonomics and Health Considerations
Beyond aesthetics, prioritize posture-friendly setups. Adjust desk height so elbows remain at roughly 90 degrees when typing, and select a supportive chair with adjustable lumbar support. Incorporate monitor stands to align screens at eye level, reducing neck strain. Schedule short movement breaks using a simple timer to maintain circulation during extended work periods.
Maintenance and Longevity Tips
Protect your investment by resealing wood surfaces annually and inspecting brackets for loosening. Rotate storage items periodically to prevent dust buildup, and update cable management as new devices are introduced. These small habits extend the life of your DIY office and maintain its professional appearance over years of daily use.
Common Challenges and FAQ
How do I handle uneven floors? Use adjustable feet on furniture or level with shims before securing pieces.
What if outlets are limited? Opt for extension cords rated for office equipment and add USB charging hubs.
Are these setups suitable for long-term use? Yes, with quality finishes and modular designs that evolve with needs.
Can I incorporate 2026 trends easily? Focus on sustainable woods and app-enabled lighting for future-proofing.
How do I manage dust in older homes during construction? Work in sections and use plastic sheeting to contain debris, then vacuum thoroughly before finishing.
What tools are essential for beginners? A cordless drill, measuring tape, level, and sandpaper set cover most basic builds described here.
Conclusion: Start Your Transformation Today
These DIY strategies empower you to create efficient home offices tailored to fixer-uppers. By following the plans and incorporating checklists, you gain a productive space that adds value to your home. Explore further at IKEA for inspiration on modular ideas and Home Depot for tool recommendations.
No comments yet. Be the first!