 Fixated on Home
Introduction: Affordable Entertainment Upgrades for Fixer-Uppers
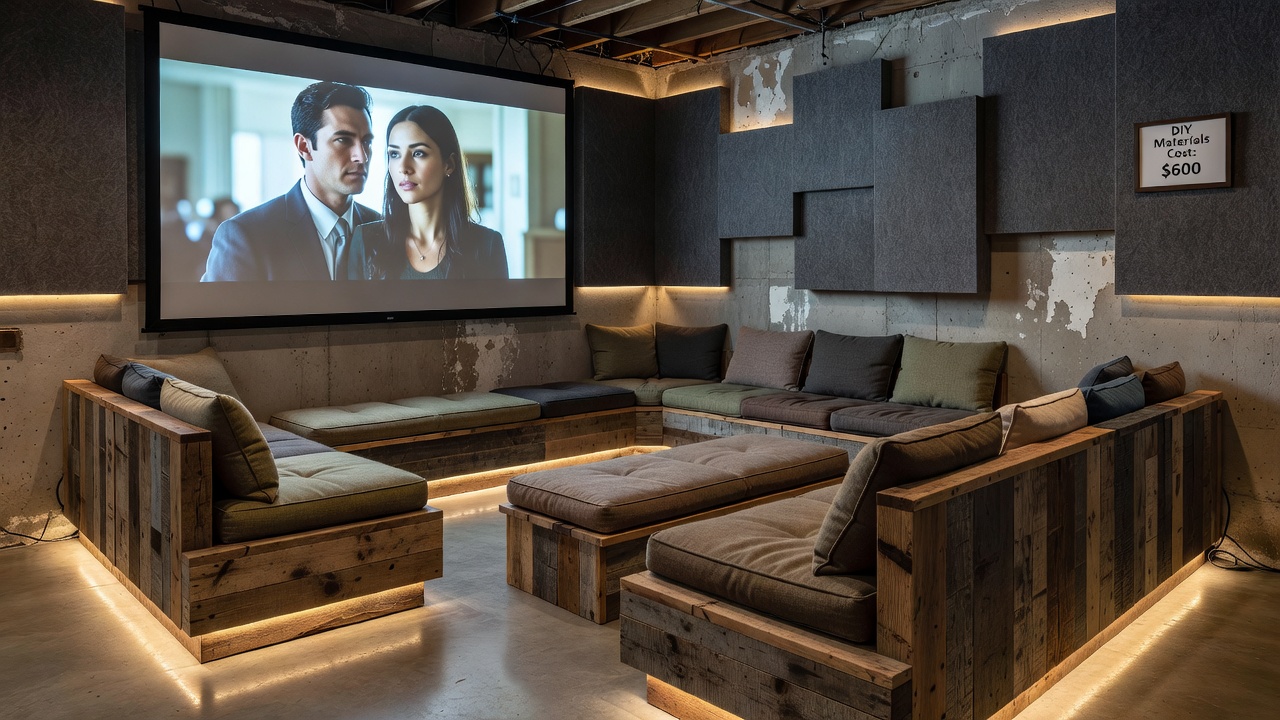
Homeowners tackling fixer-uppers often seek practical ways to enhance living spaces without overspending. A DIY home theater offers an engaging entertainment hub that boosts property value and daily enjoyment. This guide focuses on creating a functional setup suited to budget-conscious renovations, drawing from recent real-world projects completed in early 2026. Many fixer-upper owners discover that transforming an underused basement or spare room into a dedicated theater space delivers both relaxation and a strong return on modest investment through improved home appeal.
Key elements include soundproofing techniques, seating crafted from reclaimed materials, and secure projector mounting. Readers will find material sourcing tips, wiring shortcuts, acoustic panel construction, and a direct comparison of LED versus projector displays. A troubleshooting FAQ addresses beginner challenges while highlighting common pitfalls to avoid. The approach prioritizes safety, sustainability, and step-by-step execution so even novice renovators can succeed.
Planning Your Budget-Friendly Home Theater
Start by assessing the available space, typically a basement or spare room in a fixer-upper. Measure dimensions and identify power sources early. Focus on multifunctional elements that serve dual purposes, such as acoustic treatments that double as decor. Recent projects emphasize sourcing free or low-cost reclaimed lumber from local demolition sites and online marketplaces. Create a simple floor plan on paper first, noting traffic flow and sightlines from potential seating positions.
Outline a phased approach: first address acoustics and lighting, then seating, followed by display and audio integration. This sequence prevents costly rework later. Consider ventilation needs to prevent overheating of equipment and maintain comfort during long viewing sessions. Check local building codes for any electrical or structural modifications before beginning work.
Soundproofing on a Budget
Effective soundproofing transforms an ordinary room into an immersive theater. Use mass-loaded vinyl combined with dense foam to block noise transmission. Seal gaps around doors and windows with weatherstripping for immediate gains. Layer materials strategically: apply vinyl directly to walls, then add foam panels over top for absorption.
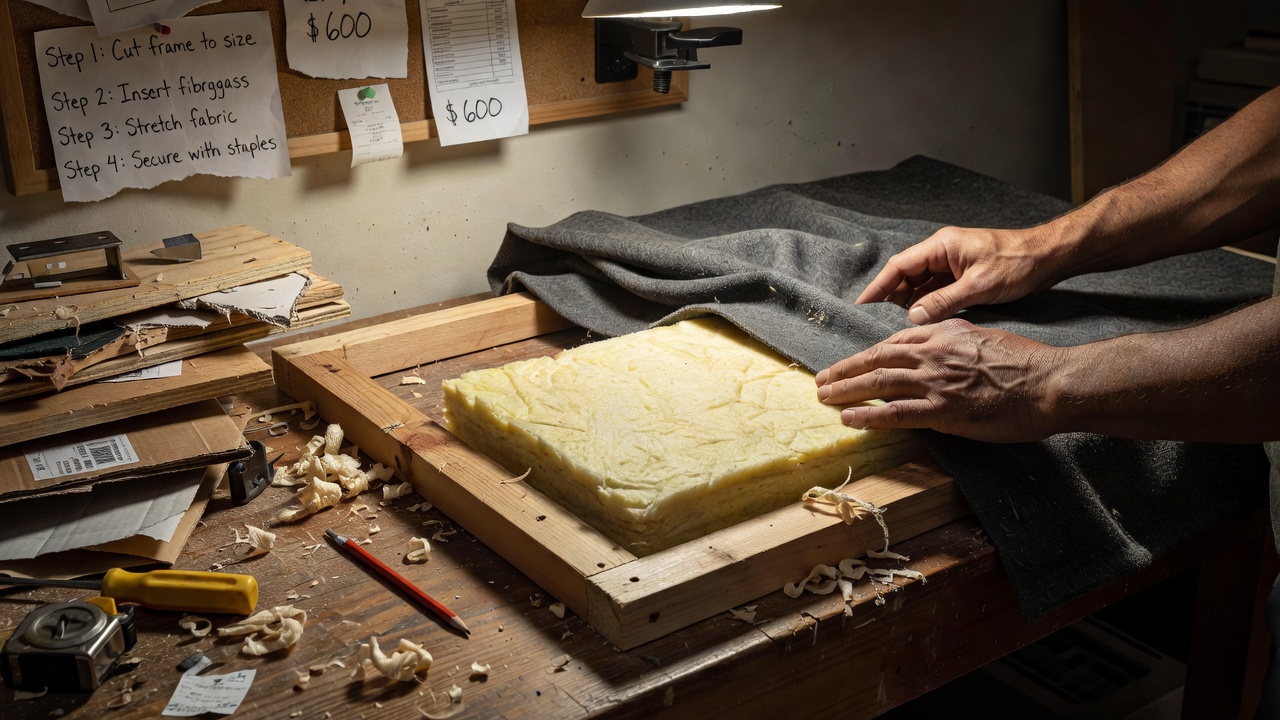
Build custom acoustic panels using rigid fiberglass boards wrapped in fabric. These absorb echoes and improve sound clarity. Position panels on side walls and ceiling at reflection points identified with a simple mirror test. For deeper treatment, construct bass traps in room corners using stacked insulation wrapped in breathable cloth. Homeowners in recent projects reported noticeable clarity improvements after installing panels at first-reflection points and adding corner traps.
DIY Seating from Reclaimed Materials
Reclaimed wood from pallets or old furniture creates sturdy, stylish seating. Sand and treat surfaces for safety and longevity. Construct modular benches or tiered platforms that accommodate multiple viewers while saving floor space. Begin by disassembling pallets carefully, removing nails, and cutting boards to consistent lengths for frames. Secure joints with screws and wood glue for stability.
Add cushions made from recycled foam scraps covered in durable fabric. This approach mirrors successful builds in Midwest fixer-uppers where seating costs stayed minimal through creative reuse. Incorporate storage compartments beneath seats for blankets or media accessories. Test each assembled unit for wobble and reinforce with additional bracing as needed. Many builders finish the wood with eco-friendly sealant to match existing room aesthetics.
Acoustic Panel Construction Details
Creating effective acoustic panels requires attention to material density and placement. Cut fiberglass to size, wrap tightly with fabric using a staple gun on the back, and mount with French cleats for easy removal. Space panels several inches from the wall to enhance low-frequency absorption. Experiment with panel sizes ranging from two by four feet up to larger formats for bigger walls. Real examples show that mixing panel thicknesses provides balanced sound control across frequencies.
Projector Mounting and Display Options
Mounting a projector requires a stable ceiling or wall bracket rated for the device's weight. Use lag bolts anchored into joists for security. Align the throw distance according to manufacturer specifications to achieve a sharp image. Verify the mounting surface can support dynamic loads and add safety cables as backup. Level the projector carefully and use keystone correction sparingly to preserve image quality.
Compare options: projectors deliver large-screen experiences ideal for dark rooms, while LED TVs offer brighter viewing in spaces with ambient light. Energy-efficient models from established brands reduce long-term operating expenses, aligning with Department of Energy guidelines on efficient appliances. Consider screen material options such as matte white for even light distribution or gray for higher contrast in rooms with some light leakage.
Wiring Hacks and Component Integration
Hide cables using conduit runs along baseboards or through existing wall cavities. Opt for wireless audio transmitters to minimize visible wiring. Connect a basic receiver to bookshelf speakers positioned for optimal surround effect. Label all cables at both ends during installation to simplify future troubleshooting. Route power cords away from signal lines to reduce interference and use surge protectors rated for home theater equipment.
Test all connections before finalizing mounts to avoid future disassembly. Integrate smart plugs for convenient control of lighting and power states via voice commands if desired.
Material Sourcing and Practical Examples
Visit habitat restoration centers and construction surplus yards for affordable supplies. Online forums share current local deals on acoustic materials and hardware. Focus on versatile items like multi-purpose screws and paint that serve multiple project stages. One recent project in a 1920s bungalow used salvaged barn wood for seating frames and leftover insulation from a neighboring renovation for panels, demonstrating how community networks accelerate sourcing.
Another example involved converting a concrete-walled basement where builders layered inexpensive moving blankets behind fabric for initial sound dampening before adding professional-grade treatments. These cases illustrate adaptability across different fixer-upper conditions.
LED vs Projector: Head-to-Head Comparison
- Image Size: Projectors excel at screens over 100 inches; LEDs suit smaller, brighter setups.
- Installation: Projectors need precise mounting; LEDs plug in easily.
- Maintenance: Lamp replacements for projectors versus longer LED lifespans.
- Room Conditions: Projectors perform best in controlled lighting; LEDs handle daylight better.
- Energy Use: Modern LEDs often consume less power during extended sessions, supporting ENERGY STAR recommendations.
- Portability: LED units move more readily between rooms compared to fixed projector setups.
Troubleshooting FAQ
Q: How do I fix audio echo after installation? Add more absorption panels on parallel surfaces and verify speaker placement.
Q: What if the projector image appears blurry? Recheck focus settings and ensure the mounting surface remains level.
Q: Can reclaimed seating support heavy use? Reinforce joints with metal brackets and test weight capacity before regular use.
Q: How do I prevent overheating in a sealed room? Install a quiet exhaust fan near the ceiling and ensure adequate intake vents at floor level.
Q: What causes buzzing in the audio system? Isolate power cables from speaker wires and confirm all grounds are properly connected.
Conclusion
These methods deliver a satisfying home theater experience tailored to fixer-uppers. By prioritizing reclaimed materials, strategic soundproofing, and careful mounting, homeowners achieve professional results affordably. Apply the steps sequentially and consult local building codes where structural changes occur. This project rewards patience with lasting entertainment value and provides a template for future upgrades as budgets allow. Document your progress with photos to share insights with other renovators facing similar challenges.
No comments yet. Be the first!