 Fixated on Home
Introduction to DIY Murphy Beds in Fixer-Uppers
Fixer-upper homes frequently feature compact layouts and older construction that demand creative, non-invasive solutions for better usability. A Murphy bed provides an efficient answer by folding vertically into the wall, instantly converting a bedroom into a multipurpose living area, office, or guest space. This 2026-focused guide delves into affordable DIY Murphy bed construction using everyday home improvement methods that preserve the character of older properties while adding modern functionality. Readers searching for practical renovation ideas will find detailed plans that emphasize ease of execution and long-term value without requiring permits or major structural work.
Throughout the article we explore every phase from initial planning to final finishing touches. Emphasis is placed on real-world applicability for homeowners who enjoy hands-on projects yet want professional-looking outcomes. By following these instructions, you can create a custom sleeping solution that blends seamlessly with existing decor and addresses common space constraints found in fixer-uppers.
Benefits of Murphy Beds for Space-Saving Renovations
Murphy beds excel in smaller homes because they reclaim valuable floor area during daylight hours. In a typical fixer-upper bedroom, a standard bed occupies permanent space that could otherwise serve as a reading nook or workout zone. The vertical storage design allows the mattress and bedding to remain made and ready while hidden behind a cabinet-style facade that doubles as wall decor. Many owners report that installing one transformed cramped secondary bedrooms into versatile rooms used daily rather than reserved solely for overnight guests.
Additional advantages include minimal impact on original architecture. Unlike built-in cabinetry that alters floor plans permanently, a Murphy bed mounts to studs and can be removed later if preferences change. Customization potential is another strong point; owners can match paint colors, add molding details, or incorporate storage shelves that reflect the home's unique style. These features make the project especially appealing for those restoring historic or character-filled properties where preserving original elements remains a priority.
Planning Your Project and Measuring Accurately
Successful builds begin with thorough planning. Start by selecting the room and evaluating wall suitability. Identify load-bearing walls using a stud finder and confirm clearance for the bed to lower fully without obstruction from windows, doors, or radiators. Measure twice: record wall height, width available, and floor space needed when the bed is open. Consider mattress thickness, as thicker profiles require deeper frames and stronger support hardware.
Sketch a simple diagram noting stud locations and electrical outlets that might interfere with mounting. Factor in future needs such as adding side tables or lighting. This preparatory stage prevents costly rework and ensures the finished piece integrates smoothly with the room's proportions. Many DIYers photograph the space before starting to document progress and inspire design choices later.
Recommended Materials and Tool Lists
Core materials center on durable yet lightweight plywood for the main box and platform, combined with solid lumber for trim and reinforcement. Heavy-duty piano hinges or specialized Murphy bed hardware provide smooth pivoting action, while gas struts or piston lifts handle the weight during operation. Select finishes like primer and paint or stain that complement surrounding trim work. Additional items include wood screws, lag bolts for wall attachment, and edge banding for clean plywood edges.
Tool requirements remain accessible for most homeowners: circular saw with fine-tooth blade, cordless drill with various bits, long level, clamps, sandpaper assortment, and safety glasses. A second person assists during lifting and alignment phases. For sourcing advice and cutting lists, consult established home improvement references such as This Old House. Quality hardware ensures longevity and safe daily use.
Detailed Step-by-Step Assembly Instructions
Begin construction by cutting all plywood panels according to your measured dimensions. Assemble the outer cabinet frame first using pocket screws for invisible joints and added strength. Next build the inner bed box that will hold the mattress, reinforcing corners with glue and screws. Attach the platform base securely before moving to hardware installation.
Mount the cabinet to the wall by locating studs and driving lag bolts through pre-drilled holes. Verify plumb and level at every stage. Install the hinge system along the top edge, followed by gas struts positioned for balanced lift assistance. Lower the bed slowly to test clearance and adjust strut tension if needed. Finish by applying trim pieces, sanding all surfaces, and applying your chosen paint or stain in multiple thin coats for a durable result.
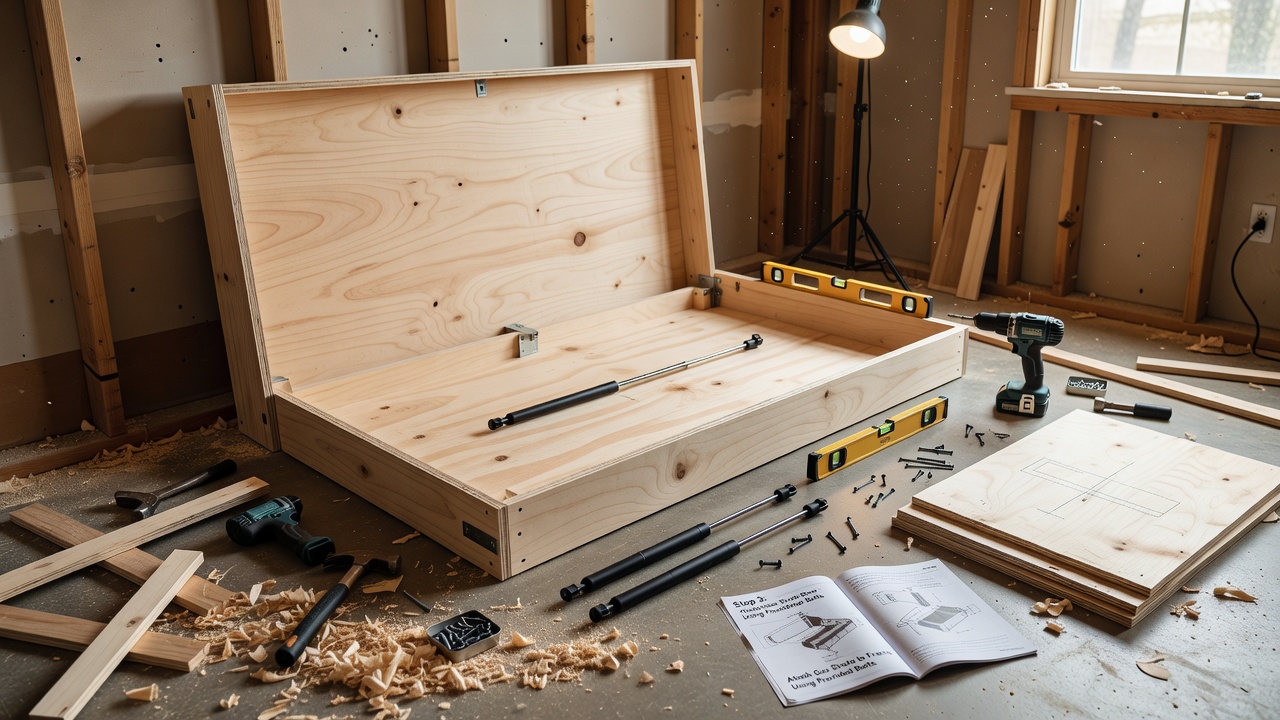
Throughout assembly, pause frequently to check alignment and tighten all fasteners. This methodical approach minimizes errors and produces a unit that operates reliably for years.
Customization Options Including Built-in Shelving
Personalization elevates a basic Murphy bed into a signature room feature. Add flanking bookcases or floating shelves on either side of the cabinet for books, decor, or linens. Integrate LED strip lighting inside the frame that activates when the bed lowers, creating a soft nighttime glow. Some builders incorporate a fold-down desk panel that tucks away when the bed is in use.
These additions require only minor modifications to the original plans yet dramatically increase utility. Choose hardware and finishes that echo existing room details for a cohesive look. Experiment with fabric panels or wallpaper on the exterior face to match upholstery or accent walls.
Real-World Examples and Cost Comparisons
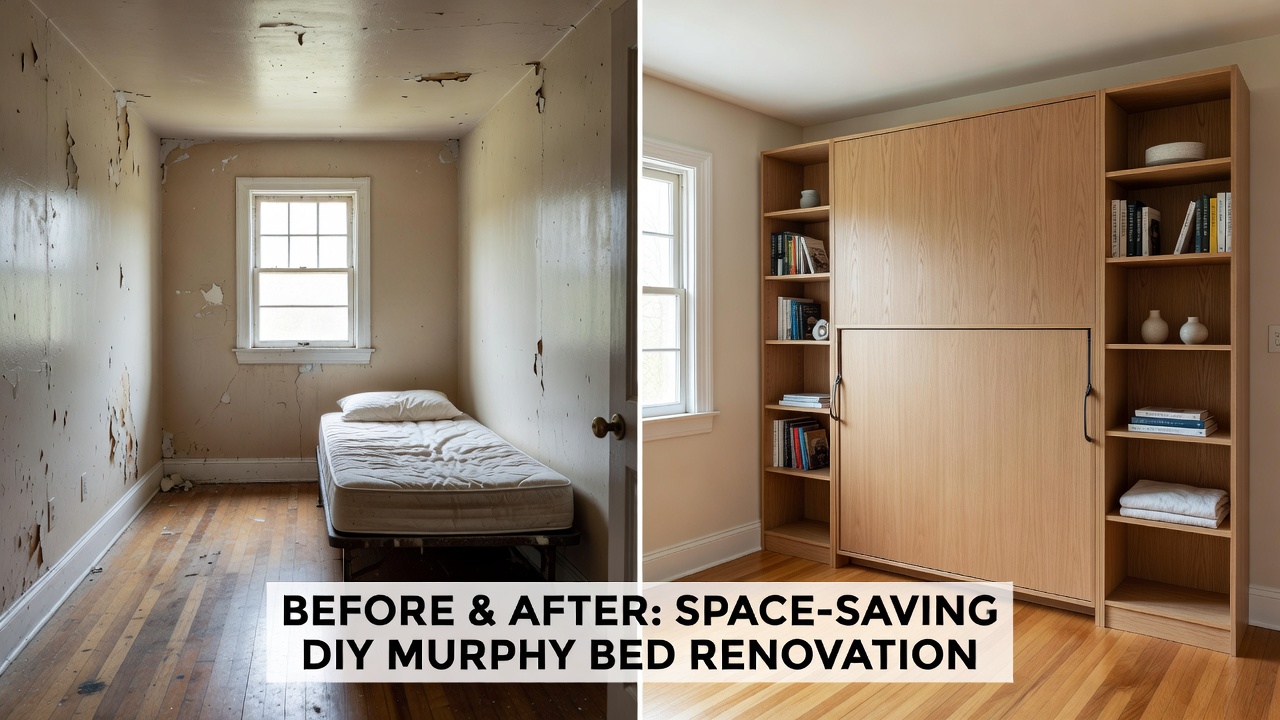
Homeowners across various fixer-upper styles have shared successful installations ranging from 1920s bungalows to mid-century ranches. Before photos commonly display cluttered rooms dominated by a full-size bed; after images reveal open floor plans with the bed concealed behind attractive cabinetry. One project converted a narrow guest room into a combined office and occasional bedroom, increasing daily usability without altering square footage.
DIY routes generally deliver superior value compared with retail models because they eliminate shipping fees, allow exact sizing, and avoid assembly labor charges. The result is a tailored piece that fits the space perfectly while reflecting personal craftsmanship. For additional project inspiration, explore tutorials at Family Handyman.
Addressing Common Challenges: Wall Reinforcement and Safety Features
Wall reinforcement forms the foundation of safe operation. Always secure the mounting frame into at least two studs using appropriately sized lag bolts and consider adding horizontal blocking between studs for extra rigidity in older plaster walls. Safety elements include locking latches that hold the bed closed, child-resistant mechanisms, and struts rated to support the combined weight of frame and mattress.
Potential issues such as uneven lowering or wall damage are avoided by double-checking levels during installation and adding protective pads where the bed contacts the floor or wall. Regular inspection of hardware prevents wear-related problems over time.
Maintenance Tips and Longevity Considerations
Once installed, routine care keeps the Murphy bed functioning smoothly. Lubricate hinges and pistons annually with manufacturer-recommended products. Inspect mounting bolts periodically and retighten as needed. Vacuum the interior frame to remove dust that could affect moving parts. With proper upkeep, a well-built unit lasts for decades and continues to enhance the home's versatility.
FAQ Section
- How much wall reinforcement is needed? Anchor into multiple studs and add blocking if plaster is fragile; professional assessment helps with historic homes.
- What safety features are essential? Reliable gas struts, secure locking latches, and weight-rated hardware prevent accidents during use.
- Can beginners complete this project? Yes, provided they follow measurements carefully and enlist help for heavy lifting phases.
- How does it compare to buying one? DIY versions offer precise customization and avoid recurring retail markups while matching your exact room dimensions.
- Are permits typically required? Most simple wall-mounted designs do not need permits, but always verify local regulations before starting.
Conclusion
2026 DIY Murphy bed builds deliver a smart, space-efficient upgrade for fixer-upper homes. Through careful planning, quality materials, and attention to safety details, you can construct a custom solution that maximizes every square foot while preserving your home's character. Begin with accurate measurements and proceed step by step to enjoy a versatile room that adapts to changing needs.

No comments yet. Be the first!