 Fixated on Home
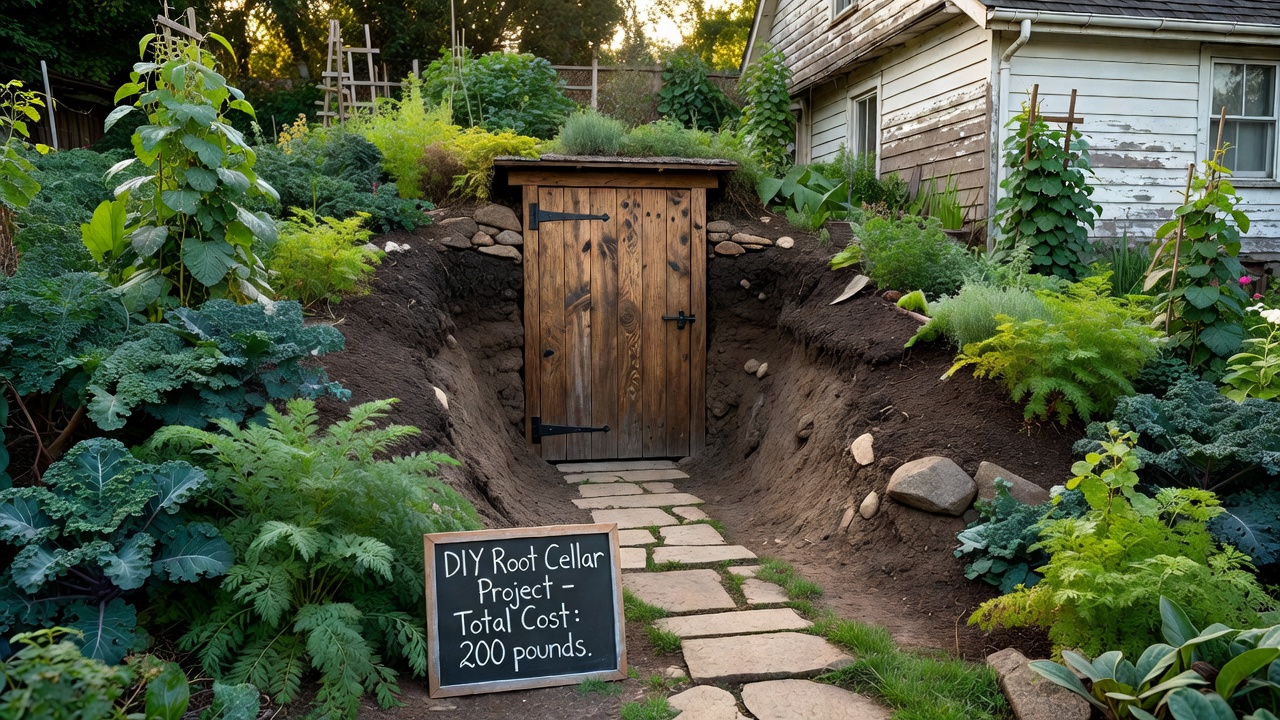
Introduction to Budget-Friendly Root Cellars in 2026
Homeowners with fixer-upper properties often seek practical ways to cut grocery expenses and embrace sustainable living. A DIY root cellar provides natural, year-round food storage without relying on electricity. This guide covers everything from choosing the right location to managing humidity, using only affordable and recycled materials where possible. Whether your home has a basement or yard space, these methods keep projects simple and effective for beginners on tight budgets. Root cellars leverage the earth’s stable temperatures, typically between 32 and 50 degrees Fahrenheit, to preserve produce like potatoes, carrots, apples, and beets for months. In 2026, with rising interest in self-sufficiency, more people are turning to these low-tech solutions to reduce reliance on commercial refrigeration and grocery trips.
Site Selection and Excavation Tips
Start by evaluating your property for the best location. Ideal spots stay cool year-round, away from direct sunlight and high-traffic areas. For homes with existing basements, an interior corner works well because it minimizes excavation needs and uses existing walls. Outdoor options require checking soil drainage and proximity to the house foundation to avoid structural issues. Look for north-facing slopes if possible, as they naturally stay cooler. Excavation involves digging to a depth of at least four feet for temperature stability, though six feet provides even better results in variable climates. Always mark utility lines first using local locator services and consider slope for natural drainage to prevent water pooling inside the cellar.
Soil testing helps determine if amendments are needed for stability. Beginners should use basic tools like shovels, picks, and wheelbarrows, breaking the work into manageable stages over several weekends. For example, one fixer-upper owner in the Midwest started with a small 6x8 foot pit and expanded after the first season. Remove topsoil carefully and set it aside for later berming around the structure. If the ground is rocky, consider renting a small excavator for a day to speed progress while keeping labor costs low.
Using Recycled Materials for Insulation
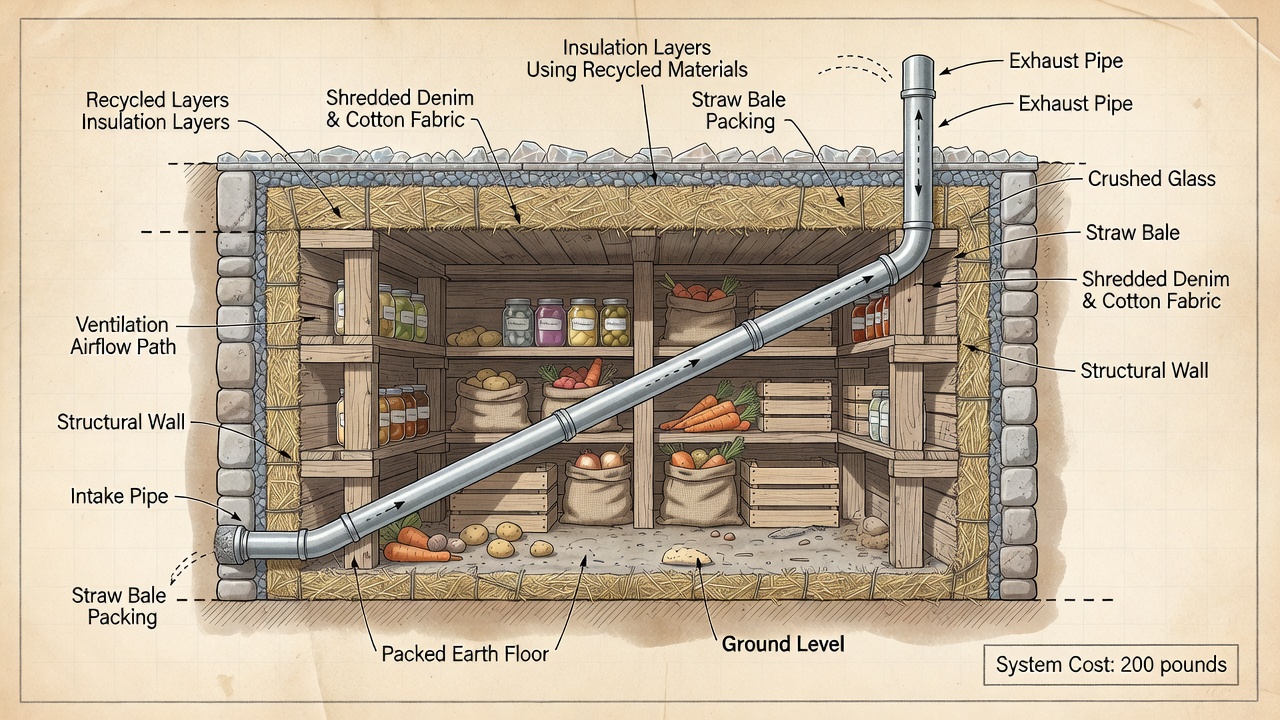
Insulation keeps temperatures consistent without high costs. Recycled materials such as straw bales, old tires filled with earth, or salvaged foam boards from construction sites offer effective thermal barriers. Layer these around the cellar walls and ceiling. Combine with earth berming for added protection. This approach reduces waste while achieving reliable performance comparable to new products. Straw bales provide excellent R-value when stacked tightly and covered with waterproof tarps. Old tires can be packed with dirt and stacked to form retaining walls that also insulate. Salvaged rigid foam from building sites can be cut to fit wall cavities.
Many successful builds incorporate materials from local Habitat for Humanity ReStores or neighborhood cleanouts. The key is ensuring materials are dry and free of contaminants before installation. EPA guidelines on recycling emphasize safe reuse of construction materials in home projects like this.
Step-by-Step Construction Process
Follow these phases for a sturdy build. First, prepare the site by clearing debris and leveling the floor with a layer of gravel for drainage. Second, build walls using cinder blocks or reclaimed lumber, securing them with mortar or screws while leaving space for vents. Third, install a roof with heavy-duty beams and cover with waterproof sheeting plus soil for insulation. Fourth, add shelving from untreated wood or metal racks positioned at least six inches off the floor for produce storage. Fifth, seal all joints with caulk or clay to control air leaks.
Diagrams in planning stages help visualize each layer. Work in pairs for safety during heavy lifting. One real-world example involved a couple who used pallet wood for interior framing and achieved a functional 100-square-foot space over four weekends. Always allow the structure to settle for a week before stocking it with food to let any off-gassing dissipate.
Ventilation and Humidity Control Methods
Proper airflow prevents spoilage. Install two vents: one low for cool air intake and one high for exhaust. Use PVC pipes or recycled metal ducts angled correctly. Monitor humidity with inexpensive gauges, aiming for 85-95% levels. Adjust by adding damp sand or opening vents as needed. Common fixes for excess moisture include gravel floors and periodic checks. In humid regions, a small solar-powered fan can assist passive ventilation without electricity costs. For drier climates, place shallow pans of water inside to raise humidity naturally.
Penn State Extension resources detail how to fine-tune these systems for different produce types, ensuring apples stay crisp while preventing root vegetables from sprouting.
Material Comparisons and Checklists
Compare options like concrete versus earth-packed walls for durability versus cost. Concrete blocks offer longevity but require more initial effort, while earth-packed tires provide free insulation at the expense of aesthetics. Recycled insulation outperforms basic plastic sheeting in temperature retention. Use this beginner checklist:
- Verify permits if required locally
- Gather tools and safety gear including gloves and dust masks
- Test soil drainage with a simple percolation test
- Plan ventilation paths before closing walls
- Stock shelves gradually after curing the space for two weeks
- Label sections for different produce to avoid cross-contamination
- Schedule monthly inspections for the first year
Real-World Project Insights, Maintenance, and FAQs
Projects completed in recent years demonstrate how recycled approaches deliver reliable storage for months. Address moisture by improving seals and adding lime treatments to walls. Permits vary by area, so confirm with local authorities early to avoid delays. Maintenance involves checking vents seasonally and rotating stock to use oldest items first. One family reported storing over 200 pounds of produce through winter using only salvaged materials.
Frequently Asked Questions
How do I handle mold growth? Improve ventilation immediately, remove affected items, and apply a vinegar solution to surfaces.
What produce stores best? Root vegetables, apples, cabbage, and winter squash thrive in these conditions when kept separate.
Can I expand later? Design with modular walls for future additions without major reconstruction.
Are there any safety concerns? Ensure proper structural support and never enter a sealed cellar without checking air quality first.
Building a root cellar transforms food storage into a low-maintenance, eco-friendly solution that supports long-term savings and self-sufficiency. With careful planning and recycled resources, any fixer-upper homeowner can create a reliable system that lasts for decades.
No comments yet. Be the first!