 Fixated on Home
Introduction to Strategic Kitchen Lighting in Renovations
Kitchen renovations offer the perfect opportunity to transform both functionality and aesthetics through thoughtful lighting design. Homeowners often overlook how proper illumination enhances workflow, safety, and ambiance in this high-traffic space. By layering different types of lighting, you can create a versatile environment that adapts to cooking, dining, and entertaining needs while aligning with current home design trends. Effective lighting not only improves visibility for precise tasks like chopping vegetables but also sets the mood for evening gatherings with family and friends.
This guide explores comprehensive lighting solutions tailored for kitchen remodels, focusing on the three essential layers: task, ambient, and accent. We'll cover precise placement strategies, energy-efficient choices, smart integrations, and budget-friendly approaches suitable for various kitchen sizes. Whether your kitchen is compact or expansive, understanding these principles ensures a successful upgrade that stands the test of time.
The Three Main Lighting Layers Explained
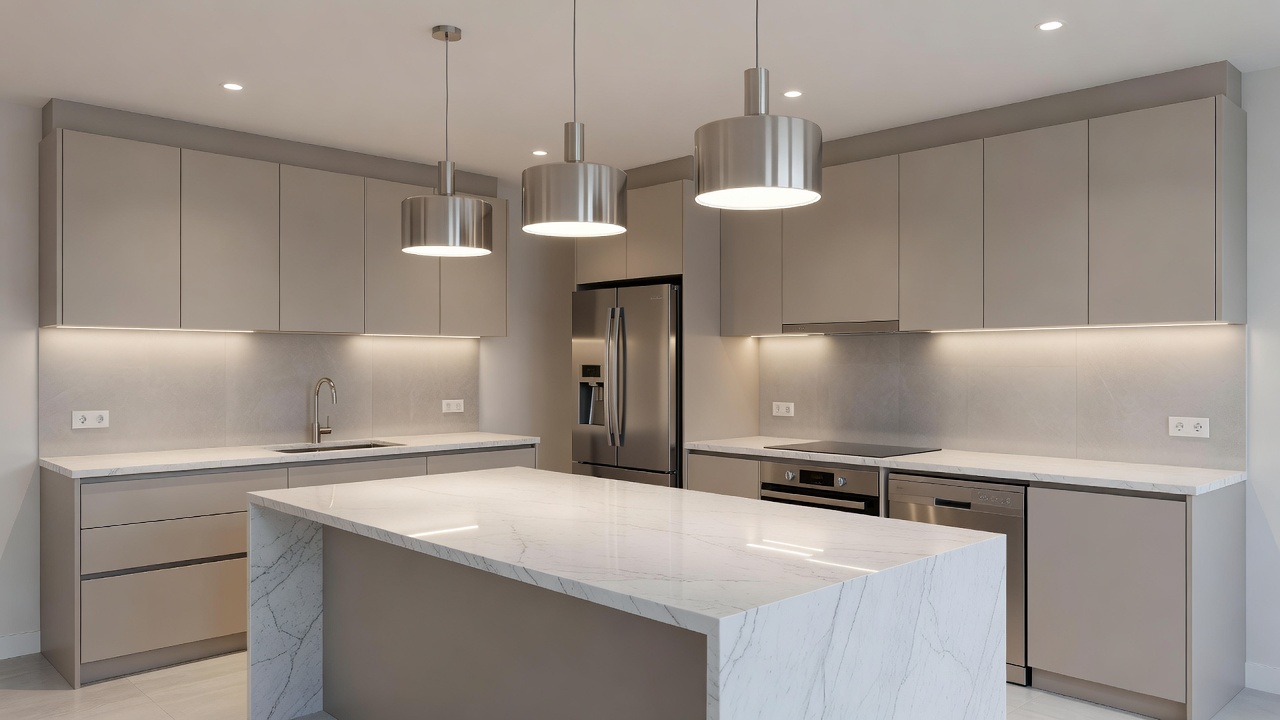
Effective kitchen lighting relies on combining three distinct layers to achieve balanced illumination. Task lighting provides focused brightness for specific activities like food prep, ensuring knives and ingredients are clearly visible without eye strain. Ambient lighting delivers overall room glow for general visibility, creating a welcoming base layer that prevents the space from feeling cave-like. Accent lighting highlights architectural features or decor elements to add depth and visual interest, such as illuminating open shelving or a backsplash feature wall.
Integrating these layers prevents shadows and glare while supporting modern open-concept layouts. For example, under-cabinet LEDs serve as excellent task lights positioned to cast even light across countertops, while recessed ceiling fixtures handle ambient needs by distributing soft, widespread illumination. Accent lights like LED strips behind glass cabinets can showcase collectibles or fine china. Homeowners should aim for a 3:2:1 ratio of task to ambient to accent light levels to maintain harmony throughout the day.
Recommended Placement for Key Kitchen Zones
Strategic placement maximizes each lighting layer's impact. Over kitchen islands, install adjustable pendant lights or linear suspensions at 30-36 inches above the surface for task lighting without obstructing views or conversations. This height allows diners to see across the island while providing ample downward light for meal prep. Countertops benefit from under-cabinet strips or puck lights positioned to eliminate shadows during chopping and mixing, typically mounted 2-3 inches from the front edge of cabinets.
Dining zones within or adjacent to the kitchen pair well with chandeliers or dimmable pendants centered over tables. These create inviting atmospheres for meals while complementing ambient ceiling lights. Always consider ceiling height and traffic patterns to avoid obstructions. In galley kitchens, wall-mounted sconces can supplement ambient light along narrow pathways, and corner accents draw attention to unique design elements like exposed brick or artwork.
Energy-Efficient LED Options for Modern Kitchens
LED technology dominates contemporary kitchen renovations due to its longevity and low energy use. Homeowners can reduce electricity consumption significantly by switching to LEDs, which last up to 25 times longer than traditional bulbs. Look for fixtures with high CRI ratings for accurate color rendering of food and surfaces, ensuring meats appear fresh and produce vibrant. Dimmable LEDs offer flexibility, allowing users to lower intensity for relaxed evenings or raise it for detailed work.
Many LED options now include tunable white features that shift from warm to cool tones, enhancing versatility across seasons and activities. For larger kitchens, integrated LED panels in ceilings provide uniform ambient light without multiple bulb replacements. Recessed downlights with interchangeable trims blend seamlessly into drywall ceilings, maintaining a clean aesthetic while delivering powerful performance.
Learn more about efficient lighting choices from the U.S. Department of Energy.
Integrating Smart Controls and Automation
Smart lighting systems elevate kitchen functionality by allowing voice or app control for dimming, scheduling, and color adjustments. Integration with home assistants like Alexa or Google Home enables hands-free operation during cooking, such as turning on task lights when entering the room. Motion sensors in task areas add convenience and energy savings for busy households, automatically activating lights only when needed.
When planning renovations, ensure wiring supports smart switches and consider compatibility with existing home ecosystems. These upgrades future-proof the space and appeal to tech-savvy buyers. Advanced systems can even sync with other smart appliances, like turning on accent lights when the oven timer goes off. Professional installation ensures seamless connectivity and avoids common pitfalls like signal interference.
Explore standards for smart home integration via Energy Star resources.
5-Step Planning Process for Kitchen Lighting
- Assess your current layout and identify dark zones through observation during different times of day, noting how natural light interacts with existing fixtures.
- Define primary activities in each zone to determine required lighting intensity and type, such as high-CRI task lights near the sink.
- Calculate total light output needs based on square footage and layer overlap, aiming for 300-500 lux in task areas.
- Select fixtures and controls that match your design style and budget constraints, prioritizing modular systems for future changes.
- Consult professionals for electrical work and test the setup before final installation, adjusting angles and intensities as needed.
Comparing Fixture Styles for Trending Home Designs
Fixture selection should complement overall kitchen aesthetics. Industrial styles favor exposed bulb pendants and metal finishes that evoke a factory-chic vibe, while contemporary kitchens suit sleek recessed lights and minimalist linear fixtures that emphasize clean lines. Transitional designs blend traditional elements like glass shades with modern LED technology for timeless appeal.
Compare options by durability, maintenance ease, and how they distribute light. Matte black and brushed nickel finishes remain popular for their versatility across color palettes, resisting fingerprints and matching various cabinet woods. Crystal accents add luxury in formal kitchens, whereas fabric shades soften the look in cozy family spaces.
Common Mistakes to Avoid During Installation
Many renovations fall short due to overlooking glare from shiny surfaces or failing to account for future furniture placement. Avoid clustering all lights in the center of the ceiling, which creates uneven pools of light. Instead, distribute sources evenly and use multiple circuits for independent control of each layer. Skipping professional electrical assessment can lead to overloaded circuits, especially when adding smart features.
Real-World Before-and-After Examples
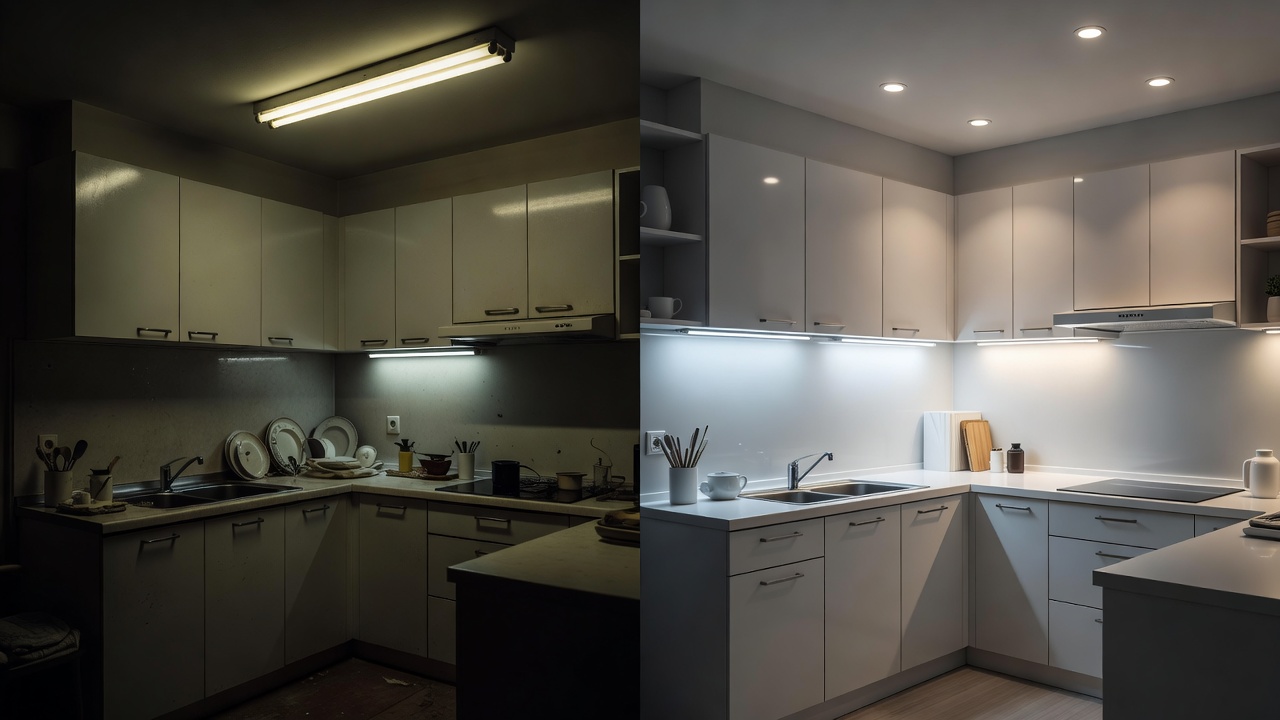
Consider a compact urban kitchen where outdated fluorescent tubes created harsh shadows on countertops and made evening meal prep challenging. After renovation with layered LEDs—including under-cabinet task lights, cove ambient lighting along the ceiling perimeter, and accent strips highlighting a new tile backsplash—the space feels dramatically brighter and more inviting for family gatherings. The transformation improved workflow efficiency and reduced eye fatigue.
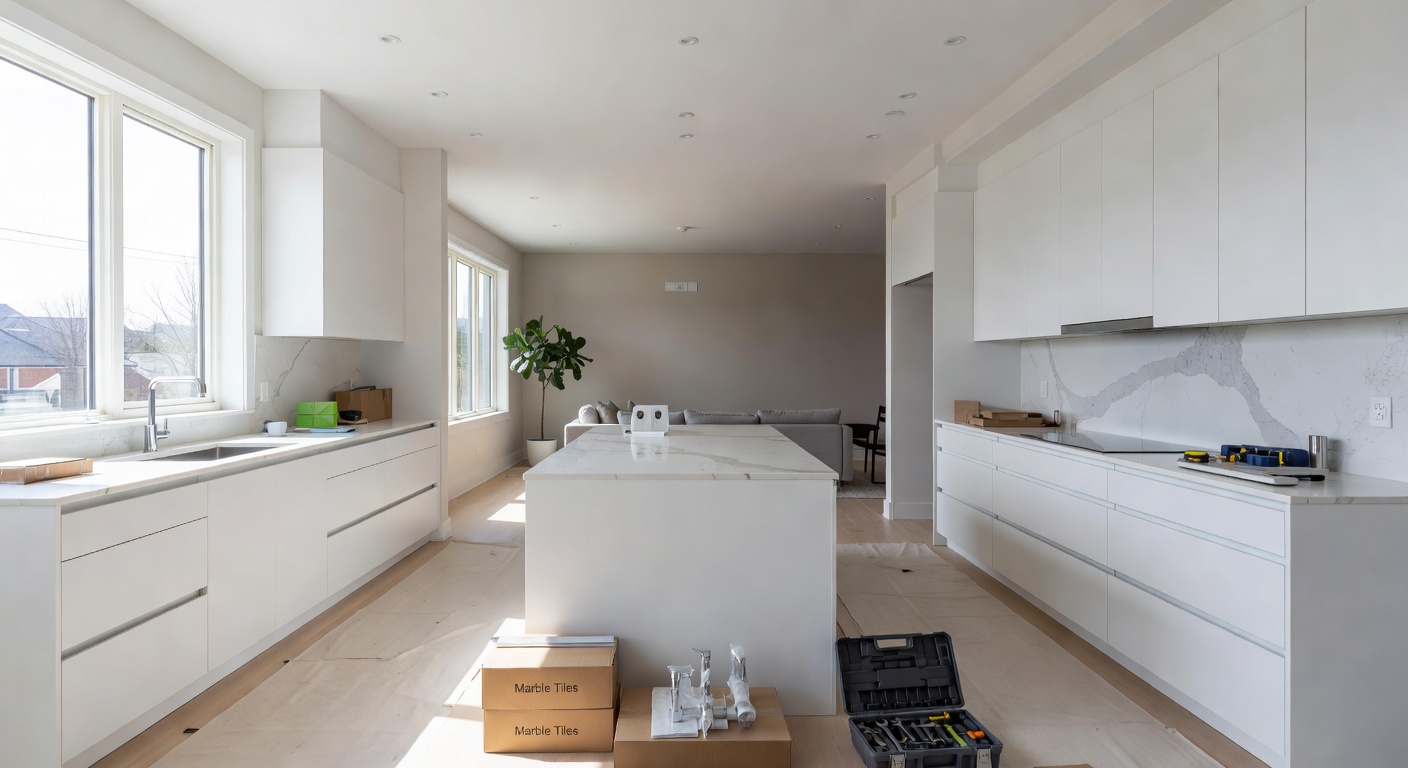
In a larger suburban home with an open floor plan, adding pendant clusters over the island and programmable smart controls allowed seamless transitions from bright morning breakfasts to subtle evening ambiance. These examples demonstrate how targeted changes yield dramatic improvements in both usability and resale value, often increasing perceived home worth through enhanced perceived space and modernity.
Budget Considerations Across Kitchen Sizes
Lighting budgets vary by project scope and material choices. Smaller kitchens may focus on 3-5 key fixtures for impactful results without overwhelming the space, emphasizing multi-functional pieces. Expansive spaces require more comprehensive systems with higher quantities of recessed fixtures and integrated controls. Prioritize quality LEDs and professional installation for longevity and reduced long-term maintenance. Factor in potential rebates for energy-efficient upgrades through local utility programs to offset initial investments.
Always evaluate total ownership costs, including replacements and energy bills, rather than upfront expenses alone. Working with a lighting designer early can optimize selections for both performance and cost efficiency across different scales.
Frequently Asked Questions
What are common installation challenges?
Electrical access in older homes often requires rewiring to support new loads and smart features. Hiring licensed electricians early prevents delays and ensures code compliance, especially in areas with strict permitting requirements.
How do I maintain new lighting systems?
Regular dusting of fixtures and checking connections maintains performance over years. Smart systems may need occasional firmware updates for optimal function and security, typically handled through manufacturer apps.
Can I mix different bulb types in one kitchen?
While possible, consistency in color temperature across layers creates a cohesive look. Mixing warm and cool tones can disrupt the visual flow unless intentionally used for zoning effects.
Conclusion
Thoughtful lighting solutions during kitchen renovations enhance daily life while boosting property appeal. By mastering the three layers, strategic placements, and modern technologies, homeowners achieve beautiful, functional results tailored to their needs. Planning thoroughly and incorporating professional advice leads to spaces that are both practical and inspiring for years to come.
No comments yet. Be the first!