 Fixated on Home
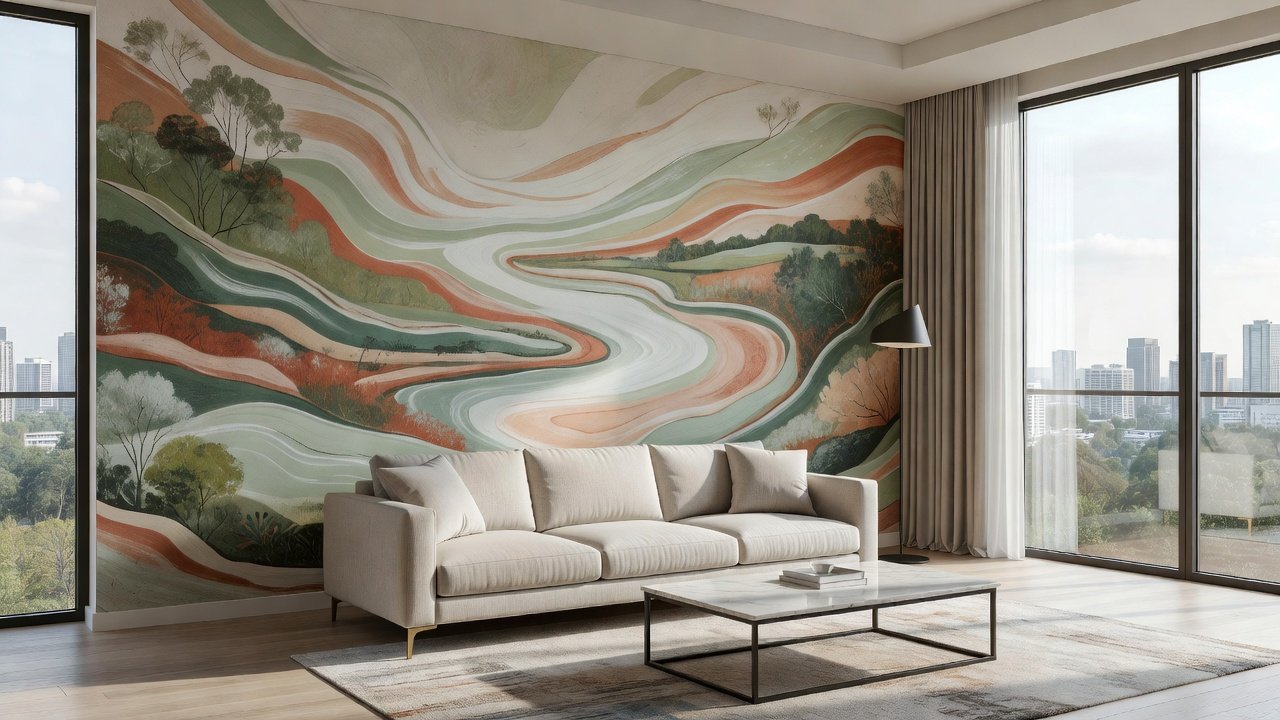
Introduction to Custom Murals in Living Room Design
Homeowners in 2026 are moving beyond traditional paint and wallpaper to embrace custom murals as a transformative element in living room remodeling. These personalized wall artworks add depth, personality, and visual interest that standard finishes cannot match. Whether you seek a serene landscape or bold geometric patterns, murals offer endless possibilities for creating a focal point that reflects your style and enhances daily living. This approach allows for complete customization, turning blank walls into conversation starters that evolve with your family's needs over time.
This guide explores every aspect of incorporating custom murals into your living room, from selecting themes to long-term care. By following these insights, you can achieve a professional-looking upgrade that enhances your space without overwhelming it. Custom murals also provide an opportunity to incorporate personal stories, travel memories, or abstract representations of your favorite hobbies, making the living room truly one-of-a-kind.
Choosing the Right Mural Styles and Themes
Selecting a mural begins with understanding your living room's architecture and existing decor. Popular 2026 trends include abstract botanical designs, minimalist line art, and immersive nature scenes that bring the outdoors inside. For modern spaces, consider metallic accents or optical illusions that play with light and perspective. Traditional themes such as vintage maps or cultural motifs can add warmth and heritage to eclectic interiors.
Real-world examples show versatility: a family in a suburban home used a custom forest mural to create a cozy reading nook, while urban apartments often feature cityscape themes for an energetic vibe. Match the scale of the mural to your wall size—large statement pieces work well behind sofas, while smaller accents suit alcoves. Consider color psychology when choosing; calming blues and greens promote relaxation, whereas energetic oranges and yellows stimulate conversation. Explore texture options like raised relief or metallic finishes to add tactile interest that changes with lighting throughout the day.
Preparing Your Walls for Mural Application
Proper wall preparation ensures longevity and a flawless finish. Start by cleaning the surface thoroughly to remove dust and grease. Repair any cracks or holes with spackle, then sand smooth. Prime the wall with a high-quality primer suited to your mural material, whether vinyl, fabric, or paint-based. Test for moisture issues in older homes, as excess humidity can cause adhesion problems later.
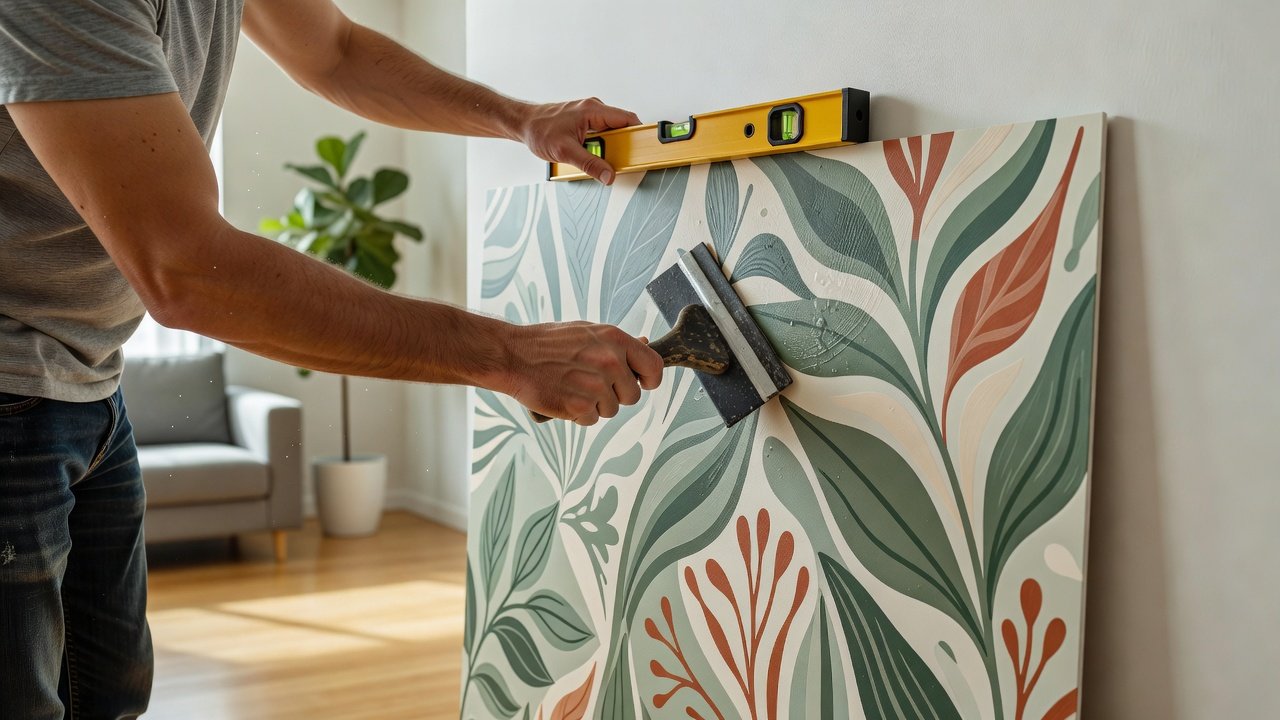
Measure the wall accurately and mark guidelines for alignment. If your mural involves multiple panels, plan the layout to minimize visible seams. This step is crucial for achieving seamless results in high-traffic living areas. Gather supplies such as painter's tape, drop cloths, and a level before beginning. In homes with textured walls, consider smoothing the surface first or selecting murals designed specifically for uneven substrates to avoid distortions.
Step-by-Step Installation Techniques
Installation varies by mural type but follows a consistent process. For peel-and-stick options, apply from the top down, smoothing out bubbles with a squeegee. Traditional painted murals require sketching the design first, followed by layering colors with appropriate brushes or sprayers. Always work in a well-ventilated area and wear protective gear when using adhesives or paints.
Professional installers often recommend working in sections to maintain precision. Always allow adequate drying time between layers. If tackling a DIY project, gather tools like levels, measuring tapes, drop cloths, utility knives, and extension poles beforehand. Common pitfalls include rushing alignment or ignoring temperature recommendations, which can lead to wrinkles or peeling. For complex designs, hire certified installers who provide warranties on their workmanship.
Integrating Murals with Existing Furniture and Decor
A successful mural complements rather than competes with your furniture. Position seating to face the mural as a natural focal point, and choose complementary colors in rugs or throw pillows. For instance, a neutral-toned abstract mural pairs beautifully with mid-century modern sofas in wood tones. Layer lighting strategically—wall sconces can highlight mural details at night, while natural light during the day enhances vibrancy. Avoid placing large pieces of furniture directly against the mural to preserve its impact.
Balance is key: if the mural is bold, keep surrounding decor minimal. Incorporate elements like floating shelves or gallery walls that echo mural colors without overcrowding the space. Seasonal updates, such as changing curtain fabrics or accent chairs, allow the mural to remain the star year-round while refreshing the overall aesthetic.
Real-World Examples and Cost Comparisons
Consider a recent project where a couple transformed their dated living room with a custom watercolor mural, resulting in a brighter, more inviting space. Another example involved a textured mural in a minimalist loft that added subtle dimension without bold colors. A third case featured a family photo collage mural that celebrated personal milestones and became the room's emotional centerpiece.
When comparing options, custom painted murals offer premium durability but require more investment than removable vinyl decals. Budget-conscious homeowners often start with digital prints on fabric for flexibility. Explore options through reputable design platforms to find styles that fit your vision and timeline.
Maintenance Tips for Long-Lasting Results
Regular dusting with a soft microfiber cloth keeps murals looking fresh. For painted surfaces, avoid harsh cleaners; use mild soap solutions sparingly. Removable murals benefit from occasional repositioning checks to prevent peeling edges. In homes with pets or children, apply a protective topcoat to resist scuffs and fingerprints.
In humid climates, consider sealants to protect against moisture. With proper care, a well-installed mural can last many years while maintaining its appeal. Schedule annual inspections for any signs of wear, especially near windows where sunlight may cause fading over time.
Mistakes to Avoid When Installing Custom Murals
- Skipping wall cleaning or priming, which leads to poor adhesion.
- Choosing themes that clash with existing color schemes.
- Overlooking scale and proportion relative to room size.
- Ignoring manufacturer instructions for climate-specific application.
- Failing to plan furniture layout around the finished mural.
FAQ: Common Concerns About Durability and Removal
- How durable are custom murals? High-quality materials withstand daily living room use, with many lasting 5-10 years before touch-ups are needed.
- Can murals be removed without damage? Peel-and-stick varieties remove cleanly, while painted options may require repainting the wall afterward.
- Are murals suitable for renters? Yes, temporary options allow easy updates without permanent changes.
- What if my style changes? Modular or removable murals provide the flexibility to refresh your space later.
- Do murals work on all wall types? Most surfaces are suitable after proper prep, though textured or heavily damaged walls may need professional smoothing first.
- How do I clean a mural safely? Use gentle, non-abrasive methods and test any product in an inconspicuous area first.
By addressing these questions upfront, you can confidently select a mural solution tailored to your needs.
For more inspiration on interior transformations, visit Houzz or explore design resources at Architectural Digest. Additional guidance on home projects is available through Better Homes & Gardens.
No comments yet. Be the first!