 Fixated on Home
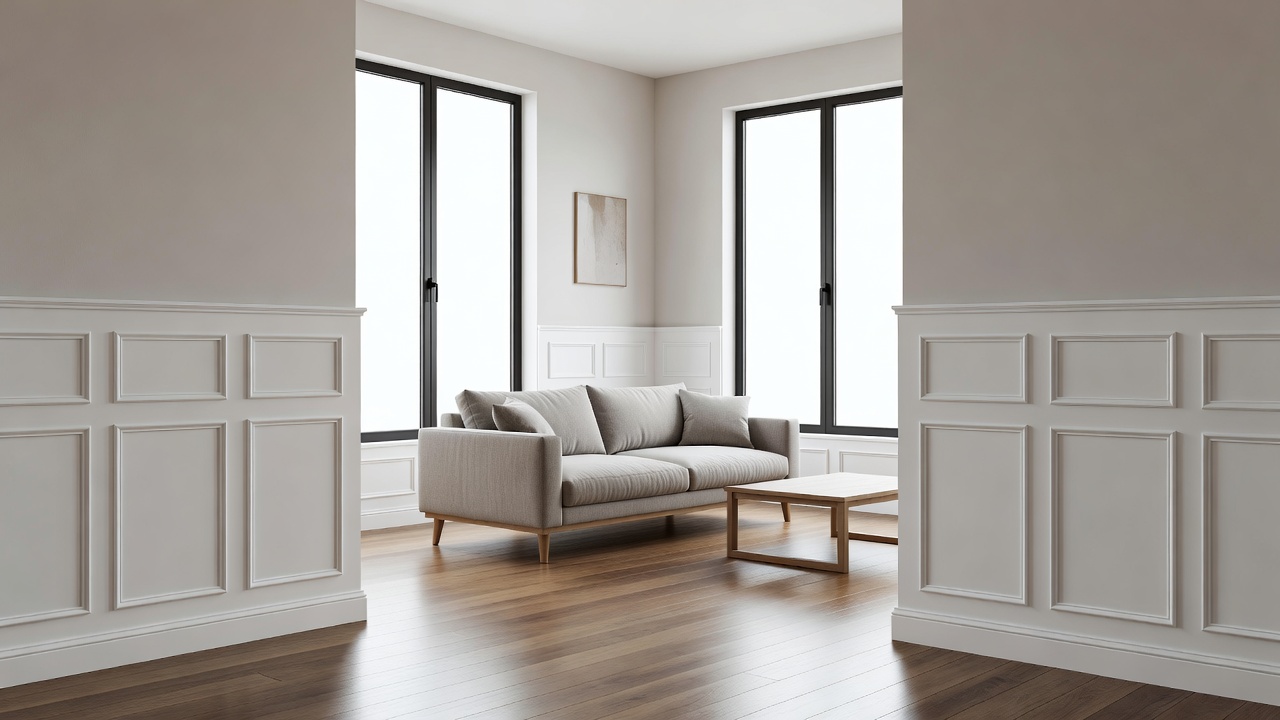
Introduction to Living Room Wainscoting
Wainscoting adds classic architectural charm and visual depth to any living room, elevating the space with texture and sophistication. This timeless feature protects walls from daily wear while complementing modern and traditional decor trends alike. Homeowners seeking a rewarding DIY project will find this step-by-step approach practical for transforming plain walls into elegant focal points that stand the test of time.
Whether updating a dated interior or enhancing new construction, wainscoting integrates seamlessly with existing furniture arrangements. Proper planning ensures professional-looking results that boost both aesthetics and home value. The process involves careful material selection, precise measurements, and methodical installation that even intermediate DIYers can master with the right guidance. By following these instructions, you can create a custom look that reflects current home design preferences while adding lasting character to your space.
Choosing the Right Materials for Your Project
Material selection forms the foundation of a successful installation. Popular options include MDF for its smooth finish and affordability, solid wood like pine or oak for durability and natural grain, and PVC for moisture-prone areas. Consider your living room's humidity levels and desired style—raised panel designs offer formal elegance, while board-and-batten creates a rustic farmhouse feel that pairs beautifully with contemporary sofas and coffee tables.
Match materials to your current color palette and furniture for cohesive design. Premium choices like hardwood provide longevity and can be stained to highlight beautiful grain patterns, while engineered panels speed up the process for beginners tackling their first major remodeling task. Compare options by examining samples in natural light to see how they interact with your room's windows and existing trim. Many homeowners opt for a hybrid approach, using MDF for lower panels and wood accents for visual interest.
Essential Tools and Safety Equipment
Gather these tools before starting: miter saw for accurate angle cuts, level for straight lines, tape measure for precise dimensions, brad nailer to secure panels without surface damage, caulk gun for seamless joints, sandpaper in various grits for smoothing, and paintbrushes for finishing. Safety gear such as goggles, gloves, and a dust mask protects during cutting and sanding. A laser level ensures precise alignment across long walls, reducing errors that could compromise the final appearance.
Double-check that your tools are calibrated for accuracy, especially when handling detailed cuts for corners and outlets. Having a stud finder on hand helps locate secure nailing points behind drywall, preventing loose installations that may shift over time. Organize your workspace with a sturdy sawhorse or workbench to support materials during cutting.
Precise Measurement and Planning Techniques
Begin by measuring wall height and width at multiple points to account for any irregularities in older homes. Standard wainscoting height ranges from 32 to 42 inches, aligning with chair rail placement for balanced proportions that complement typical living room furniture heights. Sketch a layout including panel spacing, typically 12 to 18 inches wide, to avoid awkward cuts near doors or windows. Account for baseboards and existing trim by noting their thickness and planning overlaps carefully.
Use graph paper or digital apps to visualize the design before purchasing supplies. For example, in a 12-foot wall, calculate the number of panels needed while leaving even spacing on both ends. Mark stud locations lightly with a pencil so you can align vertical elements properly during installation. This planning phase prevents costly mistakes and ensures the final result looks intentional and polished.
Preparing Your Walls for Installation
Thorough wall preparation prevents future issues like peeling or uneven surfaces. Clean surfaces thoroughly with a mild detergent solution, repair holes or cracks with spackle, and sand uneven areas until smooth. Apply primer to promote adhesion, especially on glossy painted walls that might otherwise reject new finishes. Remove baseboards temporarily if needed and mark the chair rail height consistently around the room using a level for accuracy.
Inspect for underlying problems such as moisture damage or loose drywall tape, addressing them before proceeding. Dust the walls again after sanding to create an ideal bonding surface. This preparation stage often takes as much time as the actual installation but pays dividends in longevity and appearance.
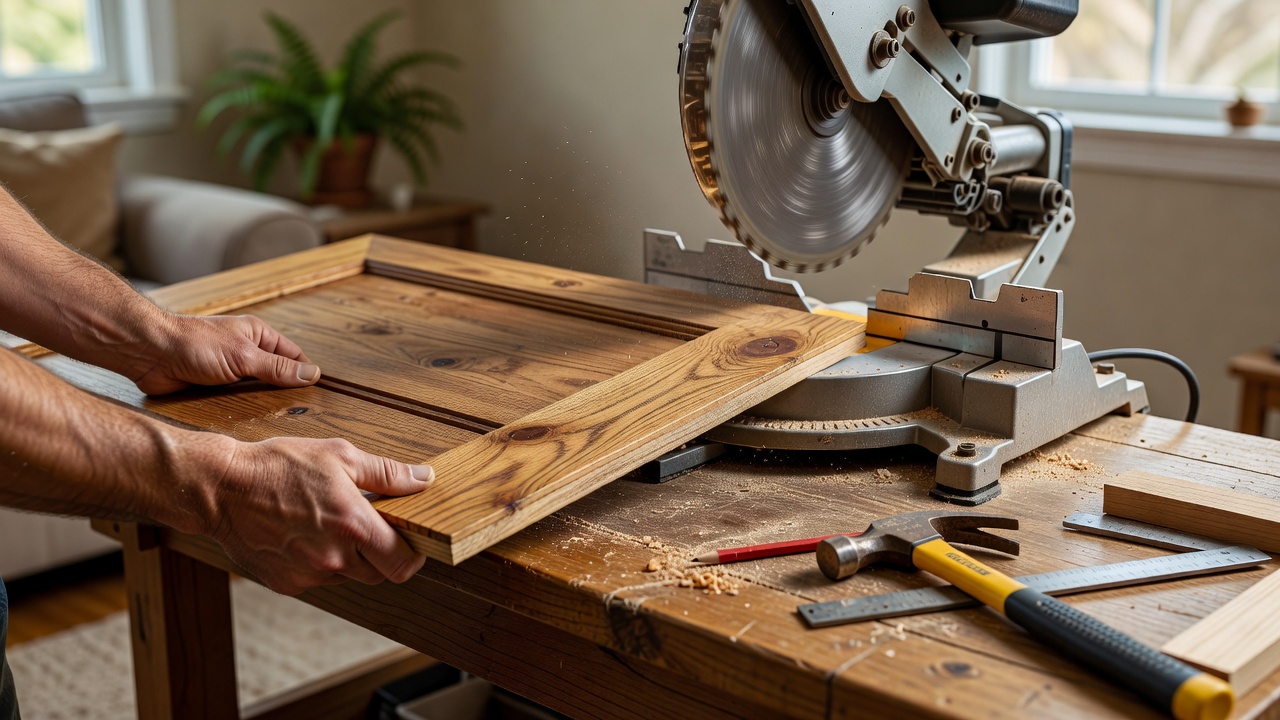
Cutting and Installing the Panels
Cut panels to size using a miter saw for clean 45-degree angles at corners. Dry-fit sections first to verify fit, then secure with construction adhesive and brad nails into studs. Start from one corner and work around the room, maintaining consistent spacing between panels. For outlets and switches, measure their positions carefully and cut precise openings with a jigsaw, testing the fit before final attachment.
Install the chair rail last, nailing it atop the panels for a finished ledge that serves both decorative and protective purposes. Fill nail holes with wood filler and sand smooth before proceeding to finishing. When working around windows or door frames, miter the edges to create seamless transitions that blend with surrounding architecture. Take your time on inside and outside corners, using coping techniques for a professional joint that hides minor imperfections.
Finishing Touches: Paint, Stain, and Sealing
Apply primer followed by two coats of paint in a semi-gloss or satin finish for easy cleaning and durability. For wood panels, use stain to highlight grain before sealing with polyurethane in multiple thin layers. Allow full drying time between coats to avoid imperfections such as brush marks or bubbling. Choose colors that either match or contrast your existing trim for visual interest.
This step enhances the wainscoting's integration with your living room's overall color scheme and furniture. Consider testing paint samples on scrap pieces to confirm the final look under your room's lighting conditions before committing to the full application.
Integrating Wainscoting with Existing Furniture and Decor
Position sofas, console tables, and artwork to highlight the new architectural detail. Neutral wainscoting pairs well with bold accent pieces, while painted versions complement upholstered seating in complementary tones. Add matching crown molding for a polished, built-in look that frames the upper walls elegantly. Experiment with lighting placement, such as sconces mounted above the chair rail, to cast attractive shadows across the panels.
Examples include pairing white wainscoting with dark leather furniture for contrast or using stained oak panels alongside mid-century modern pieces for warmth. The key is ensuring the wainscoting serves as a subtle backdrop rather than competing with focal furniture items.
Common Pitfalls to Avoid
- Skipping wall prep leads to poor adhesion and bubbling over time.
- Inaccurate measurements cause visible gaps at seams that are difficult to hide.
- Neglecting expansion gaps in wood can result in warping during seasonal changes.
- Overlooking outlet and switch placements creates awkward interruptions in the pattern.
- Rushing the finishing process often results in uneven coats or drips that require rework.
Maintenance and Style Variations FAQ
How do I clean wainscoting without damaging the finish?
Use a soft cloth with mild soap and water. Avoid abrasive cleaners that scratch painted or stained surfaces. Annual inspections for loose nails keep the installation secure and looking fresh for years.
What style variations work best in small living rooms?
Lower-profile board-and-batten or beadboard maximizes space perception. Light colors reflect light, making rooms feel larger while adding subtle texture that enhances rather than overwhelms the space.
Can wainscoting be added to homes with textured walls?
Yes, but skim-coat or install furring strips first for a flat surface. This ensures panels lie evenly without telegraphing imperfections through the new finish.
How does wainscoting pair with smart home upgrades?
It frames outlets and speaker placements neatly. Explore This Old House for advanced integration ideas with lighting and controls.
Which wood species offers the best balance of cost and durability?
Pine provides an affordable, paintable option while oak delivers superior strength and stain acceptance for high-traffic living areas.
Conclusion
Installing living room wainscoting delivers lasting style and functionality through careful execution of each phase. From material choices to final finishing, this project rewards attention to detail with a refined space tailored to your tastes. For more remodeling inspiration, consult resources like HGTV, DIY Network, and Bob Vila.

No comments yet. Be the first!