 Fixated on Home
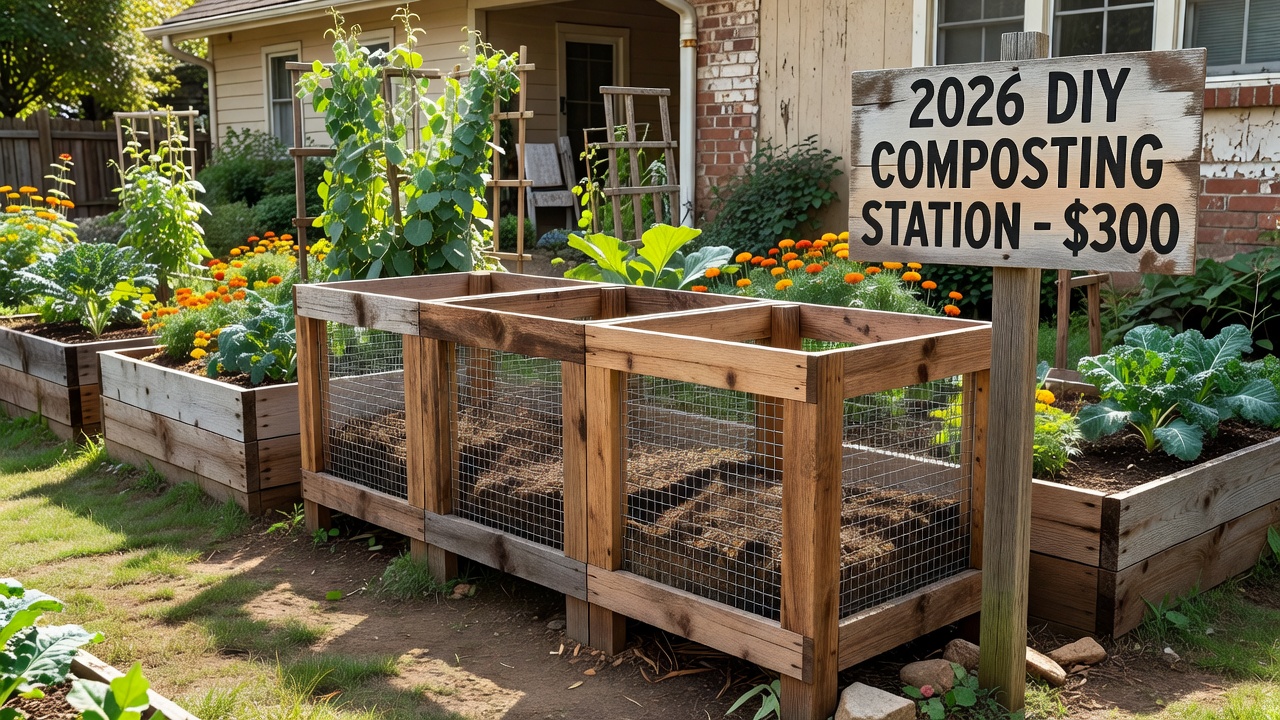
Introduction to DIY Composting for Fixer-Upper Yards
Homeowners renovating older properties often seek sustainable upgrades that enhance both curb appeal and environmental impact. Building your own composting station integrates seamlessly with outdoor renovations while reducing waste. This guide explores practical options tailored for 2026 fixer-upper projects, focusing on weather-resistant materials and optimal placement that works alongside existing home improvement layouts. Composting not only diverts organic waste from landfills but also creates nutrient-rich soil that supports thriving gardens, making it an essential element for any eco-conscious renovation.
Why Composting Stations Suit Fixer-Upper Properties
Fixer-upper yards frequently feature uneven terrain, overgrown areas, or outdated landscaping that can be transformed through thoughtful additions like composting stations. These structures help manage kitchen scraps and yard waste on-site, reducing the need for frequent trash pickups. They also promote biodiversity by encouraging microbial activity in the soil. Integrating a station during a broader outdoor upgrade allows homeowners to align it with new pathways, raised beds, or fencing for a cohesive look that boosts property value over time.
Selecting Durable, Weather-Resistant Materials
Durability is key for year-round outdoor use. Opt for cedar or redwood lumber that naturally resists rot and insects without chemical treatments. Pressure-treated pine offers another affordable alternative when sealed properly. Incorporate galvanized hardware cloth or welded wire mesh to contain materials while allowing airflow. Avoid cheap plastics that degrade in sunlight and temperature swings. For hardware, use stainless steel screws and hinges to prevent rust. These choices ensure the station withstands harsh winters and humid summers common in many regions.
For authoritative guidance on composting benefits, refer to resources from the EPA.
Ideal Site Placement Considerations
Choose a level spot with good drainage but partial shade to maintain consistent moisture levels. Position the station near the garden for convenient compost transport yet at least 10 feet from windows or patios to limit any potential odors. During renovation planning, map out utility lines and consider how the station fits with new patios or storage sheds. South-facing orientations in northern climates help with winter warmth, while northern exposures suit hotter southern areas. Always check local ordinances for any setback requirements from property lines.
Three Beginner-Friendly Build Variations
These designs accommodate different yard sizes and skill levels while keeping construction straightforward.
1. Pallet Bin System
Ideal for larger yards, this uses four to six standard shipping pallets arranged in a U-shape or divided into multiple compartments for staged composting phases.
2. Wire Mesh Enclosure
A lightweight cylindrical or rectangular frame made from metal T-posts and hardware cloth, perfect for compact urban fixer-uppers with limited space.
3. Wooden Slat Tumbler Base
Combines a fixed wooden frame with a removable rotating barrel insert to accelerate breakdown through regular tumbling.
Step-by-Step Assembly Instructions
Begin by clearing and leveling the chosen site, then spread a 4-inch layer of gravel for drainage and stability. Cut and assemble the frame using a level to ensure even sides. Secure mesh liners inside each panel to prevent material escape. Attach a hinged lid made from plywood or additional slats for weather protection. For the tumbler variation, install a simple axle system with PVC pipe and bearings. Test stability before adding the first batch of materials. 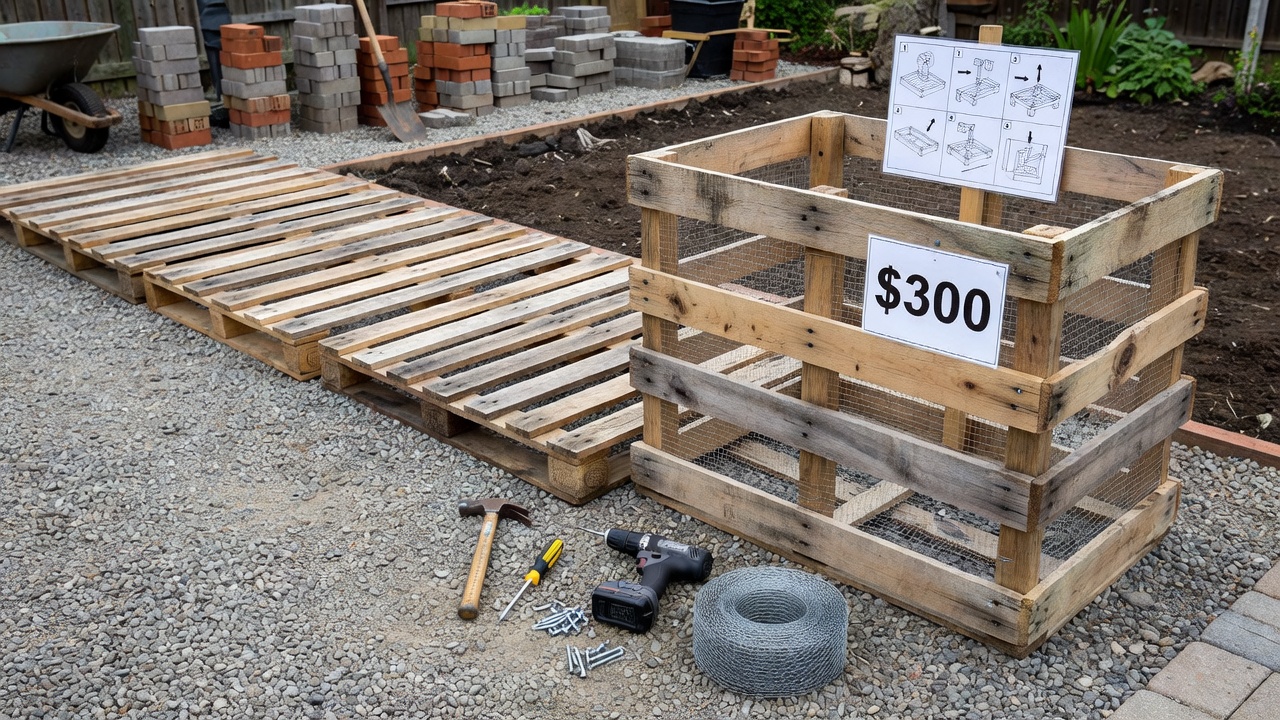
Cost Breakdowns and Budget Planning
Most DIY builds can stay well under $300 when sourcing recycled pallets or shopping sales at local lumberyards. Basic wire enclosures often require minimal investment in posts and mesh, while wooden versions add costs for fasteners and sealants. Homeowners should factor in occasional maintenance supplies like extra mesh or wood preservative. Tracking expenses during the project helps compare against professional installations and keeps the overall renovation budget on track.
Real Fixer-Upper Case Studies with Transformations
One suburban couple renovated a 1950s ranch with a neglected backyard full of invasive weeds and poor soil. After installing a three-bin pallet system along the new fence line, they began composting all yard clippings and kitchen waste. Within six months the before-and-after was dramatic: the area became a productive vegetable garden yielding tomatoes, herbs, and flowers, with visibly healthier soil and reduced trash volume. Another urban row-home renovation featured a tight side yard transformed by a compact wire mesh station. The owners reported faster decomposition thanks to frequent turning, resulting in rich compost that supported container gardens on their patio and noticeably cut monthly waste fees.
Comparisons to Store-Bought Units
Pre-made composters from big-box stores frequently cost more and offer less customization for specific yard dimensions. Many plastic models crack after one or two seasons of freeze-thaw cycles, whereas well-built DIY stations using quality lumber last five years or longer. DIY options also allow exact sizing to fit awkward corners left over from other renovation projects, providing better integration than generic commercial designs.
Maintenance Routines for Year-Round Performance
Consistent care ensures continuous compost production regardless of season.
- Turn the pile every 7 to 10 days using a pitchfork to introduce oxygen and speed microbial activity.
- Check moisture weekly; the material should feel like a wrung-out sponge—add water in dry periods or dry leaves during wet spells.
- Maintain a 2:1 ratio of brown materials such as dried leaves and cardboard to green materials like vegetable peels and grass clippings.
- Harvest finished compost from the bottom of the bin every three to six months and screen it for use in garden beds or as mulch.
- In winter, insulate bins with straw bales or tarps to keep temperatures active in colder climates.
Common Mistakes to Avoid
Many beginners overload bins with food scraps, leading to anaerobic conditions and odors. Always bury greens under a layer of browns. Neglecting to turn the pile results in slow decomposition and potential pest attraction. Using treated wood or adding dairy and meat products can introduce toxins or attract animals. Plan for adequate airflow from the start by spacing slats or using mesh properly.
Environmental and Practical Benefits
Beyond waste reduction, on-site composting lowers reliance on commercial fertilizers and improves soil structure for better water retention. This aligns perfectly with sustainable renovation goals by creating closed-loop systems within the property. Long-term users often notice stronger plant growth and fewer disease issues in gardens enriched with homemade compost.
For additional sustainable practices, explore guidelines at USDA and CDC.
FAQ
How do I control odors effectively?
Proper aeration through regular turning combined with balanced carbon-to-nitrogen ratios prevents smells. Avoid adding oils, meats, or excessive greens without brown cover materials.
What steps prevent pest problems?
Secure all openings with fine mesh, bury food waste deeply, and keep lids closed. Elevating the bin slightly and avoiding placement near bird feeders reduces rodent interest.
Can I compost in winter?
Yes, insulate the station and continue adding materials. Decomposition slows but resumes with warmer weather; frozen piles can be broken up in spring.
How much space does a station need?
Most beginner designs fit in a 4-by-4-foot area, making them suitable even for small fixer-upper lots when placed thoughtfully.
Conclusion
DIY composting stations offer fixer-upper homeowners an affordable, customizable way to enhance outdoor spaces sustainably. By selecting the right materials, following detailed assembly steps, and maintaining routines, these projects deliver rich compost and environmental benefits that complement any renovation. Start small, expand as needed, and enjoy the transformation of both yard and waste management habits.
No comments yet. Be the first!