 Fixated on Home
Introduction to DIY Stone Veneer for Outdoor Renovations
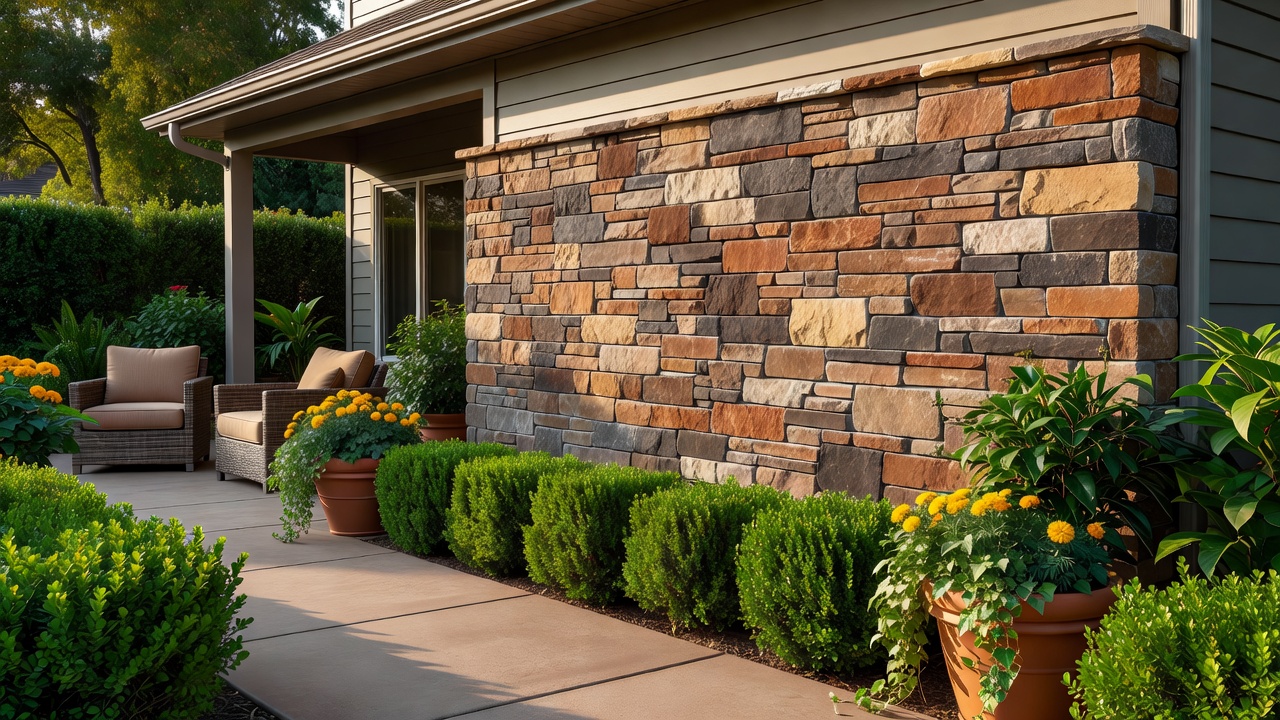
Homeowners tackling fixer-uppers in 2026 are turning to stone veneer as a cost-effective way to elevate outdoor spaces. This material delivers the look of natural stone without the heavy weight or high expense, making it ideal for budget-conscious DIY projects focused on outdoor renovation. Whether refreshing a patio, accenting a garden wall, or updating a porch, stone veneer adds lasting curb appeal and durability that withstands years of exposure. In this comprehensive guide, we explore everything from selecting the right veneer to weatherproofing techniques tailored for various climates. Expect practical steps, tool lists, comparisons between natural and manufactured options, and real-world examples that fit fixer-upper budgets. Stone veneer projects align perfectly with current trends in sustainable outdoor renovation, helping homeowners increase property value while keeping expenses manageable.
Natural vs Manufactured Stone Veneer: Which Is Right for You?
Choosing between natural and manufactured stone veneer depends on your project goals, climate, and budget. Natural stone offers unique textures and colors but requires more maintenance and can vary significantly in quality. Manufactured veneer, made from concrete or resin, provides consistency and easier installation while mimicking real stone closely. For outdoor renovation projects, manufactured veneer frequently wins for its weather resistance and lower weight on existing structures. Natural options may suit those seeking authentic geological patterns, but they often demand specialized cutting tools and professional-grade sealers. Consider factors like local availability and long-term maintenance when deciding. Many 2026 DIYers opt for manufactured varieties to achieve high-impact results without exceeding budget limits.
Essential Tools for DIY Stone Veneer Success
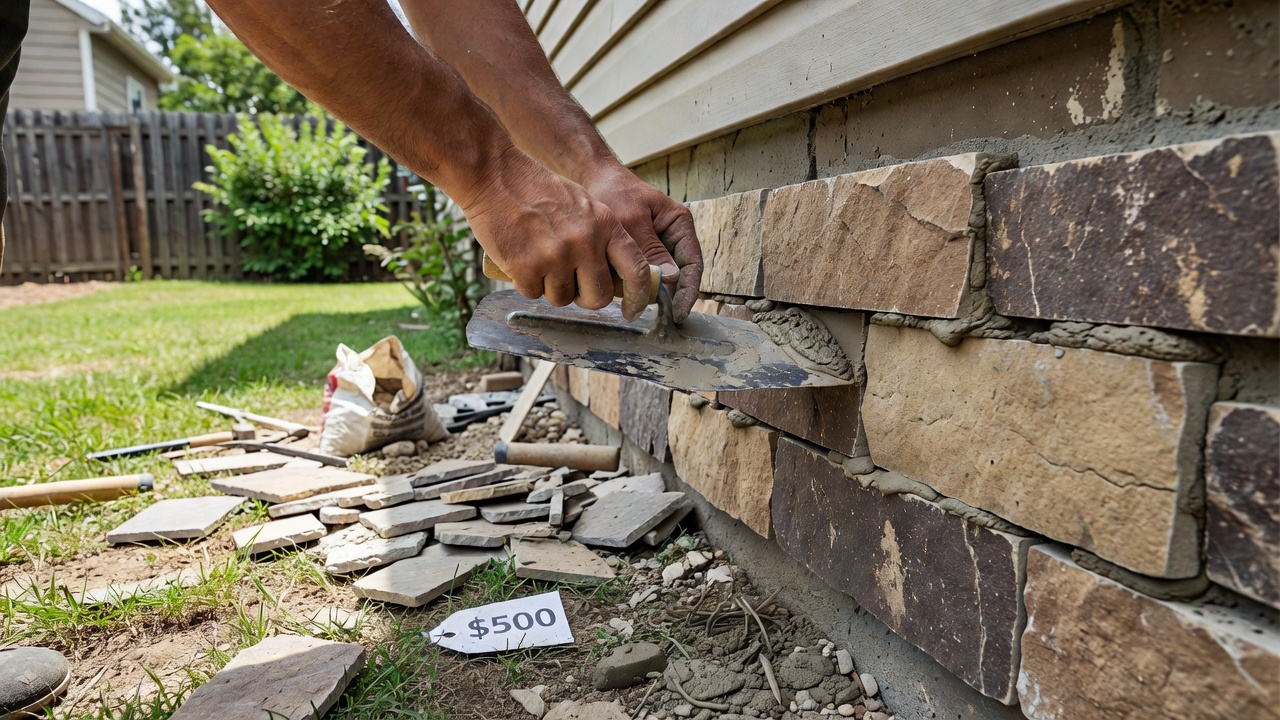
Successful installation starts with the right tools. Gather these before beginning any outdoor project to ensure efficiency and safety. Key items include a trowel and notched trowel for adhesive application, a level and measuring tape for precise alignment, a masonry saw or angle grinder with diamond blade for cutting, a grout float and sponge for finishing, plus safety gear including gloves and goggles. Additional helpful tools encompass a mixing bucket for mortar, a rubber mallet for setting stones, and a caulking gun for sealants. Following OSHA safety guidelines helps prevent common injuries during cutting and lifting tasks. Investing in quality tools upfront reduces frustration and supports professional outcomes on fixer-upper budgets.
Selecting the Right Stone Veneer for Your Climate
Climate plays a major role in material performance. In humid regions, choose veneer with low water absorption rates to prevent mold growth. For freeze-thaw zones, select products rated for thermal expansion and pair them with flexible adhesives. Coastal areas benefit from salt-resistant manufactured veneers that resist corrosion. Always review manufacturer specifications and local building codes before purchase. This step ensures your outdoor renovation withstands seasonal changes without premature deterioration.
5-Step Installation Process with Photo Placeholder
Follow this proven 5-step process for reliable outdoor stone veneer application that delivers lasting results.
Step 1: Surface Preparation
Clean the surface thoroughly by removing dirt, grease, and loose material. Repair any cracks or damage with appropriate patching compounds. Apply a weather-resistant backer board if the existing surface lacks sufficient strength. Proper prep prevents future issues with adhesion and forms the foundation for a successful project.
Step 2: Material Layout and Planning
Dry-lay the veneer pieces to plan the pattern, ensuring variety in sizes and colors for a natural look. Measure twice and mark guidelines on the wall to maintain even courses. Account for expansion joints every few feet in larger installations.
Step 3: Applying Adhesive and Setting Stones
Spread thin-set mortar or veneer adhesive evenly using the notched trowel. Press stones firmly into place starting from the bottom up, checking level frequently. Work in small sections to avoid adhesive drying before placement.
Step 4: Grouting and Cleaning
Fill joints with grout once the adhesive cures, then tool them smooth for a clean finish. Wipe excess grout immediately with a damp sponge to avoid haze on the stone surface.
Step 5: Sealing for Longevity
Apply a quality masonry sealer to protect against moisture and UV damage, especially important in rainy or snowy climates. Reapply according to product instructions for ongoing protection.
Common Pitfalls with Weatherproofing and How to Avoid Them
Weatherproofing failures often stem from poor sealing or inadequate expansion joints. Always check local climate data and use flexible sealants around edges and penetrations. Avoid installing in extreme temperatures to prevent adhesive issues. Another frequent mistake involves skipping the backer board on uneven surfaces, leading to cracking over time. Learning from these pitfalls saves time and money on future repairs.
Budgeting and Sourcing Materials for Projects Under $500
Many DIY stone veneer outdoor upgrades stay under $500 (as of 2026-08-15) by focusing on small accent walls or planter boxes. Factor in materials like adhesive, sealer, and backer board, plus basic tools if you do not already own them. Shop sales at home improvement stores and compare manufactured veneer options for the best value. Sourcing from local suppliers can further reduce shipping costs while supporting community businesses.
Before-and-After Examples and Real Homeowner Case Studies
Imagine a plain concrete patio transformed with manufactured veneer into a rustic retreat. Before photos show cracked surfaces and faded finishes; after reveals elegant stone accents that boost property value without major structural changes. One homeowner in the Midwest added veneer to a retaining wall, completing the project over two weekends and reporting improved drainage after proper sealing. Another case involved a coastal fixer-upper where manufactured veneer replaced rotting wood trim, providing better resistance to salt air. These examples demonstrate how thoughtful planning turns neglected outdoor areas into functional, attractive spaces.
Maintenance Tips for Various Climates (FAQ Section)
How often should I reseal stone veneer?
Reseal every 2-3 years, or more frequently in harsh coastal or freeze-thaw areas, to maintain water repellency and color vibrancy.
What maintenance works best in humid climates?
Inspect for mold regularly, ensure good drainage around the base, and clean with mild detergent solutions to avoid buildup.
Can stone veneer handle snow and ice?
Yes, when properly sealed and installed with expansion allowances for freeze-thaw cycles, it performs reliably across cold winters.
Are there eco-friendly veneer options available?
Many manufactured products now incorporate recycled content; check labels and consult EPA recommendations on building materials for sustainable choices.
Conclusion
Stone veneer outdoor projects offer transformative results for fixer-uppers in 2026. By following these steps and focusing on quality prep and sealing, you can achieve professional-grade outdoor renovation results on a budget. Start small, plan carefully, and enjoy the lasting impact on your home. For additional guidance, explore resources from Department of Energy home improvement resources to enhance energy efficiency alongside your aesthetic upgrades.
No comments yet. Be the first!