 Fixated on Home
Introduction to DIY Yard Drainage for Fixer-Uppers
Poor drainage remains one of the most frequent issues in fixer-upper properties, causing water pooling that damages foundations, erodes soil, and ruins landscaping investments. In 2026, with increasingly variable weather patterns including intense storms and prolonged dry spells, addressing these problems through outdoor renovation projects is essential for long-term property health. This comprehensive guide equips homeowners with practical, beginner-friendly approaches to DIY projects that improve drainage while enhancing curb appeal and usability. Solutions such as French drains and swales redirect water effectively, integrate with existing yards, and reduce reliance on professional services. By following detailed assessments and step-by-step installations, even novice renovators can achieve professional-grade results that protect their investment.
Initial Site Assessment Techniques
Thorough site assessment forms the foundation of any successful drainage project. Begin by observing your yard during and after rainfall to identify flow patterns, pooling areas, and natural slopes. Walk the property at different times of day, noting how water moves toward foundations, driveways, or low-lying garden beds. Test soil composition by digging small test holes; clay-heavy soils retain water longer, while sandy soils drain quickly but may erode. Use basic tools like a four-foot level, string line, and measuring tape to map elevation changes across the yard. Mark utility lines and call 811 beforehand to prevent damage. Document findings with photos and sketches, including proximity to downspouts, patios, and mature trees. This detailed evaluation prevents costly rework and ensures your chosen drainage method targets actual problem zones rather than visible symptoms alone.
Material Selection for Sustainable DIY Projects
Selecting the right materials ensures durability and environmental responsibility in 2026 DIY projects. Core components for French drains include perforated PVC or corrugated pipes, clean gravel or crushed stone for filtration, and non-woven geotextile fabric to prevent soil intrusion. For swales, prioritize native grasses, erosion-control blankets made from coconut coir, and amended topsoil that promotes infiltration. Source materials locally when possible to minimize transportation emissions and support regional sustainability goals. Consider UV-resistant and freeze-thaw tolerant options suited to changing climate conditions. Avoid cheap imports that degrade quickly; instead, choose products rated for residential drainage systems that meet current building standards. This thoughtful selection process supports both immediate functionality and years of low-maintenance performance.
Step-by-Step Installation of French Drains
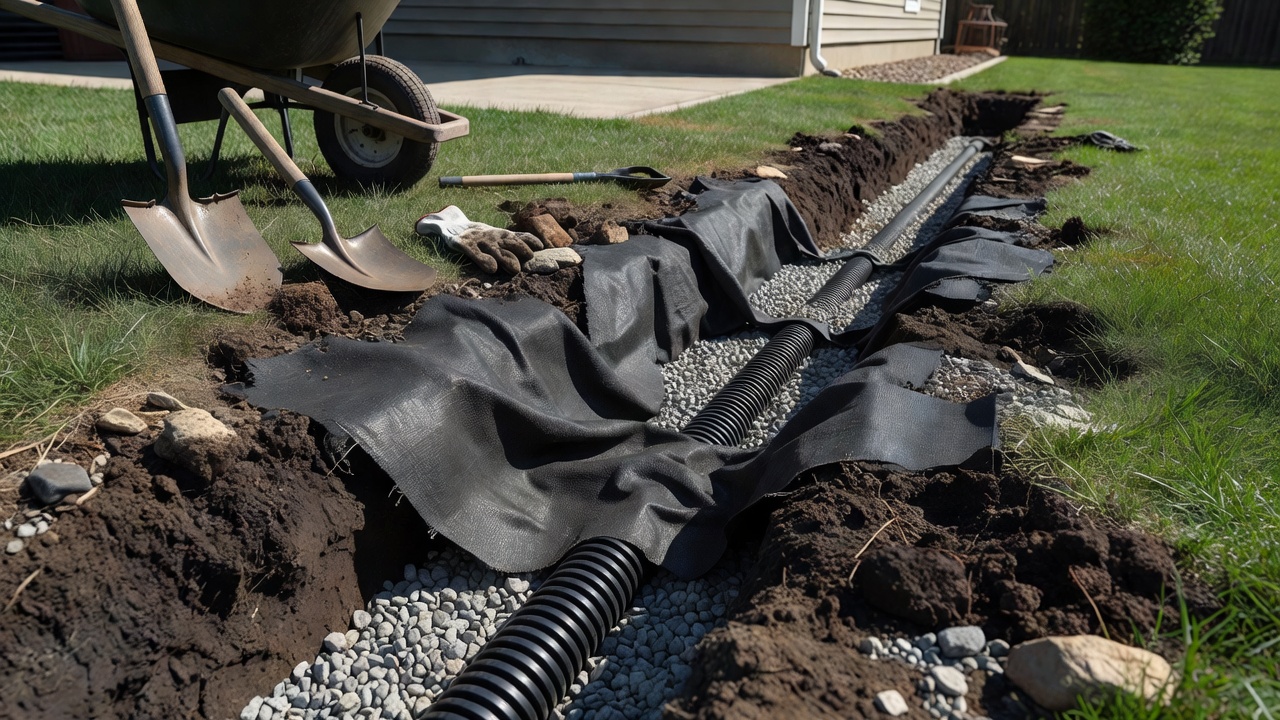
Installing a French drain begins with precise planning and excavation. Mark the trench path from the highest water collection point downhill to a suitable outlet such as a dry well, storm sewer, or vegetated area. Dig a trench 12 to 18 inches wide and 18 to 24 inches deep, maintaining a consistent slope of at least one inch per eight feet for gravity flow. Line the trench with geotextile fabric, overlapping edges by six inches. Add a four-inch layer of gravel, lay the perforated pipe with holes facing downward, then cover with more gravel until the pipe is fully surrounded. Fold fabric over the top and backfill with soil or mulch. Connect multiple sections using fittings and test the system with a garden hose before final covering. This method efficiently captures subsurface water and protects vulnerable areas around foundations in fixer-upper yards.
Installing Swales for Natural Drainage
Swales provide an attractive, low-impact drainage solution that mimics natural waterways. Locate them along contour lines or property edges where runoff concentrates. Excavate a shallow, broad channel six to twelve inches deep and two to four feet wide, with gently sloping sides. Line the bottom with erosion-control fabric or biodegradable matting, then plant deep-rooted native vegetation such as switchgrass or sedges to stabilize soil and absorb moisture. Incorporate check dams made from rocks or logs every ten feet on steeper slopes to slow water velocity. Over time, swales recharge groundwater, filter pollutants, and create micro-habitats that enhance biodiversity while solving drainage challenges in outdoor renovation projects.
Cost Comparisons: DIY vs Professional Options
DIY drainage installations generally require lower overall investment than hiring professionals because homeowners supply their own labor and select materials incrementally. Professional crews add expenses for equipment mobilization, insurance, and markup on supplies. However, complex sites with steep slopes or underground obstacles may justify expert help to avoid mistakes. Weigh the value of your time against the learning curve; many weekend warriors complete basic French drains or swales successfully using rented equipment. Long-term savings come from reduced water damage repairs and improved property marketability after the work is finished.
Real-World Before-and-After Examples
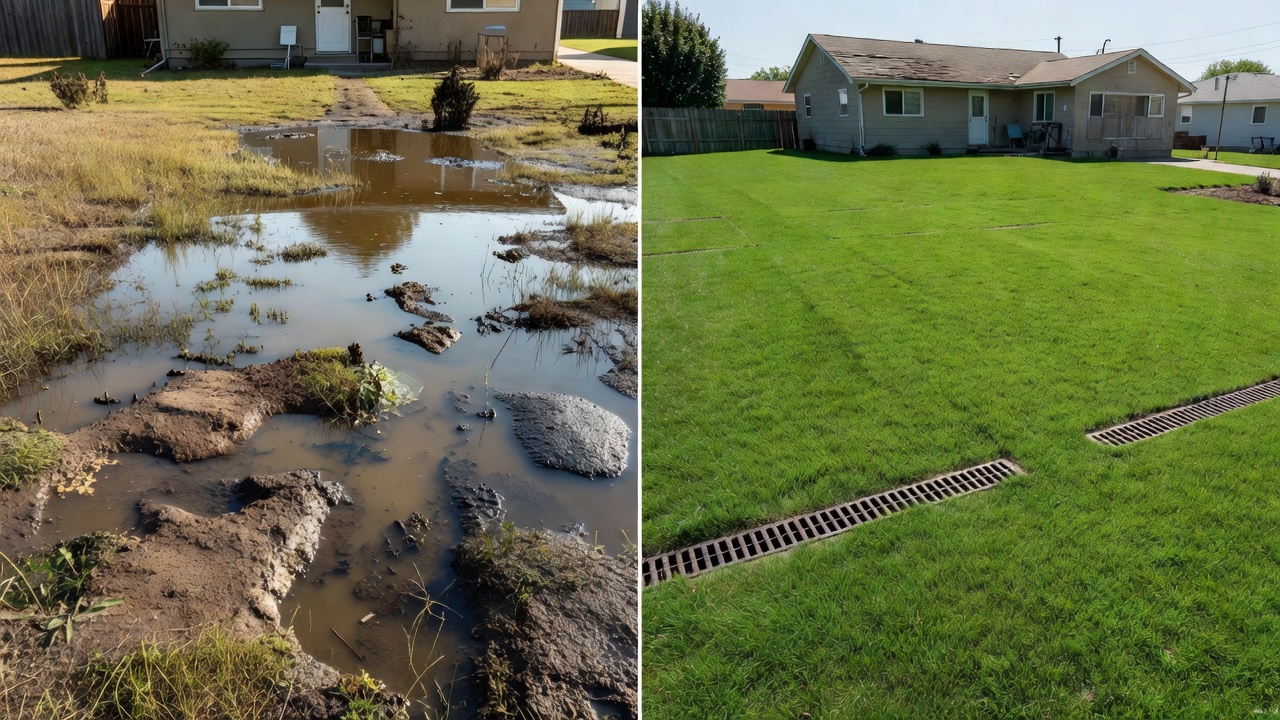
One suburban fixer-upper featured chronic flooding near the back patio after heavy rains. The homeowner mapped the slope, installed a 40-foot French drain connected to a gravel dry well, and reseeded the area. Within one season, the once-soggy lawn supported new play equipment and raised garden beds without standing water. Another sloped property suffered erosion that washed away topsoil annually. By constructing two contour swales planted with native wildflowers, the owner halted runoff, created terraced planting zones, and attracted pollinators. These transformations demonstrate how targeted drainage work revitalizes neglected outdoor spaces into functional extensions of the home.
Integration with Existing Landscaping
Successful integration preserves mature trees, shrubs, and hardscaping while adding drainage features. Route French drain trenches beneath existing mulch paths or around tree root zones using hand tools to minimize disturbance. Disguise outlet grates with decorative rocks or groundcover. Design swales as rain gardens by incorporating colorful perennials that tolerate both wet and dry periods. Coordinate plant choices with your current color palette and maintenance routine so the new elements feel like intentional additions rather than afterthoughts. This approach maintains visual continuity throughout the outdoor renovation process.
Tools and Safety Considerations
Essential tools include a trenching shovel, wheelbarrow, tamper, laser level, and utility knife for fabric. Wear sturdy boots, gloves, and eye protection during excavation. Rent a compact trencher for longer runs to reduce physical strain. Always verify underground utilities, work in sections to avoid trench collapse, and keep children and pets away from open excavations. These precautions ensure safe completion of your drainage project.
Common Mistakes to Avoid
- Skipping proper slope calculations, which causes water to stagnate inside the system.
- Using incorrect pipe diameter or omitting fabric, leading to rapid clogging.
- Directing outlets toward neighboring properties or sensitive wetlands without permits.
- Ignoring seasonal freeze-thaw cycles that can shift improperly compacted backfill.
Troubleshooting FAQs
- What if water still pools after installation? Verify the outlet is clear and recheck slope with a level; extend the trench if needed.
- Can I install these in winter? Planning and material gathering are possible, but digging should wait for thawed ground to prevent compaction issues.
- How do utilities affect placement? Contact 811 at least two days before digging to mark lines and adjust routes accordingly.
- Will drainage features affect my lawn mower? Keep swales wide and shallow or cover French drain trenches with sod for seamless mowing.
Maintenance Tips for 2026 Climate Conditions
Regular upkeep maximizes system longevity amid 2026 weather variability. Inspect French drains each spring and fall, flushing pipes with water to remove sediment. Clear swale vegetation of debris after storms and replenish mulch layers annually. Monitor for animal burrows or root intrusion near pipes and address immediately. Regrade any settled areas around trenches to maintain original slopes. These simple routines prevent major repairs and keep your drainage solution performing reliably through heavy rains and drought cycles.
Conclusion
Mastering DIY yard drainage transforms fixer-uppers into resilient, enjoyable outdoor spaces. Through careful assessment, sustainable material choices, precise installation of French drains or swales, and ongoing maintenance, homeowners achieve lasting results that protect foundations and enhance landscaping. Begin small, follow the detailed steps, and enjoy the satisfaction of a dry, functional yard ready for 2026 and beyond.
No comments yet. Be the first!