 Fixated on Home
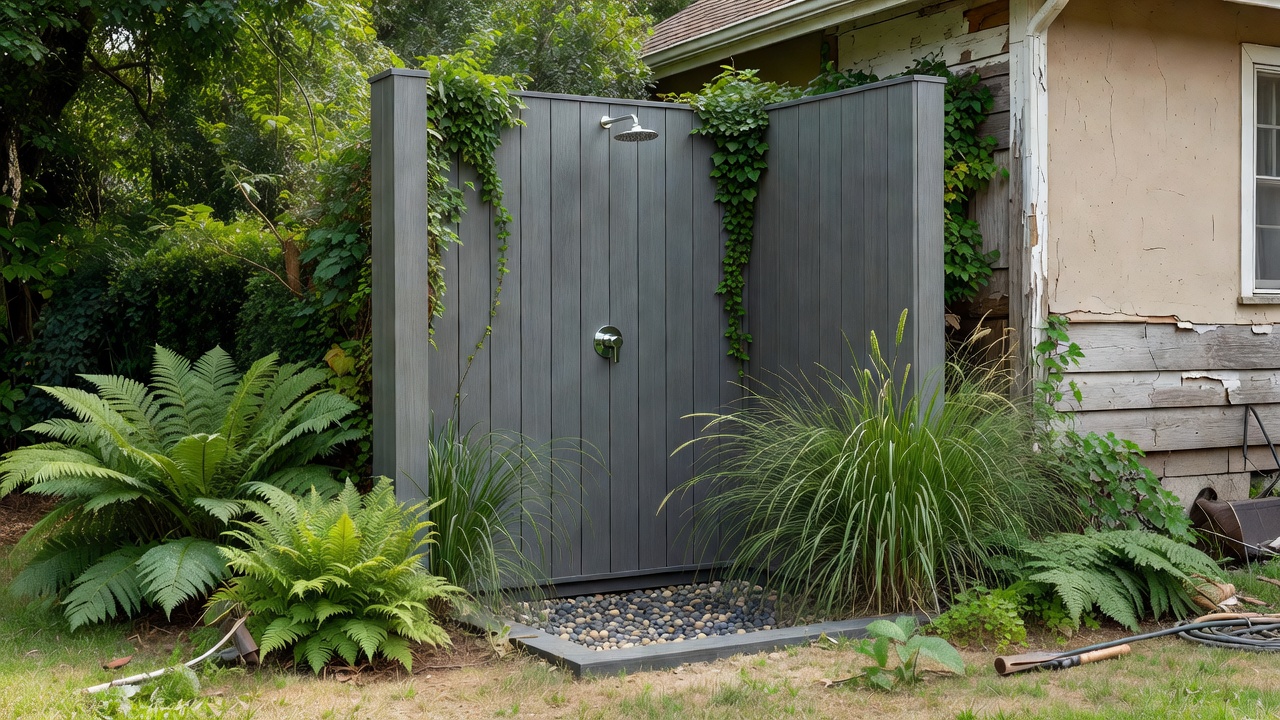
Introduction to DIY Outdoor Showers for Fixer-Uppers
Adding an outdoor shower is one of the most rewarding upgrades for homeowners tackling a fixer-upper property. It enhances curb appeal, increases functionality for rinsing off after gardening or beach days, and can boost resale value when done thoughtfully. In 2026, with growing interest in sustainable outdoor living spaces, these projects blend practicality with modern design elements like weatherproof materials and efficient water systems. Homeowners often discover that a well-planned shower transforms underused backyard corners into practical retreats that family members use daily during warmer months.
This guide walks through every stage of building your own outdoor shower, from initial planning to long-term maintenance. Whether you're aiming for a simple rinsing station or a more luxurious setup with multiple heads, the principles remain the same: prioritize safety, efficiency, and seamless integration with your existing landscape. Real-world examples show that even modest investments in time and materials yield spaces that feel custom and increase daily enjoyment of the property.
Site Planning and Preparation
Choosing the right location is critical for functionality and code compliance. Start by assessing your yard's slope for natural drainage, proximity to existing plumbing lines, and privacy from neighbors. Measure available space to ensure the shower enclosure fits without crowding pathways or garden beds. Consider sun exposure for comfort and wind patterns to minimize spray onto adjacent structures. Soil testing helps determine if additional drainage amendments are necessary before excavation begins.
Check local building codes early. Many areas require permits for any plumbing work, even outdoor installations. Verify setbacks from property lines and ensure the design meets accessibility standards if needed. Walk your property at different times of day to observe light patterns and foot traffic, which informs the best placement for both convenience and discretion.
Plumbing Basics for Outdoor Showers
Plumbing an outdoor shower involves tapping into your home's existing water supply, typically from a nearby exterior spigot or dedicated line. Use freeze-proof faucets in colder climates to prevent pipe bursts. Install a mixing valve for temperature control and consider a dedicated shutoff valve for seasonal winterization. Gather tools such as pipe cutters, wrenches, and Teflon tape before starting. Map out the route from the main supply to avoid future landscaping conflicts.
Water efficiency features are essential. Opt for low-flow showerheads that reduce consumption while maintaining pressure. Learn more about water-saving fixtures from the EPA. Test water pressure at the source first to confirm adequate flow for your chosen fixtures. Common mistakes include skipping backflow preventers, which can lead to contamination issues during inspections.
Material Choices: Weatherproof Composites and More
Select materials built to withstand sun, rain, and temperature swings. Weatherproof composites like PVC or fiber cement boards resist rot and require minimal upkeep compared to natural wood. For flooring, choose non-slip composite decking or gravel with proper edging. Hardware should be stainless steel or coated to avoid corrosion. Compare options by evaluating UV resistance ratings and warranty lengths from manufacturers.
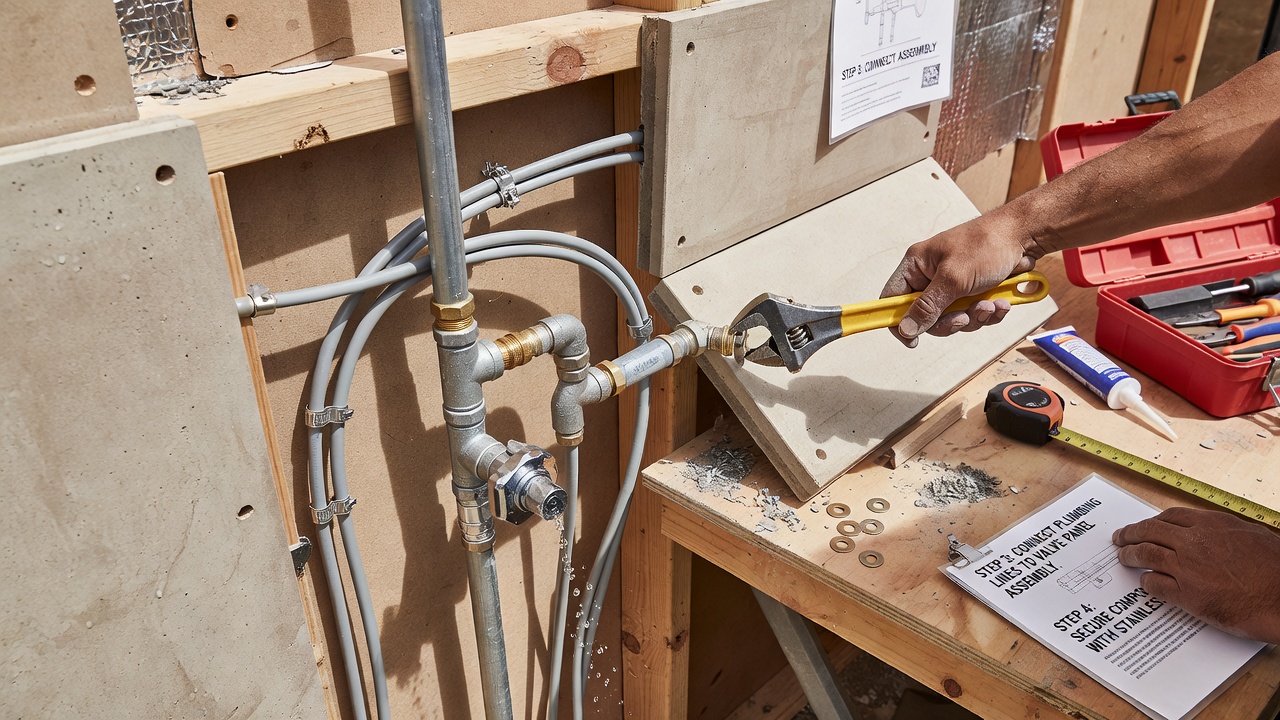
Simple designs using pressure-treated lumber offer quick assembly for beginners, while luxury versions incorporate tiled walls, built-in benches, and multiple showerheads. Composites often win for fixer-uppers due to their durability and lower long-term costs. Consider adding hooks, shelves, and towel bars made from the same weather-resistant materials to keep the space organized and functional year-round.
Step-by-Step Installation Guide
Follow these expanded steps for a successful build:
- Mark and excavate the area, ensuring a slight slope for drainage. Remove sod and roots carefully to protect nearby plants.
- Install the plumbing rough-in, including supply lines and drain. Secure pipes with straps and insulate exposed sections in freeze-prone regions.
- Build the frame using pressure-treated posts and secure it to a concrete footing. Check plumb and level at every stage to prevent wobbling.
- Attach wall panels and mount the showerhead and controls. Seal all joints with exterior-grade caulk to block moisture intrusion.
- Add finishing touches like doors, hooks, and lighting. Install solar-powered lights for evening use without running new electrical lines.
Always test the system for leaks before finalizing enclosures. Document each phase with photos for future reference or resale documentation.
Cost Breakdowns and Budget Considerations
Budget-friendly builds focus on reusing existing plumbing access and choosing durable composites over premium finishes. Factor in tools, permits, and professional help for any electrical components. Integration with landscaping can further control expenses by minimizing new plantings. Track material quantities carefully to avoid over-ordering and waste.
Integration with Existing Landscaping
Blend the shower into your yard by surrounding it with native plants that tolerate moisture. Use gravel paths or pavers to connect it to patios or gardens. Strategic screening with tall grasses or trellises enhances privacy without blocking views. Incorporate the shower near existing irrigation zones so runoff can nourish plants rather than create muddy patches.
Maintenance Tips for Longevity
Regular cleaning prevents mold and mineral buildup. Flush the system seasonally and inspect seals. In winter, drain lines completely and cover exposed parts with insulated covers. Create a quarterly checklist that includes tightening hardware, re-sealing joints, and clearing debris from the drain. These habits extend the life of the installation significantly.
Safety Codes, Water Efficiency, and Design Comparisons
Adhere to plumbing codes for backflow prevention. Review general safety guidelines on OSHA. Simple designs suit beginners, while luxury versions add features like rain heads and steam options but demand more complex plumbing. Evaluate your skill level honestly before choosing complexity. Water-efficient choices also qualify for potential local rebates in some municipalities focused on conservation.
Beginner Checklist
- Obtain necessary permits and review zoning rules
- Map utility lines with a professional locator if unsure
- Gather weather-resistant tools and safety gear
- Plan drainage solution including gravel or dry well
- Test water pressure and temperature consistency
- Prepare a materials list with quantities and suppliers
- Schedule inspections at key stages
- Arrange for help with heavy lifting or electrical work
Real-World Examples and FAQ
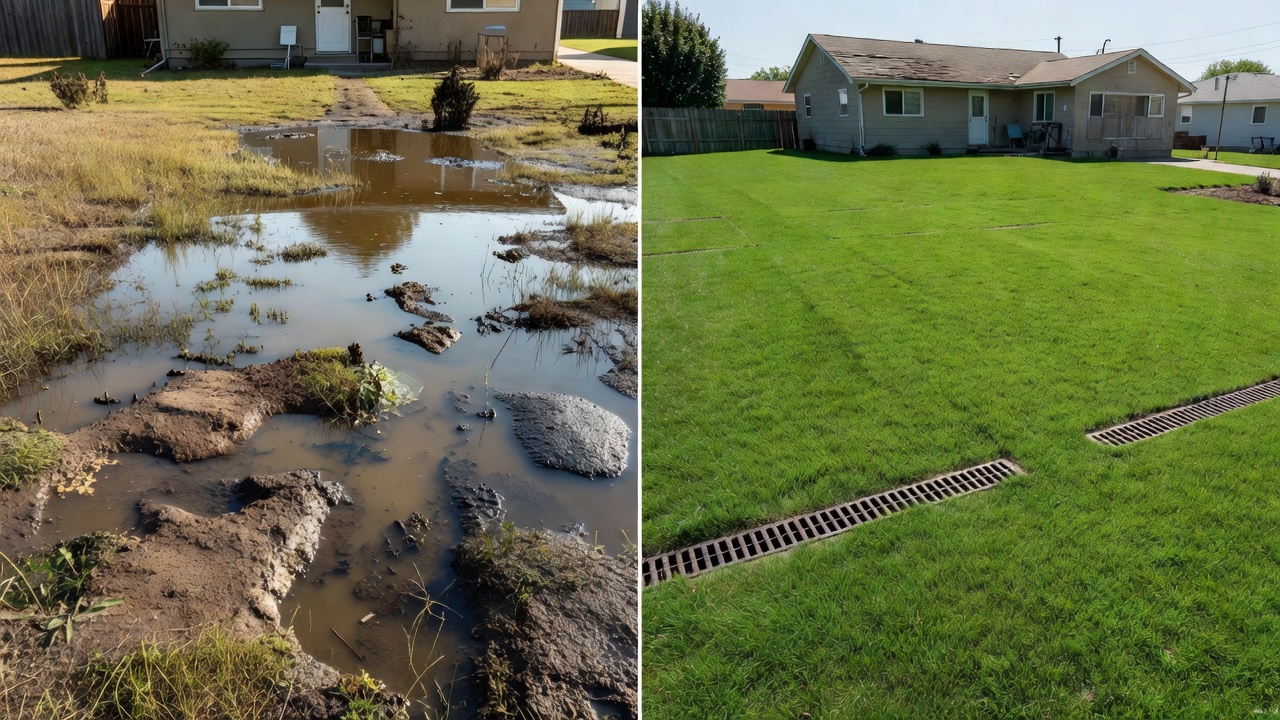
Homeowners in coastal areas often add outdoor showers for post-swim rinses, using composites to combat salt air. Suburban fixer-uppers have successfully integrated showers beside existing decks, creating spa-like extensions that increase usable living space. Common challenges include poor drainage, solved by French drains, and permit delays, avoided by early submissions to local authorities.
FAQ
How do I handle drainage? Install a gravel bed or connect to a dry well for eco-friendly runoff management that prevents pooling.
Do I need a permit? Usually yes for plumbing modifications—check your local municipality before breaking ground.
Can it work in cold climates? Yes, with proper winterization and insulated lines that protect against freezing temperatures.
What plants work best nearby? Choose moisture-tolerant species such as ferns or ornamental grasses that thrive with occasional overspray.
By following this comprehensive approach, your DIY outdoor shower will deliver years of enjoyment and added property value while meeting modern standards for safety and efficiency.
No comments yet. Be the first!