 Fixated on Home
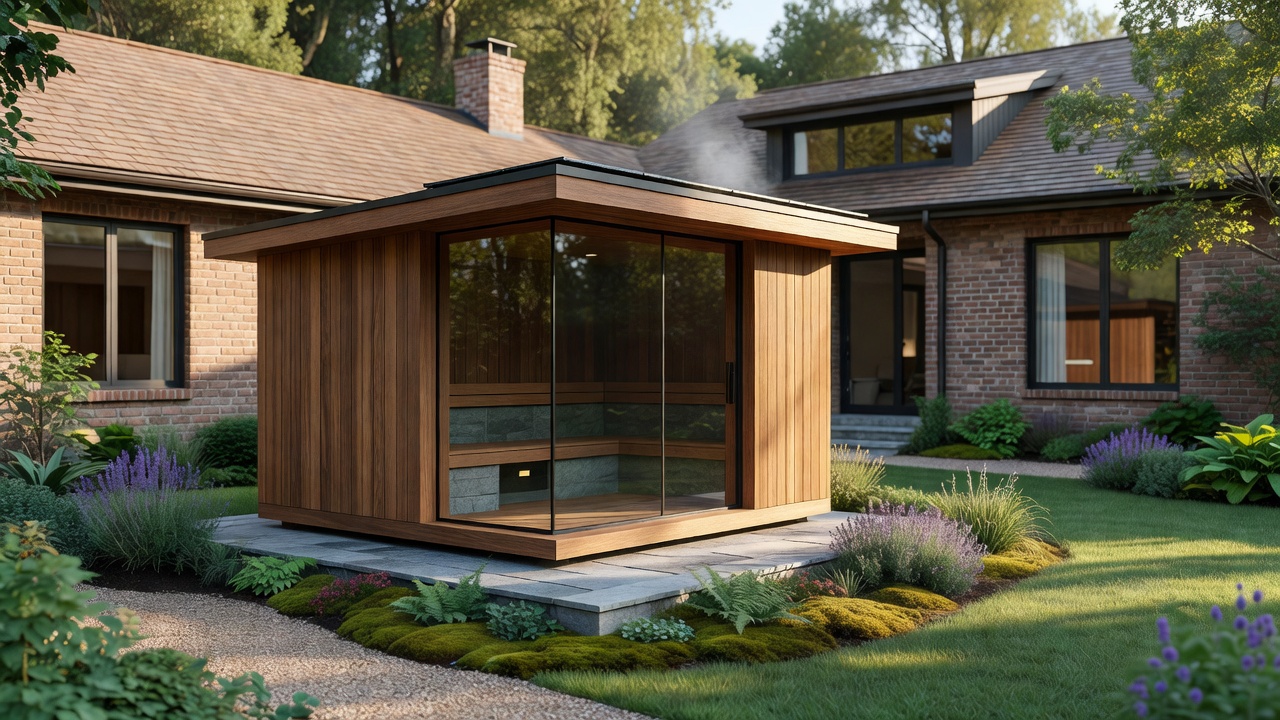
Introduction to DIY Outdoor Sauna Projects for Fixer-Uppers
Homeowners tackling fixer-upper properties in 2026 are increasingly turning to wellness-focused outdoor renovations. Building your own outdoor sauna combines practical DIY skills with health benefits, transforming underused backyard spaces into relaxing retreats. This comprehensive guide covers everything from initial planning through final integration, helping you create a durable, efficient structure tailored to your property and lifestyle. Whether you have a small urban lot or a sprawling suburban yard, an outdoor sauna can become a centerpiece of daily wellness routines while adding long-term value to your home.
Planning Your DIY Outdoor Sauna Build
Successful projects begin with thorough site assessment. Evaluate your yard's slope, sun exposure, and proximity to the main house. Consider local zoning rules and permit requirements early to avoid delays. Factor in how the sauna will complement existing landscaping or future outdoor upgrades. Start by measuring available space and sketching preliminary layouts that account for foot traffic patterns and views from the house. Think about seasonal changes, such as how snow accumulation or summer heat might affect access and usability. Many successful 2026 projects include a simple site analysis checklist that covers drainage patterns, wind direction, and nearby utilities.
Key Considerations Before Starting
- Determine the ideal size based on expected users and available space, typically allowing at least 4-6 square feet per person for comfortable seating.
- Assess soil conditions for foundation stability, testing for compaction and moisture levels.
- Review neighborhood covenants for aesthetic guidelines and height restrictions.
- Decide on heating type, such as traditional wood-burning stoves or modern electric heaters, based on local fuel availability.
Material Selection for Long-Lasting Results
Choose weather-resistant woods like cedar or hemlock for the exterior and interior. These naturally resist moisture and insects while providing a pleasant aroma. For the frame, pressure-treated lumber provides structural integrity against ground contact and weather exposure. Opt for energy-efficient options such as double-pane windows and insulated doors to maintain heat while reducing energy use. Consider alternatives like thermally modified wood for enhanced durability in humid climates. When selecting roofing materials, metal panels or asphalt shingles offer good longevity, but ensure they match the overall aesthetic of your fixer-upper home.
Insulation Techniques for Efficiency
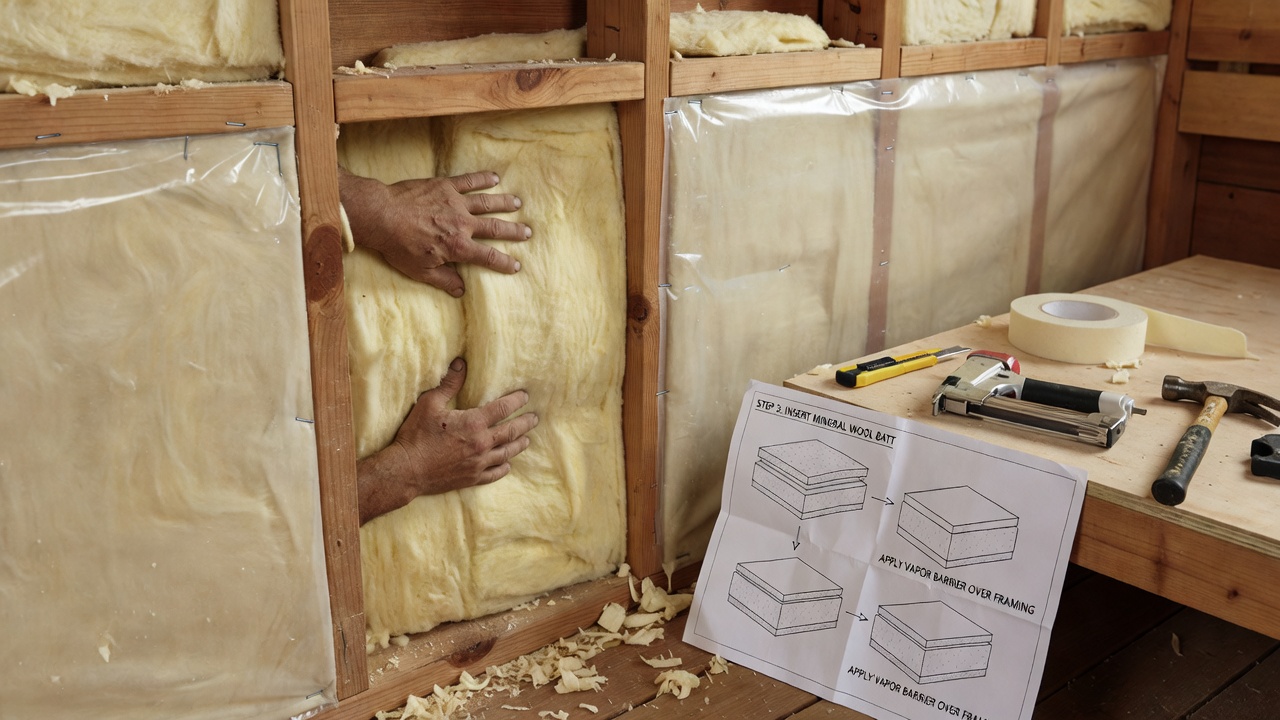
Proper insulation keeps heat inside and protects against outdoor temperature swings. Install vapor barriers on walls and ceilings, followed by mineral wool or rigid foam boards. Seal all seams carefully to prevent drafts using high-quality tape and caulk. This approach supports year-round usability in varying climates. In colder regions, add an extra layer of insulation to the roof and floor to minimize heat loss through the foundation. Homeowners in milder areas might focus on reflective barriers to manage radiant heat. Always test insulation performance after installation by monitoring internal temperatures during the first few uses.
Step-by-Step Construction Process
Follow these phases for a solid build: prepare the foundation with concrete piers or a slab, frame the walls and roof using standard framing techniques, install sheathing for weather protection, add insulation layers methodically, and finish with interior cladding. Work methodically, checking levels at each stage with a laser level or spirit level. Gather essential tools including a circular saw, drill, hammer, and measuring tape before beginning. Real-world examples show fixer-uppers completing similar projects over 4-6 weekends with basic tools and occasional help from friends. Break the process into manageable daily tasks, such as foundation work on day one and framing on days two and three, to maintain momentum without burnout.
Electrical and Plumbing Considerations
Consult licensed professionals for electrical wiring to power heaters safely. Use outdoor-rated components and GFCI protection on all circuits. For plumbing, plan simple drainage if adding a shower or cold plunge, routing lines below the frost line where applicable. Always prioritize code compliance to ensure safety and insurance coverage. Incorporate smart controls where possible, such as programmable thermostats that integrate with home automation systems. In areas with strict energy codes, select heaters that meet efficiency standards to keep operating costs manageable over time.
Integrating the Sauna with Your Existing Yard
Blend the structure into your landscape by aligning it with pathways, decks, or gardens. Add privacy screens or native plants around the perimeter to create a secluded feel. Before-and-after scenarios from 2026 renovations often highlight how a well-placed sauna elevates property appeal without overwhelming the space. Consider adding lighting along access paths and incorporating seating areas nearby for post-sauna relaxation. This integration can turn the sauna into an extension of your living space rather than an isolated addition.
Cost Comparisons and Budget Planning
DIY approaches typically offer significant savings compared to professional installations by allowing you to source materials directly and complete labor yourself. Focus on quality materials that balance upfront investment with long-term durability and lower maintenance needs. Track expenses through a simple spreadsheet that categorizes lumber, insulation, hardware, and finishes to stay organized throughout the project.
Safety Tips for 2026 Builds
Always install proper ventilation and carbon monoxide detectors when using wood stoves. Keep heaters away from flammable materials and establish clear emergency exits. Review guidelines from CDC on wellness environments and EPA recommendations for safe building materials. Additional tips include wearing protective gear during construction, securing ladders properly, and having a first-aid kit on site at all times.
Real-World Examples and Scenarios
One suburban fixer-upper transformed a neglected corner lot into a cedar-clad sauna retreat, adding value and daily relaxation for a family of four. Another project integrated the sauna beside a renovated deck, creating seamless indoor-outdoor flow that encouraged year-round use. A third example involved converting an old garden shed foundation into the base for a compact two-person sauna, demonstrating how existing structures can be repurposed creatively.
Maintenance and Long-Term Care
Regular maintenance ensures your sauna remains functional and attractive. Clean interior surfaces monthly with mild soap and water, inspect seals around doors and windows annually, and reapply protective finishes to exterior wood every two to three years. Monitor heater elements for wear and replace them promptly when performance declines. These simple routines prevent costly repairs and extend the life of your build significantly.
Mistakes to Avoid
Common pitfalls include underestimating foundation requirements, skipping vapor barriers during insulation, and neglecting permit processes. Always double-check measurements before cutting materials, and avoid rushing electrical work without professional input. Learning from these mistakes helps ensure a smoother build and safer final product.
FAQ: Common Challenges for 2026 Projects
How do I handle permits?
Start by contacting your local building department for specific requirements on structures over certain sizes, and prepare detailed plans showing dimensions and materials.
What if my yard has poor drainage?
Install French drains or elevate the foundation to manage water flow effectively, consulting a landscaper if needed for complex sites.
Can I add smart features?
Yes, integrate app-controlled heaters or lighting for modern convenience while maintaining traditional sauna benefits and energy efficiency.
How long does construction typically take?
Most DIY builders complete the project in three to six weekends depending on experience level and weather conditions.
What heating option works best for beginners?
Electric heaters are often recommended for ease of installation and consistent temperature control without the need for chimney construction.
Conclusion
Embarking on a DIY outdoor sauna build enhances both your fixer-upper property and personal wellness routine. With careful planning, quality materials, and attention to detail across every phase, you can achieve professional results that last for years and provide ongoing enjoyment for your household.
No comments yet. Be the first!