 Fixated on Home
Introduction: Why Build a DIY Mini Golf Course in 2026
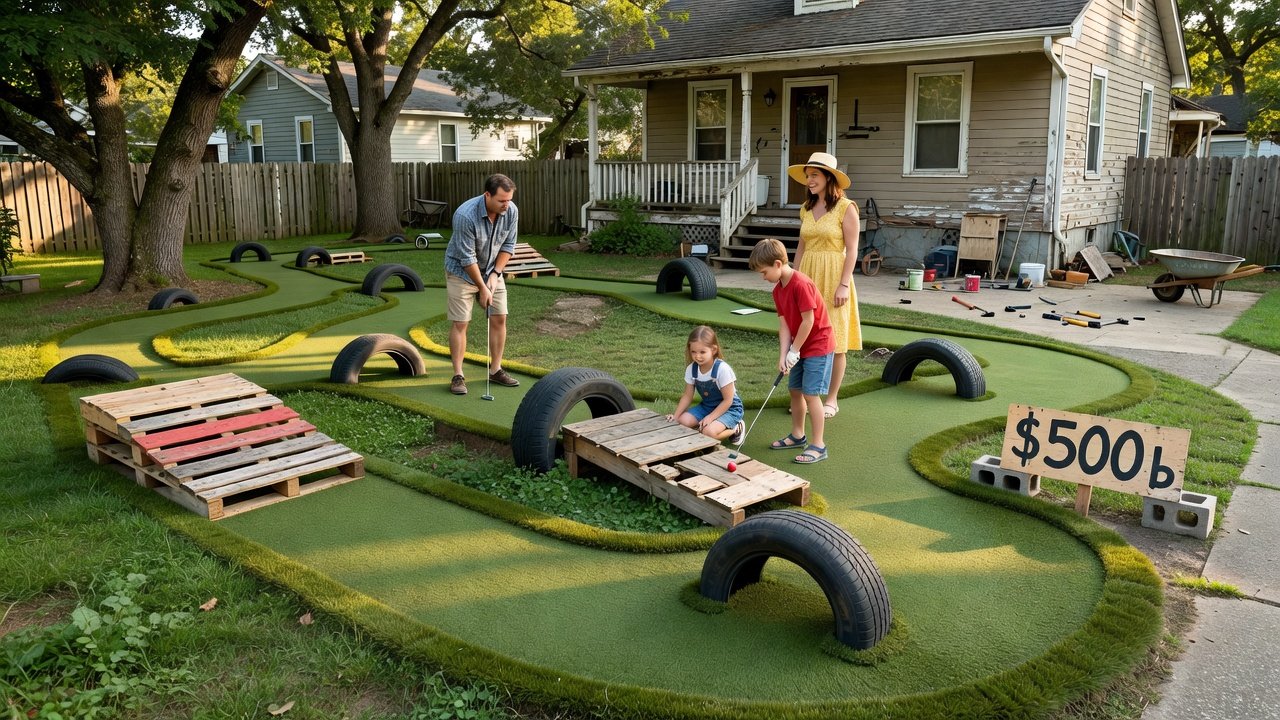
Homeowners with fixer-upper yards often seek creative ways to add entertainment value while improving curb appeal and property worth. A backyard mini golf course delivers exactly that by turning underused outdoor space into a fun, functional feature. This 2026 guide focuses on practical, low-cost methods that blend with existing landscaping for lasting home improvement results. The project stands out as an engaging upgrade because it combines recreation with tangible enhancements to your property, making it more appealing for family use and potential resale.
By using recycled materials and thoughtful design, you can create an engaging course that family and friends will enjoy for years. The project emphasizes integration with your current yard layout to minimize disruption and maximize visual impact. Many homeowners report increased outdoor time and stronger neighborhood connections after completing similar builds, turning once-neglected spaces into community gathering spots.
Planning Your Layout and Design
Start by assessing your available space. Measure the area and sketch a simple 6- to 9-hole course that flows naturally around trees, patios, or garden beds. Consider traffic patterns so the course does not interfere with walkways or play areas. Account for slope and sun exposure to ensure comfortable play year-round. Take time to photograph the yard from multiple angles before beginning, which helps visualize how each hole will interact with surrounding elements.
Map each hole with gentle curves rather than sharp turns to accommodate different skill levels. Incorporate existing landscaping elements like shrubs or rocks as natural boundaries. This approach reduces material needs and creates a seamless look that enhances overall yard aesthetics. For instance, a hole that curves around a mature tree can use the trunk as a visual landmark while adding challenge through strategic placement of barriers.
Material Comparisons and Recycled Options
Choosing the right materials keeps the project affordable and eco-friendly. Compare options such as reclaimed wood versus new lumber, or plastic bottles filled with sand versus concrete blocks for obstacles. Recycled items like old tires, PVC pipes, and wooden pallets offer durable, low-cost alternatives that perform well outdoors. Reclaimed wood provides a rustic charm but requires sealing, while PVC offers longevity with minimal upkeep.
Focus on weather-resistant choices to withstand seasonal changes. For surfaces, synthetic turf provides consistent ball roll while requiring less water than natural grass. Pair it with proper base preparation for longevity. Always source materials locally to reduce transport costs and environmental impact. For guidance on sustainable practices, consult the EPA. Additional insights on responsible material reuse come from the USDA, which highlights benefits of incorporating natural elements into outdoor projects.
Step-by-Step Build Sequence
- Clear and level the chosen area, removing debris and marking hole positions with string. Work in small sections to avoid overwhelming the space and double-check measurements twice before digging.
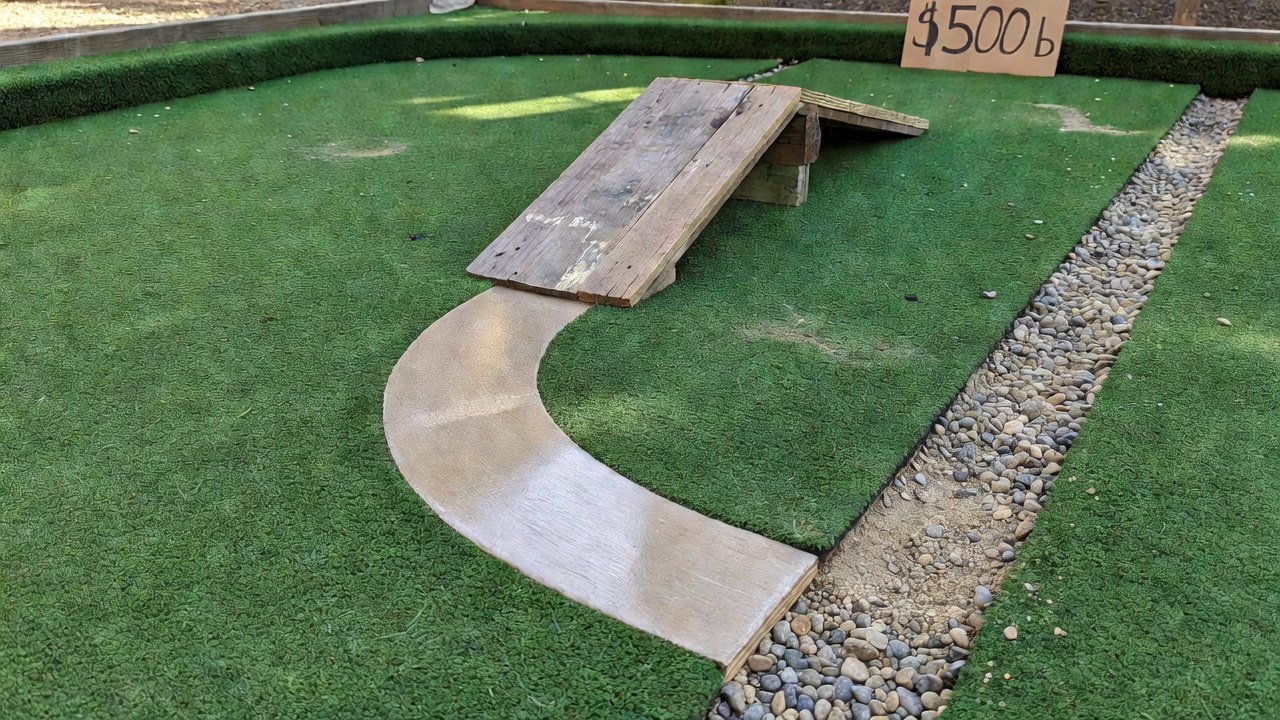
- Install drainage trenches filled with gravel to prevent water pooling. Ensure trenches slope slightly away from the course center for optimal flow.
- Lay synthetic turf or compacted soil bases, securing edges firmly with landscape staples spaced every 12 inches.
- Construct obstacles using recycled wood frames, tires cut into ramps, or stacked bricks for tunnels. Test each obstacle by rolling a ball through it multiple times to confirm smooth movement.
- Build putting surfaces with slight inclines and smooth transitions between holes. Sand any rough edges on wood components to protect hands and balls alike.
- Add finishing touches like numbered signs made from painted scrap wood. Position signs at eye level for easy visibility during play.
Turf and Drainage Solutions
Effective drainage prevents soggy areas that ruin playability. Dig shallow channels around the perimeter and fill them with crushed stone before adding turf. Choose turf with a short pile height for better ball control and easier cleaning. In regions with heavy rain, incorporate French drains connected to existing yard systems. Test drainage after installation by running a hose over the course. Adjust as needed to ensure water flows away from play surfaces. These steps protect your investment and keep the course usable in varying weather conditions throughout the year.
Budget Breakdowns and Cost-Saving Tips
Keep the entire project under $500 by prioritizing free or low-cost reclaimed items from local sources. Focus spending on essential turf rolls, basic fasteners, and paint. Shop end-of-season sales for tools and check community reuse centers for wood and containers. Track expenses carefully to stay within limits while achieving professional-looking results. Many builders reuse items already on their property, such as leftover fencing or garden edging, which further lowers overall outlay without sacrificing quality.
Safety Considerations
Prioritize safety throughout construction and use. Round sharp edges on obstacles and secure all elements to prevent tipping. Choose non-toxic paints and sealants suitable for outdoor play. Maintain clear sight lines so players can see approaching balls. For general safety recommendations, refer to resources from the CDC. Supervise younger players and establish simple rules to avoid collisions. Install low lighting if evening use is planned, using solar options for efficiency and reduced energy consumption.
Maintenance Tips for Long-Term Enjoyment
Regular upkeep preserves the course and your yard's appearance. Sweep turf weekly to remove leaves and debris. Inspect obstacles seasonally for loose parts and tighten as needed. Replenish gravel in drainage areas annually. Store portable elements indoors during harsh winters to extend lifespan. Monitor grass or plant borders for overgrowth and trim regularly. These habits ensure the mini golf remains a highlight of your outdoor space without ongoing major repairs, allowing you to focus on enjoyment rather than fixes.
Integration with Existing Landscaping
Successful builds weave the mini golf course into the current landscape rather than imposing a separate feature. Use native plants along hole borders to create natural framing that attracts pollinators while softening hard edges. Elevate certain putting areas slightly to protect tree roots and allow water to drain toward garden beds. This thoughtful approach turns the project into a true home improvement that complements rather than competes with established greenery.
Before-and-After Examples
One homeowner transformed a patchy lawn into a nine-hole course using pallet wood ramps and recycled tire bumpers. The result added visual interest and increased usable entertaining space. Another integrated the course around existing flower beds, creating a cohesive garden-golf hybrid that boosted resale appeal. A third example involved converting a sloped side yard into a multi-level challenge with terraced holes supported by reclaimed railroad ties, demonstrating how even challenging terrain can become an asset.
Common Mistakes to Avoid
- Skipping proper drainage, which leads to puddles and turf damage after rain.
- Overcomplicating hole designs with overly steep inclines that frustrate beginners.
- Neglecting to secure obstacles, resulting in shifting pieces during play.
- Ignoring sun patterns, causing uncomfortable glare or uneven turf wear.
FAQ on Common Challenges
How do I handle uneven terrain?
Build up low spots with soil and compact thoroughly before laying turf. Use adjustable ramps to create level putting surfaces on slopes.
What if my yard is very small?
Design a compact 4-hole loop that wraps around the perimeter. Vertical obstacles save horizontal space while adding challenge.
How long does construction take?
Most DIY builders complete a basic course in two to three weekends, depending on material availability and yard size.
Can I add water features to holes?
Yes, but keep them shallow and use sealed liners to prevent leaks. Position them away from electrical lines and ensure easy access for cleaning.
What maintenance is needed after winter?
Inspect for frost damage, re-level any shifted turf, and repaint faded signs. Early spring checks prevent issues once play resumes.
Conclusion
A DIY backyard mini golf course offers an exciting 2026 upgrade that combines recreation with meaningful property enhancement. By following these detailed steps for design, construction, and care, you can create a lasting feature that elevates your fixer-upper yard. Start planning today to enjoy the benefits all season long.
No comments yet. Be the first!