 Fixated on Home
Introduction to DIY Pollinator Gardens for Fixer-Uppers
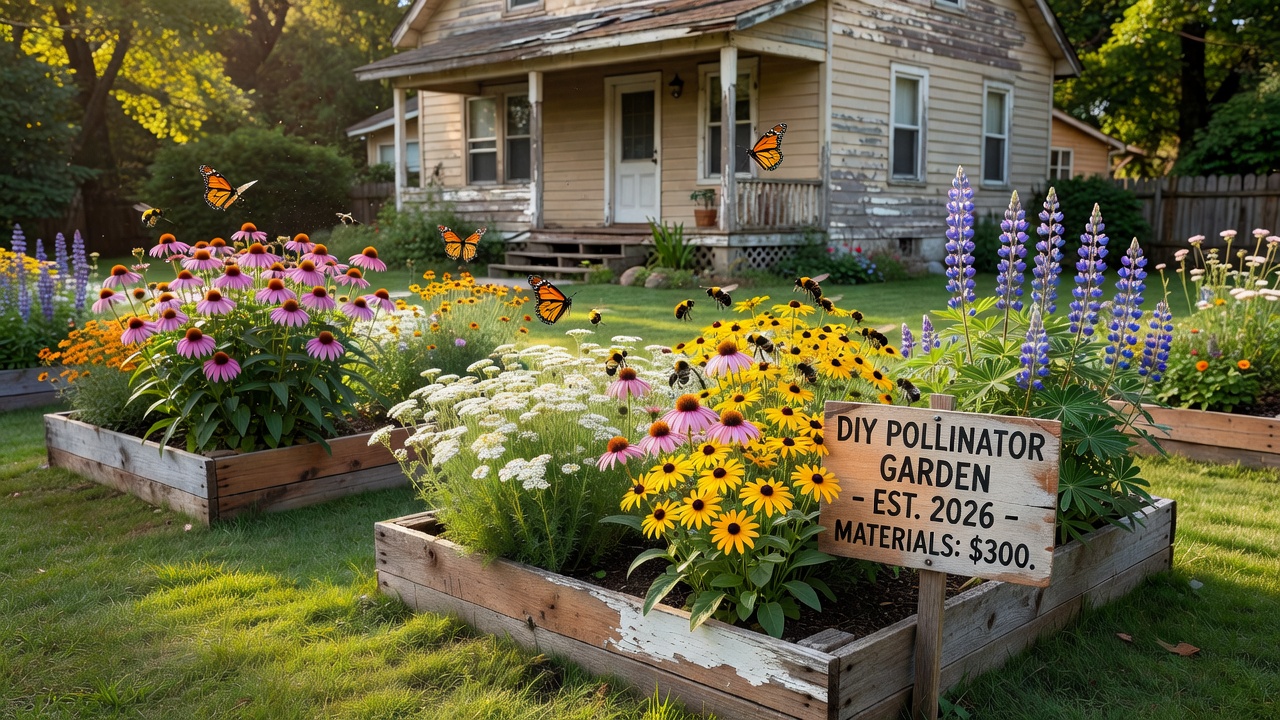
Homeowners tackling outdoor renovations in 2026 are increasingly turning to pollinator gardens as a smart way to enhance curb appeal while supporting local ecosystems. These gardens attract bees, butterflies, and hummingbirds, delivering measurable benefits like improved biodiversity and potential increases in property value. This guide walks beginners through site assessment, soil preparation, native plant selection aligned with current climate trends, and DIY builds using recycled materials. By integrating these elements into existing landscapes, you create a cohesive, eco-friendly outdoor space without major overhauls. Pollinator gardens also align with growing homeowner interest in sustainable living, offering long-term rewards such as reduced maintenance needs and enhanced neighborhood appeal. Whether your fixer-upper features a small urban lot or a sprawling suburban yard, these projects scale effectively and contribute to broader environmental goals like supporting declining pollinator populations.
Site Assessment and Planning
Begin by evaluating your backyard for sunlight exposure, soil type, and drainage. Pollinator gardens thrive in full sun (at least six hours daily) with well-draining soil. Map out areas near existing fixer-upper features like patios or fences to blend seamlessly. Consider wind patterns and proximity to water sources for long-term success. Walk your property at different times of day to note microclimates, such as shaded corners or wind tunnels created by buildings. For example, a south-facing slope may warm faster in spring, making it ideal for early bloomers. Use simple tools like a soil probe or smartphone apps for sun tracking to gather data before purchasing plants. This assessment prevents costly mistakes and ensures your garden integrates naturally with ongoing renovation work, such as new walkways or deck additions.
Soil Preparation Steps
Test soil pH and amend with organic compost to support native species. Remove weeds and loosen compacted earth to a depth of 12 inches. This foundation prevents common failures and encourages deep root growth for drought resilience amid shifting 2026 weather patterns. Start with a basic home soil test kit to check nutrient levels and pH, aiming for a slightly acidic to neutral range of 6.0 to 7.0. Incorporate aged manure or leaf mold for organic matter, mixing thoroughly to improve structure. In clay-heavy soils common in many fixer-upper neighborhoods, add coarse sand or gypsum to enhance drainage. For sandy soils, focus on compost to retain moisture. Allow the prepared area to settle for a week before planting, and consider raised beds if native soil quality remains poor after amendments. This detailed prep work pays off with healthier plants that establish faster and require fewer interventions later.
Selecting Native Plants for 2026 Climate Trends
Choose plants adapted to your USDA hardiness zone that bloom across seasons. Focus on species like coneflowers, milkweed, and bee balm for regional compatibility. These support pollinators while requiring less water than non-natives. Verify local extensions for the best matches to current climate shifts, including drought-tolerant varieties suited to warmer summers. Group plants by bloom time and height for layered visual interest: low-growing ground covers in front, mid-height perennials in the middle, and taller options at the back. Examples include spring bloomers like wild columbine and lupine that emerge early, summer standouts such as black-eyed Susan and cardinal flower that peak during peak pollinator activity, and fall choices like aster and goldenrod that provide late-season nectar. Source plants from reputable nurseries specializing in natives to avoid invasive look-alikes. Consider companion planting, such as pairing milkweed with nectar-rich salvias, to create mini-habitats that sustain butterflies through their full life cycles.
- Spring bloomers: Wild columbine and lupine
- Summer options: Black-eyed Susan and cardinal flower
- Fall choices: Aster and goldenrod
Verify local extensions for the best matches to current climate shifts.
DIY Construction Using Recycled Materials
Incorporate borders from reclaimed wood, bricks, or tires to define garden edges sustainably. This approach keeps costs low while adding character to fixer-upper yards. Repurposed materials not only reduce waste but also create unique textures that complement older home architecture. Source items from local construction sites, Habitat for Humanity ReStores, or your own demolition leftovers to maintain an authentic, budget-conscious aesthetic.
Building Raised Beds
- Gather untreated lumber or pallet wood for frames.
- Assemble 4x8-foot beds at 12-inch height.
- Line with landscape fabric and fill with amended soil mix.
- Plant densely in layers for visual impact and pollinator access.
Secure corners with galvanized screws for durability, and elevate beds slightly off the ground if drainage is an issue. These structures make weeding easier and protect plants from foot traffic during family gatherings or future landscape tweaks.
Vertical Planters for Small Spaces
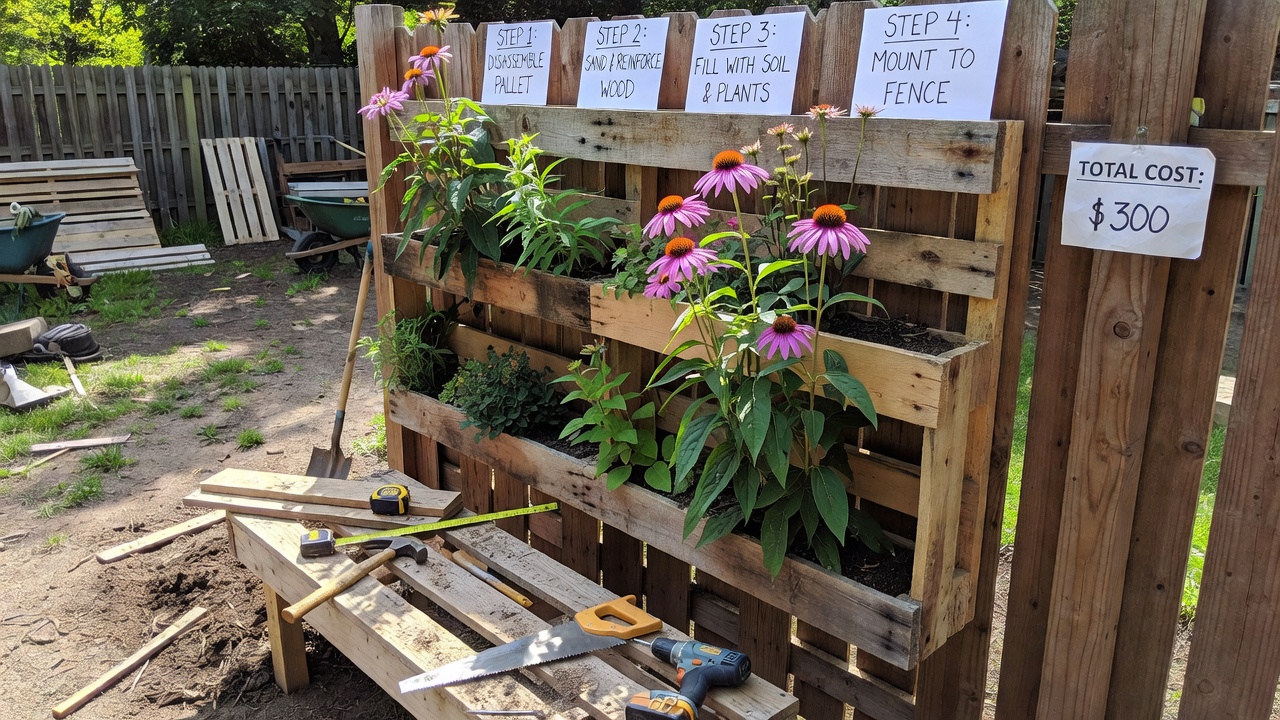
Repurpose pallets or gutters into vertical structures. Mount on south-facing walls to maximize sun and create height in compact areas. These add architectural interest and increase planting space without expanding footprint. Drill drainage holes in gutter sections, attach them in staggered rows, and fill with lightweight potting mix blended with native seeds. For pallets, staple landscape fabric to the back and sides before adding soil and plants like trailing nasturtiums or upright salvias. This method works especially well for townhome fixer-uppers with limited ground space, turning bland fences into living walls that attract hummingbirds.
Budget Breakdowns and Cost-Saving Tips
Focus on free or low-cost materials from local salvage yards. Native plant starts from community swaps further reduce expenses, allowing full projects to stay budget-friendly under $300 as of 2026-08-11 estimates. Prioritize multipurpose tools you already own, such as shovels and wheelbarrows, and trade labor with neighbors for larger tasks like hauling soil. Track expenses in a simple spreadsheet to stay on target, reallocating savings toward premium native varieties that offer better long-term performance.
Seasonal Maintenance Checklist
- Spring: Divide perennials and add mulch.
- Summer: Deadhead flowers and monitor for pests naturally.
- Fall: Leave seed heads for birds and collect seeds.
- Winter: Protect roots with leaf litter.
Expand spring tasks by inspecting for winter damage and replanting any bare spots with fresh divisions. In summer, water deeply but infrequently during dry spells, and introduce beneficial insects like ladybugs instead of chemicals. Fall cleanup focuses on minimal intervention to preserve overwintering habitats, while winter mulching insulates roots against freeze-thaw cycles common in transitional climates.
Common Pitfalls to Avoid
Overplanting non-natives or skipping soil tests often leads to poor establishment. Avoid chemical pesticides that harm pollinators. Plan for succession blooming to maintain year-round interest. Another frequent error is underestimating mature plant sizes, resulting in overcrowding that blocks airflow and invites disease. Space seedlings according to label recommendations and thin as needed in the first season. Also, resist the urge to tidy every fallen leaf in autumn, as this removes essential shelter for beneficial insects.
Integration with Existing Landscapes
Blend new gardens with current hardscaping by echoing materials and colors. This creates unified outdoor upgrades that enhance overall home value. For instance, match recycled brick borders to existing pathways or use the same gravel mulch around nearby trees. Connect the pollinator area to patios with stepping stones planted with low-growing thyme, encouraging visitors to explore while protecting delicate blooms.
Measurable Home Improvement Benefits
Well-designed pollinator gardens contribute to higher resale appeal through curb appeal and sustainability certifications. They also foster neighborhood biodiversity, aligning with growing 2026 eco-trends. Homeowners often report increased enjoyment of outdoor spaces and opportunities for educational family activities, such as observing butterfly life cycles.
Monitoring Success and Wildlife Attraction
Track pollinator visits with a simple journal noting species and peak times. Install a shallow birdbath with pebbles for landing spots to draw additional visitors. Over time, observe increases in native bee diversity and reduced need for supplemental watering as plants mature.
FAQ
How do I attract specific wildlife?
Include host plants like milkweed for monarchs and shallow water features for bees. Learn more from the National Wildlife Federation.
What about long-term care?
Annual division and minimal watering after establishment keep gardens thriving. Check resources at EPA for pollinator protection tips.
Can this work in urban fixer-uppers?
Yes, container and vertical options adapt well to small lots. Consult USDA for zone-specific guidance.
How long until I see results?
Most gardens show visible blooms and pollinator activity within the first growing season when using established plants.
Conclusion
Embarking on a DIY backyard pollinator garden transforms fixer-upper spaces into vibrant, beneficial landscapes. With thoughtful planning and native choices, you achieve sustainable results that reward both your home and the environment for years ahead. Start small, scale as confidence grows, and enjoy the ongoing connection to nature that these projects provide.
No comments yet. Be the first!