 Fixated on Home
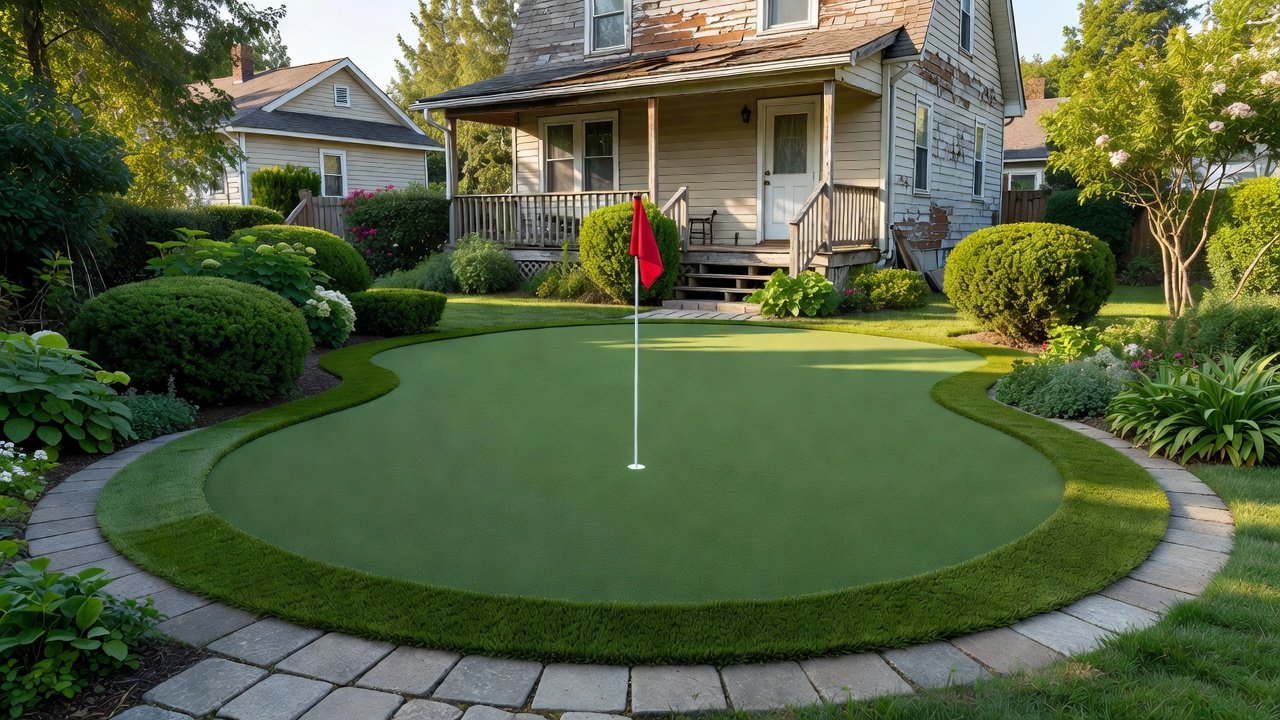
Introduction to DIY Backyard Putting Greens in 2026
Homeowners tackling fixer-uppers often seek outdoor upgrades that add value and enjoyment without breaking the bank. Building a backyard putting green combines practical DIY skills with home improvement goals, turning unused lawn space into a functional recreation area. This guide walks beginners through every stage using beginner-friendly language and real-world 2026 renovation examples. Whether your property needs a complete outdoor overhaul or simple enhancements to existing landscaping, a putting green delivers consistent practice opportunities while elevating property aesthetics. In today's market, such additions appeal to families and golf enthusiasts alike, creating versatile spaces that support both relaxation and active hobbies.
Why a Putting Green Fits Fixer-Upper Projects
Fixer-uppers typically feature dated outdoor spaces that need modern touches. A putting green enhances curb appeal, provides year-round entertainment, and supports wellness through light exercise. It pairs well with other budget renovations like patio updates or garden beds, creating a cohesive backyard retreat. Beyond aesthetics, these installations can improve drainage across the yard, reduce mowing needs in targeted zones, and offer a low-water alternative in drought-prone regions. Homeowners report increased satisfaction with their properties after completion, as the feature encourages daily outdoor time and can even serve as a conversation starter during gatherings. For those focused on long-term livability, integrating a green aligns perfectly with sustainable home improvement trends seen in recent years.
Site Preparation Essentials
Start by assessing your yard's slope, sun exposure, and soil type. Clear the area of grass, rocks, and debris. Level the ground using a laser level and tamper for a smooth base. Proper preparation prevents uneven surfaces that ruin putting accuracy later. Begin with a thorough soil test to identify compaction issues or drainage problems. Remove existing vegetation completely to avoid regrowth underneath the turf. If the site has heavy clay content, consider amending the subsoil with sand for better stability. Measure the intended area multiple times to ensure accurate boundaries, accounting for any future expansions you might plan. This foundational work often takes the most time but directly impacts the longevity and playability of the finished green.
Selecting the Right Turf for Your Climate
Artificial turf designed for putting greens offers consistent roll and low maintenance. Choose nylon or polyethylene fibers with a 3/8-inch pile height for realistic ball behavior. Consider UV resistance and drainage holes to handle heavy rain. In 2026 renovations, many homeowners opt for hybrid blends that mimic natural grass under varying weather conditions. Evaluate options based on regional factors such as intense sunlight in southern states or freeze-thaw cycles in northern climates. Look for products with antimicrobial treatments to prevent mold in humid areas. Comparing different backing materials helps ensure the turf withstands foot traffic from regular use. Consulting local extension services provides tailored recommendations suited to your specific microclimate.
Integrating Effective Drainage Systems
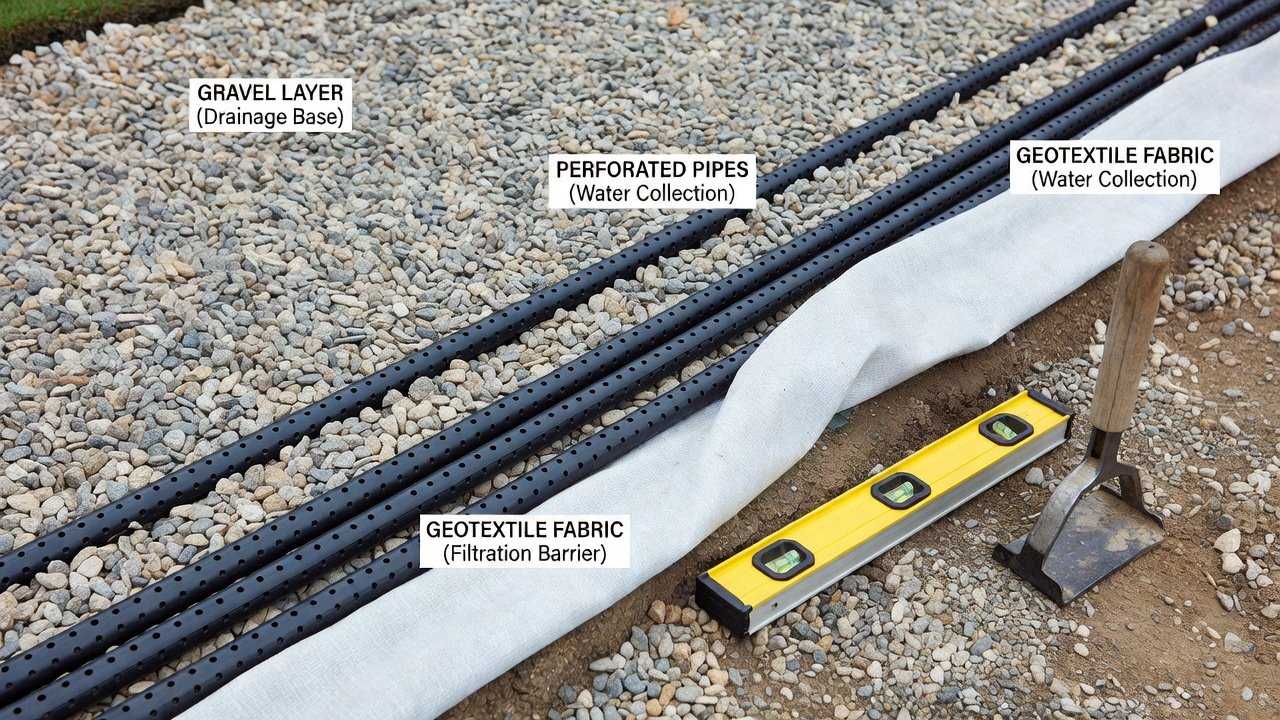
Drainage prevents water pooling that damages turf and creates mud. Install a perforated pipe system beneath the base layer, sloping it toward a collection point. Add gravel and sand layers for filtration. Refer to guidelines from the EPA for sustainable stormwater practices that protect local waterways. Proper drainage starts with mapping natural water flow patterns across your property. Trench depths typically range from six to twelve inches depending on soil permeability. Connect pipes to existing yard drains where possible to minimize new infrastructure. Test the system with water before covering to confirm flow rates meet expectations. Poor drainage remains one of the leading causes of premature turf failure in DIY projects, so investing time here pays dividends over the life of the installation.
Step-by-Step Installation Process
- Mark the green's perimeter with stakes and string, double-checking dimensions against your design plan.
- Excavate 4-6 inches of soil and compact the subgrade thoroughly using a plate compactor for stability.
- Lay geotextile fabric to block weeds while allowing water passage, overlapping seams by at least six inches.
- Add and level crushed stone base in two-inch lifts, checking flatness frequently with a straightedge.
- Install turf panels starting from one edge, stretching gently to remove wrinkles before seaming.
- Brush in infill material evenly and roll the surface multiple times to settle everything in place.
- Place the cup and flag for practice, ensuring the hole sits flush with the turf surface.
Materials Checklist
- Artificial putting green turf rolls sized to your layout
- Crushed stone and sand for base and infill layers
- Geotextile fabric for weed and root barriers
- Perforated drainage pipes and fittings
- Seaming tape and specialized glue rated for outdoor use
- Infill sand or crumb rubber options
- Putting cup, flagstick, and hole liner
- Leveling tools, tamper, and measuring tape
Tools Needed for a Successful Build
Beyond basic hand tools, gather a laser level, plate compactor rental, utility knife for precise cuts, and a heavy roller for final smoothing. Safety equipment including gloves and knee pads protects during extended work sessions. Having a wheelbarrow on site speeds material movement, while a shop vacuum helps clean up loose infill after installation. Renting specialized equipment rather than purchasing keeps costs manageable for one-time projects typical of fixer-upper timelines.
Maintenance Routines for Year-Round Play
Weekly brushing keeps fibers upright and maintains true roll characteristics. Rake debris monthly and inspect seams for wear, addressing any separation immediately with repair kits. In winter, clear snow gently to avoid damaging the base. Seasonal deep cleaning removes embedded dirt that affects play quality. These simple steps ensure the green stays usable across seasons, supporting consistent practice habits. Rotate practice spots to distribute wear evenly, and reapply infill annually in high-traffic zones. Many owners establish a quarterly checklist that includes checking perimeter edges for shifting caused by ground movement.
Common Pitfalls to Avoid
Skipping proper leveling leads to inconsistent ball rolls and frustration during use. Using low-quality turf results in rapid fading and fiber breakdown under sunlight exposure. Ignoring local permits can delay projects or require rework. Always double-check drainage before final turf placement to avoid costly fixes. Another frequent mistake involves inadequate seam sealing, which allows water intrusion and edge lifting over time. Rushing the base compaction phase often creates soft spots that appear after the first heavy rain. Learning from documented 2026 renovation failures highlights the importance of patience during each phase.
DIY Versus Professional Installation Comparison
DIY routes save on labor while building hands-on skills, ideal for fixer-upper enthusiasts who enjoy the process. Professionals deliver faster results with warranties but at higher overall expense. Many 2026 projects blend both by handling prep DIY and hiring experts only for complex drainage or large-scale grading. DIY offers full control over material choices and timeline flexibility, whereas professionals bring specialized equipment that achieves tighter tolerances on large surfaces. Weighing personal skill levels against project scope helps determine the best hybrid approach for your situation.
Practical Examples from Recent Renovations
One suburban home in a temperate zone transformed a sloped backyard into a 300-square-foot green integrated with native plants and a small seating area. The owners extended the drainage system to benefit adjacent garden beds, creating a multifunctional landscape. Another urban fixer-upper used modular turf panels for quick assembly on a rooftop deck, adapting to space constraints while improving property value through added recreational amenities. A third example involved a rural property where the green was built adjacent to an existing shed, using reclaimed materials for bordering to keep the project aligned with overall budget renovation goals.
Budget-Friendly Tips for Fixer-Uppers
Focus on smaller initial sizes that can expand later, sourcing materials during off-season sales when possible. Reuse excavated soil for other yard projects to reduce disposal fees. Partner with neighbors for shared equipment rentals to lower individual costs. These strategies help maximize impact within typical fixer-upper financial frameworks while delivering professional-looking results.
FAQ: Climate Adaptations and More
How does climate affect turf choice?
Hotter regions benefit from heat-reflective fibers, while cooler areas need freeze-resistant bases. Test local soil drainage first and consider wind exposure when selecting pile direction.
What permits might be needed?
Check municipal codes for structures over certain sizes. Drainage modifications often require simple notifications rather than full permits, but always verify before breaking ground.
Can I expand the green later?
Yes, modular designs allow phased additions without redoing the entire base. Plan initial drainage to accommodate future growth.
How do I adapt for heavy rainfall areas?
Increase base depth and add extra perimeter drains. Select turf with larger drainage perforations and monitor during the first rainy season.
Conclusion
A DIY backyard putting green delivers lasting enjoyment for fixer-upper owners. By following these steps for preparation, installation, and care, you create a personalized outdoor feature that boosts both fun and home value. Start small, plan thoroughly, and enjoy the process of transforming your space in 2026 and beyond. For golf-specific standards, explore resources from the USGA. Additional soil management guidance is available through the USDA.
No comments yet. Be the first!