 Fixated on Home
Introduction to Built-In Outdoor Seating for Fixer-Uppers
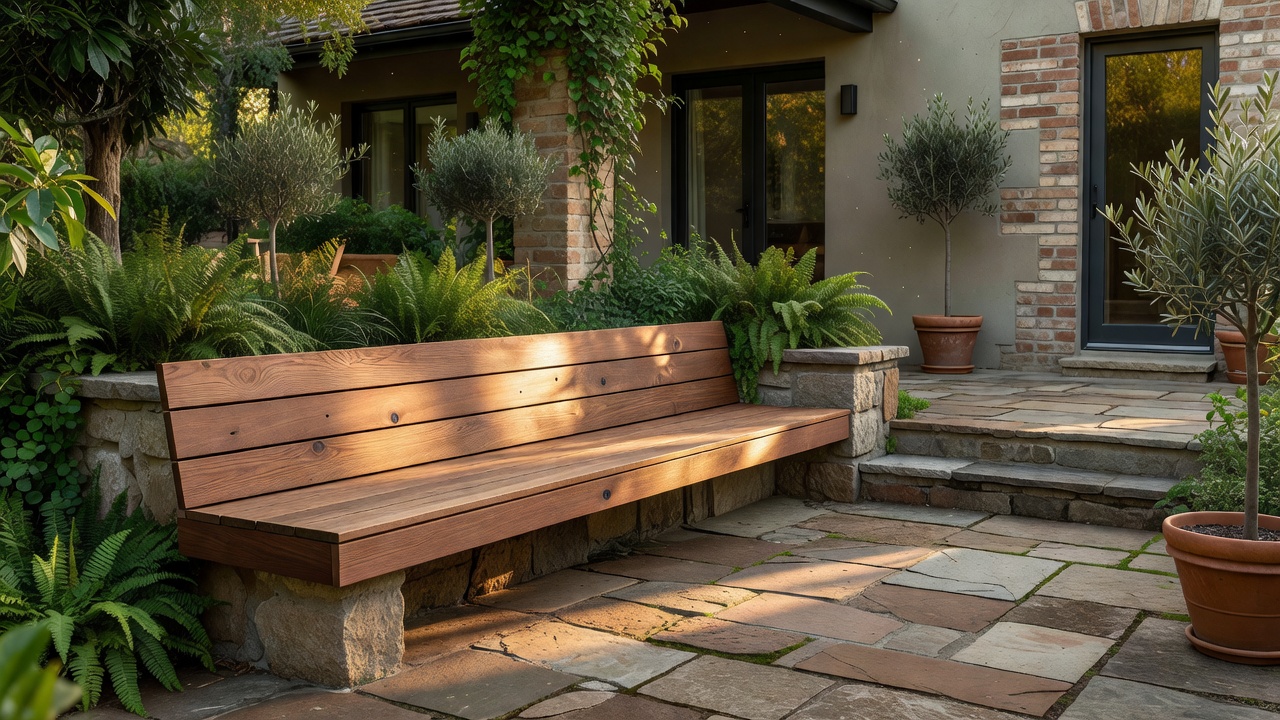
Built-in outdoor seating transforms underutilized yard spaces into functional, inviting areas while boosting property value. In 2026, sustainable upgrades emphasize eco-friendly materials and low-maintenance designs that align with modern fixer-upper renovations. This comprehensive guide covers everything from initial site assessment to final customization, helping beginners create durable benches or sectional seating integrated with existing patios or decks. Whether your yard is compact or expansive, built-in options offer space-saving benefits over freestanding furniture. They also provide opportunities for storage and personalization using weather-resistant wood or composites that stand up to seasonal changes.
Many homeowners are turning to these projects as part of broader outdoor renovations because they create permanent solutions that feel like natural extensions of the home. Unlike movable pieces, built-ins reduce clutter and can incorporate features such as hidden storage compartments or integrated lighting. The focus on beginner-accessible techniques makes this an achievable weekend project for those with basic tools and a willingness to follow precise measurements.
Site Assessment and Planning
Begin by evaluating your outdoor space thoroughly. Measure the available area multiple times, noting sun exposure throughout the day, prevailing wind directions, drainage patterns, and proximity to structures like the house or fences. Identify level ground or slopes that may require additional leveling or retaining walls for long-term stability. Consider existing patios or decks for seamless integration—attach seating directly to deck framing using lag bolts for added structural support and to prevent shifting over time.
Check local building codes and zoning requirements for any necessary permits, especially if the seating will exceed standard bench heights or include electrical components for lighting. Account for foot traffic flow, accessibility needs, and sightlines to ensure the design enhances the landscape rather than obstructing it. Sketch multiple layout options on graph paper before committing to cuts, allowing you to visualize how the seating will interact with surrounding elements like gardens or pathways.
Material Choices for 2026 Trends
Select materials that withstand weather extremes while supporting sustainability goals. Weather-resistant woods like cedar, redwood, or cypress offer natural beauty, pleasant scents, and proven longevity in outdoor environments. Composite lumber provides low-maintenance alternatives with high recycled content, resisting rot, insects, and color fading without annual staining. Both options reflect 2026 trends favoring durable, eco-conscious builds that minimize replacement frequency and environmental impact.
For fasteners and hardware, always use galvanized or stainless steel to prevent rust and corrosion. Cushions and upholstery should feature solution-dyed acrylic fabrics with built-in UV stabilizers and mildew resistance. When comparing options, consider thermal properties—wood stays cooler in direct sun while composites can feel warmer. Learn more about sustainable material guidelines from the EPA.
Basic Construction Steps
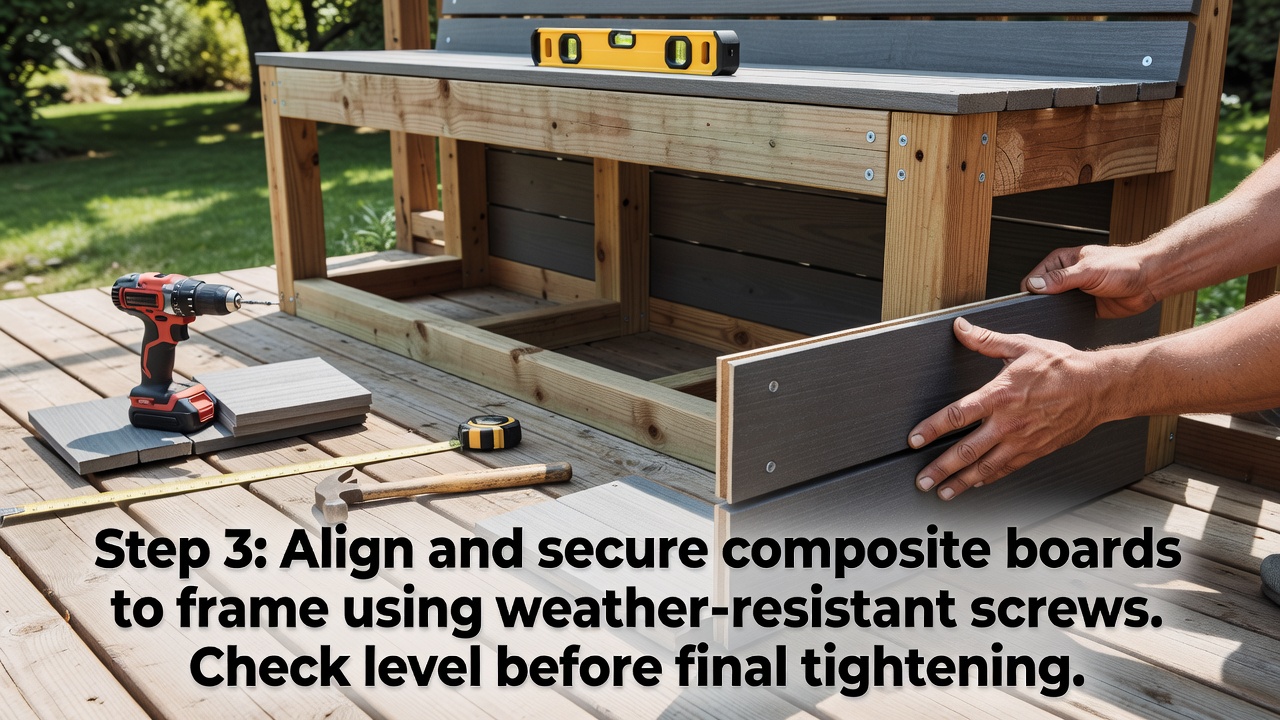
Follow these expanded beginner-friendly steps for a standard bench build. First, prepare the site by clearing all debris, vegetation, and old materials, then lay a compacted gravel base at least four inches deep to promote drainage and prevent settling. Build the frame using pressure-treated lumber or composites cut to precise lengths, securing it to existing decking or concrete footings with appropriate anchors. Install seating planks with consistent spacing to allow for natural expansion and contraction, predrilling holes to avoid splitting. Add backrests or armrests for ergonomic comfort, ensuring all joints are reinforced with corner brackets. Sand all surfaces smooth before applying multiple coats of protective sealant or stain formulated for exterior use. Finish by attaching cushions and optional planters or side tables for enhanced customization.
Throughout the process, wear appropriate safety gear including gloves, eye protection, and dust masks. Double-check all measurements before every cut and test-fit components as you assemble.
Materials Checklist
- Weather-resistant lumber or composite boards in required dimensions
- Galvanized screws, lag bolts, and metal brackets
- Gravel or concrete mix for stable foundations
- High-quality outdoor sealant, stain, or paint
- Waterproof cushions with removable covers
- Basic tools: circular saw, cordless drill, level, square, measuring tape, sandpaper
- Optional: planters, lighting fixtures, storage hinges
Customization for Different Yard Sizes and Styles
Small yards benefit from corner L-shaped benches that maximize every square foot while providing built-in storage underneath the seats. Larger properties allow for expansive wraparound designs or modular sectionals arranged around fire pits and conversation areas. Incorporate vertical elements like attached planters or trellises for added functionality and visual interest. When comparing seating styles, simple straight benches work best in narrow side yards, while sectional configurations create lounge-like zones perfect for entertaining. Adapt designs to sloped terrain by building tiered levels or using adjustable footings.
Safety Considerations
Prioritize stability by anchoring all frames securely into the ground or existing structures. Install proper drainage channels or weep holes to avoid water accumulation that could lead to rot or slippery surfaces. Maintain adequate clearance from utility lines and ensure pathways remain unobstructed. Review general construction safety practices from OSHA.
Maintenance, Drainage, and Common Challenges
Address drainage by incorporating gently sloped surfaces and elevated bases that direct water away from the seating area. Perform annual maintenance including thorough cleaning with mild soap solutions, inspection of all fasteners, and reapplication of protective finishes. Store cushions indoors during harsh winters to extend their lifespan. Common challenges such as wood warping or composite expansion can be mitigated through proper spacing and material selection from the start.
Example Builds and Cost-Saving Tips
One popular example integrates a cedar bench along a deck perimeter using reclaimed boards from the original renovation. Another features a composite sectional in a compact urban yard with modular cushions that can be rearranged. DIY methods significantly lower overall expenses by eliminating professional labor fees. Reuse materials from other home projects, purchase hardware during seasonal sales, and opt for standard lumber sizes to reduce waste. Explore wood sustainability resources from the USDA.
FAQ
How do I handle drainage issues effectively?
Incorporate sloped seating planes, gravel bases, and integrated channels that move water away from the structure and prevent pooling around footings.
What maintenance is required throughout the year?
Conduct seasonal cleanings, tighten hardware as needed, and refresh sealants every 12 to 18 months depending on climate exposure.
Can complete beginners complete this project successfully?
Yes, beginners can succeed by starting with straightforward bench plans, using pre-cut material kits, and following step-by-step diagrams available from reputable woodworking sites.
How do built-in designs compare to freestanding furniture long-term?
Built-ins require less ongoing replacement and offer superior stability and customization, though they demand more upfront planning and permanent installation.
Conclusion
Built-in outdoor seating elevates fixer-upper projects with practical, stylish, and sustainable results. By focusing on careful planning, quality materials, and thoughtful integration with your existing landscape, you can create lasting outdoor living spaces that enhance daily enjoyment and property appeal for years to come.
No comments yet. Be the first!